
Create an eye-catching Resin Rainbow Geode Letter Keychain to add a pop of color to your purse, backpack, or keys!
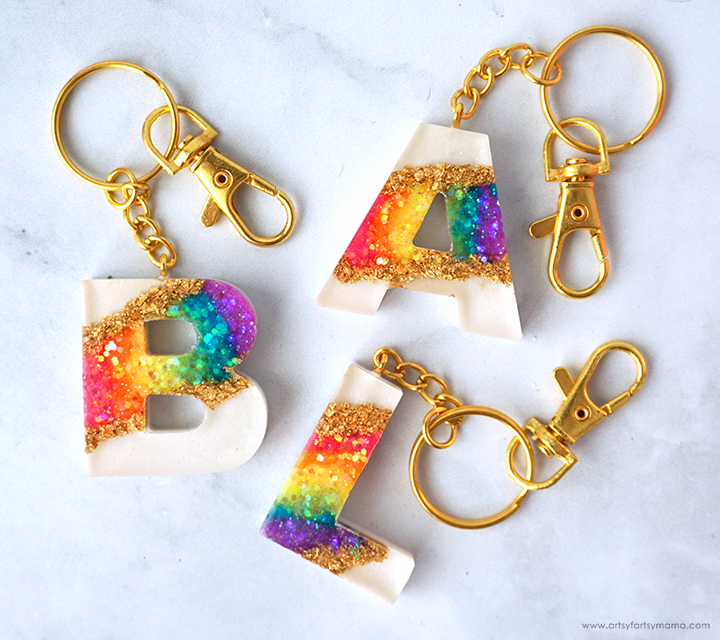
Keychains are one of the easiest projects to make with resin, especially if you are a beginner. Of all of the ones I've made, these Rainbow Geode Letter Keychains are probably one of my absolute favorites! They are so sparkly, and I love the bright pop of color that they add to any backpack, purse, or keys. Not only are they a simple resin project, but they also make a wonderful gift idea (even for yourself!). I hope you love this colorful project as much as I do!!
New to resin? Be sure to check out Resin 101: Getting Started with Resin!

To make your own Rainbow Geode Letter Keychain, you will need these supplies:
- Amazing Clear Cast
- Measuring Cups
- Stirring Sticks
- Disposable Gloves
- Alphabet Silicone Mold
- White Mica Powder
- Gold Leaf Flakes
- Neon Glitter - pink, orange, yellow, green, blue, purple
- Jewelry Eye Screw
- Key Ring with Chain
*Save 10% on resin supplies when you shop Polytek with code AFM
SAFETY FIRST: Before getting started, wear disposable gloves, protect your workspace, and be sure to work in a well-ventilated area!
Prepare about 5ml of Amazing Clear Cast (per keychain) according to package directions. Pour in equal parts of resin and hardener to a mixing cup. Slowly stir the resin together with a stir stick for two minutes or until combined. If the resin looks cloudy or has any streaks running through it, you need to keep stirring it until it becomes clear.
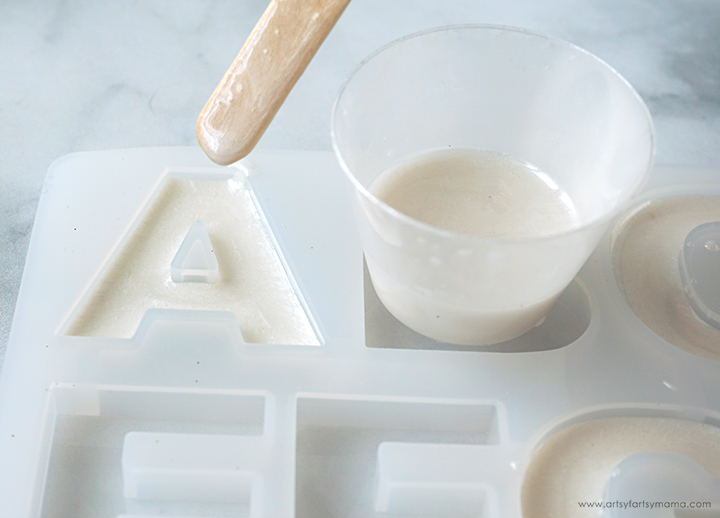
Add a little bit of white mica powder to the resin and stir together until evenly incorporated. Use the stir stick to help you carefully fill the mold a little bit less than halfway.
Add a little bit of white mica powder to the resin and stir together until evenly incorporated. Use the stir stick to help you carefully fill the mold a little bit less than halfway.
Use a straw, heat gun, or spritz with 91% alcohol to remove any surface bubbles. Leave the resin to cure in an undisturbed area for at least 6 hours. **DO NOT REMOVE THE RESIN FROM THE MOLD!**

Prepare another 5-10ml of Amazing Clear Cast, following package directions. Once it becomes clear, shake in a generous amount of gold leaf flakes. Stir the mixture, and add more flakes until it becomes a paste-like consistency.
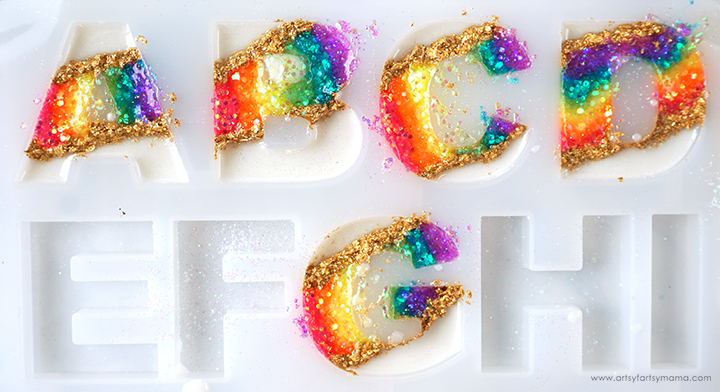
Use the stir stick to make two parallel lines across the letter, leaving a 1" or so gap in between. These gold lines will be the edges of the rainbow section of the geode.
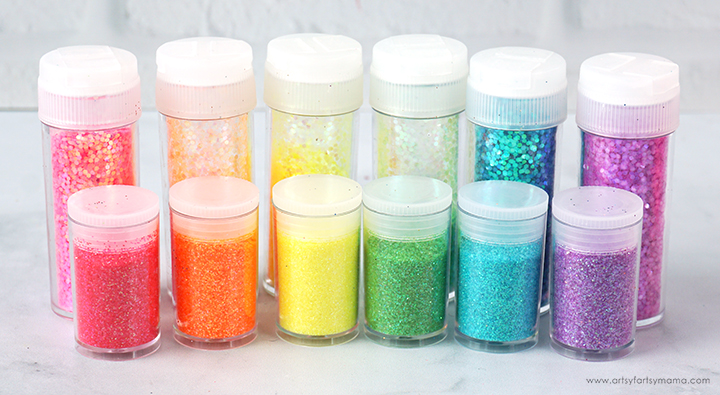
Instead of the metallic glitter flakes I showed in the supplies image above, I decided to use a rainbow of colors in both fine and chunky Neon Glitters instead.

Prepare about 30ml of Amazing Clear Cast, following package directions. Once it becomes clear, split the resin equally into 6 small measuring cups. Add a generous amount of fine and chunky glitter into each cup, one for each color of the rainbow (I used pink instead of red).
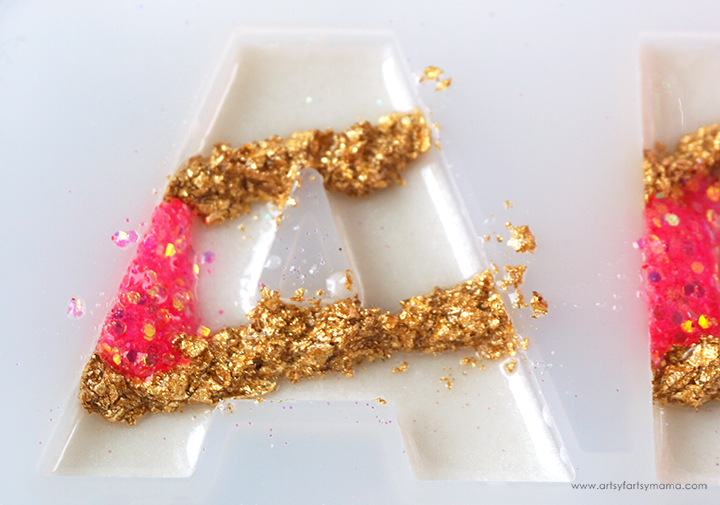
Carefully add a thin line of pink glittered resin to one end of the letter, in between the gold flake resin lines.

Continue adding lines of color, in rainbow order, until you get to the opposite end.
Use a straw, heat gun, or spritz with 91% alcohol to remove any surface bubbles. Leave the resin to cure in an undisturbed area for at least 6 hours. **DO NOT REMOVE THE RESIN FROM THE MOLD!**
You can put the lines of color on the letters vertically or horizontally. Have fun experimenting with different letters and using different angles! There's no wrong way to do it!

Prepare one last 5ml of resin (per keychain) according to package directions. Use the stir stick to fill the letter mold the rest of the way to the top. Be careful to not overfill.
Use a straw, heat gun, or spritz with 91% alcohol to remove any surface bubbles. Leave the resin to cure in an undisturbed area for at least 12 hours.
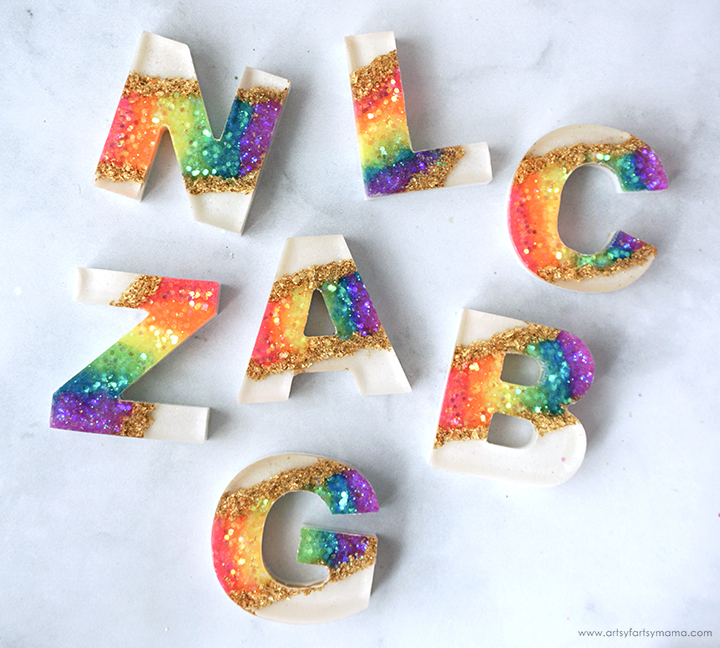
Now for my favorite part, demolding! Once the resin has completely cured, you can remove the rainbow geode letters from the mold. Since these were created face-up, there's no surprise reveal - but it's still just as exciting.
Trim away any excess resin with scissors or a craft knife. Sand down edges, if necessary, and bring back the shine with clear spray sealant. If the resin still feels flexible, it may just need more time to cure. Let the pieces sit in a warm, flat area to cure for a few hours (or days) to completely harden.
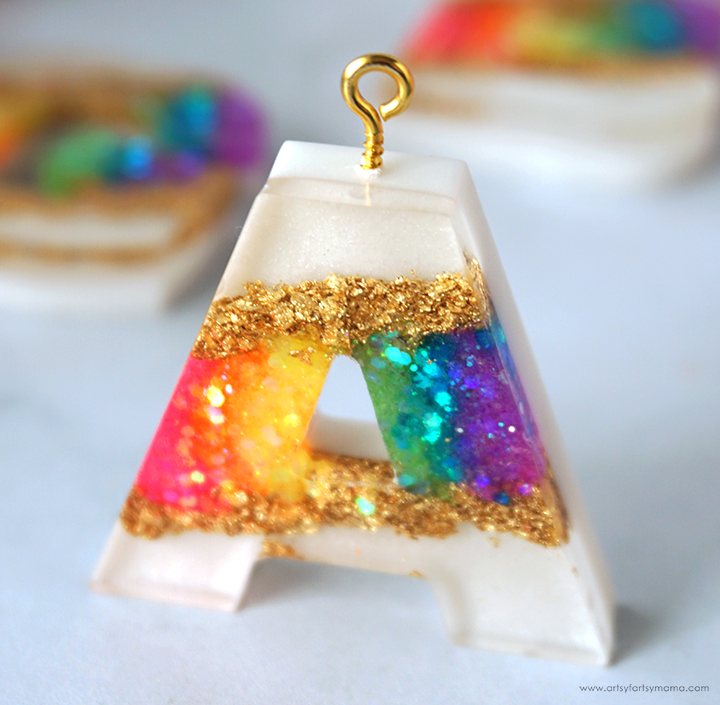
Use the hand drill to make a small hole at the top of the letter, but make sure it's into the white portion of the resin! If not, the screw will show through the clear resin. Remove the drill, and then twist an eye screw into the hole. For a more permanent hold, put some super glue on the screw before putting it in.

Use pliers to hook a jump ring through the eye screw, and then attach the key ring chain to the jump ring. Close the jump ring to connect the key ring to the charm.
I am in LOVE with how these gorgeous Resin Rainbow Geode Letter Keychains turned out! They make great gifts (even for yourself), and I would definitely recommend giving this project a try. I would love to hear what you think! Share your resin creations on Instagram, Facebook, or leave a comment/photo on the project pin on Pinterest! #AFMCrafts
Don't forget to Pin, Like, and Share!


