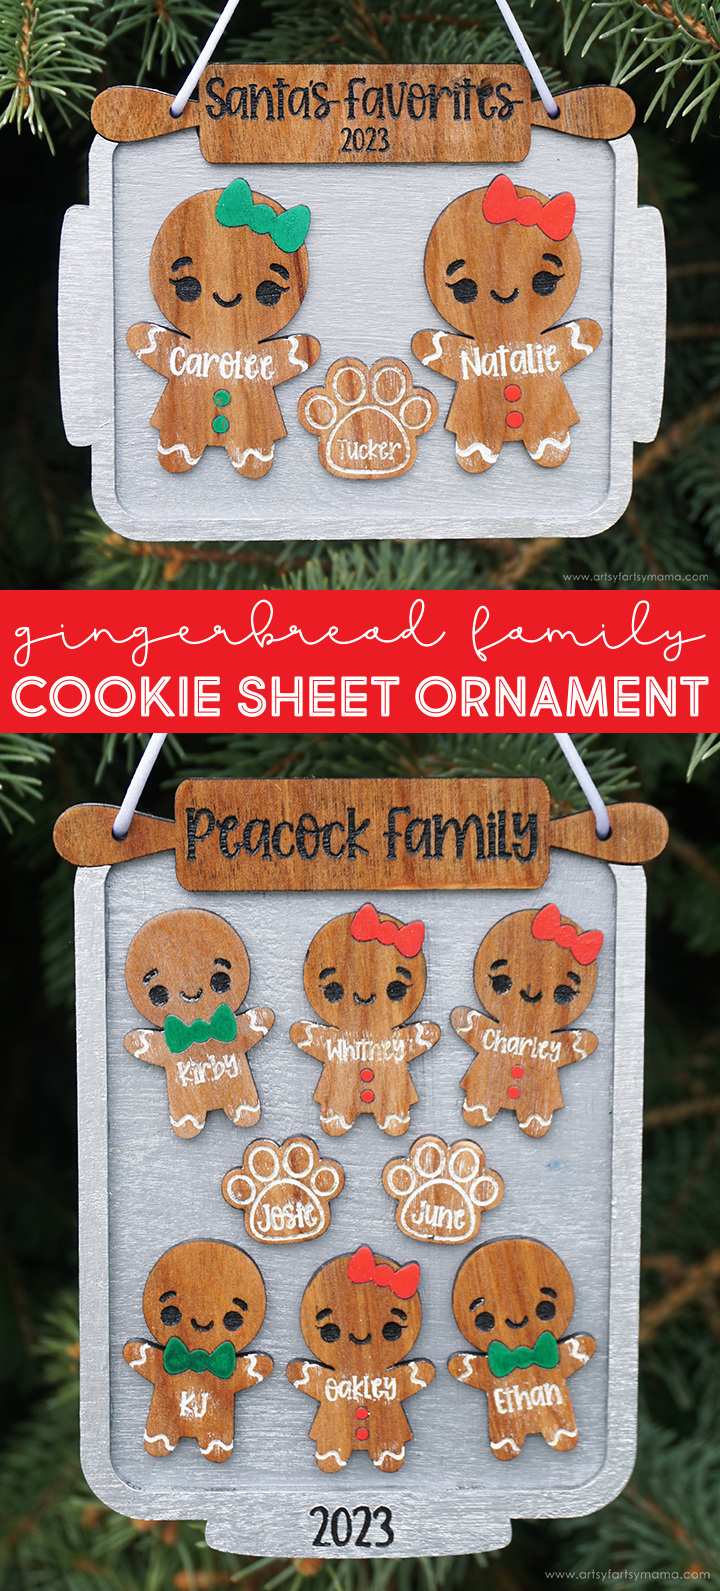
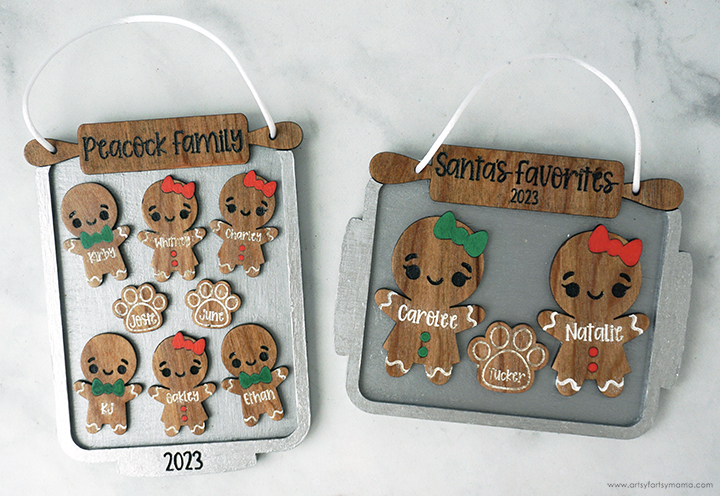
Add a little sweetness to your Christmas Tree with a personalized Gingerbread Family Cookie Sheet Ornament!
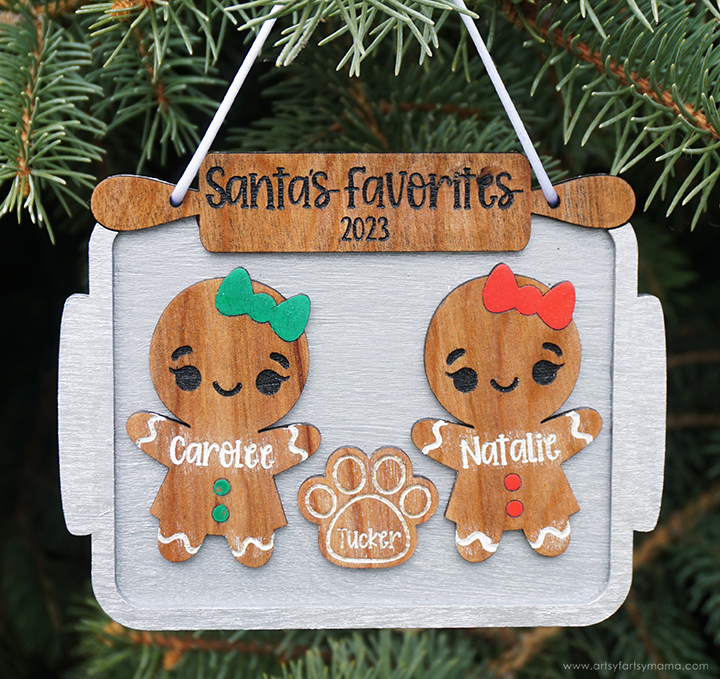
I love creating new ornaments, and I am so excited about this adorable Gingerbread Family Cookie Sheet Ornament that I just made! These ornaments are easy to personalize and make using an xTool M1 laser cutter, and are definitely a creative handmade gift. Not only am I going to walk you through the process of making the ornament step-by-step, but I'm sharing the FREE laser cut file so that you can make one for your own family and friends!

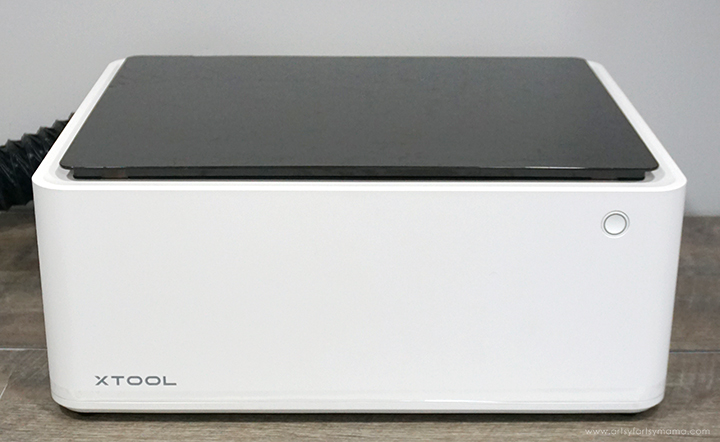
The crafting possibilities are endless when it comes to using the xTool M1 laser cutting machine, and it's actually very easy to use! Once you have one of these, the hardest thing you'll have to do is decide what to make first. If you want to learn more about how this incredible machine works, be sure to check out my complete xTool review.
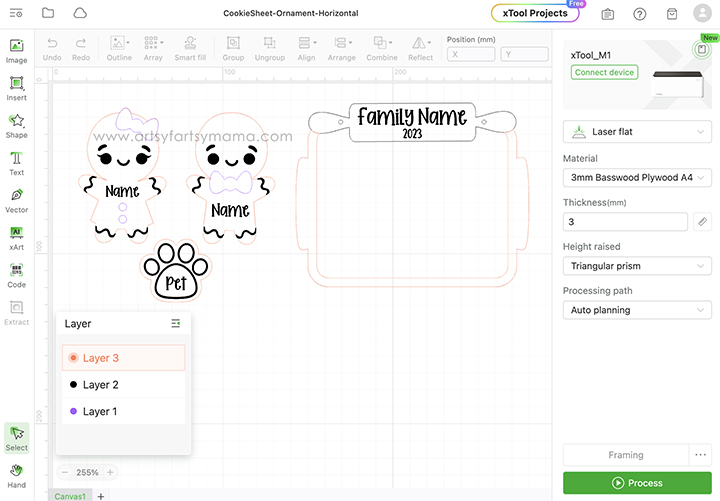
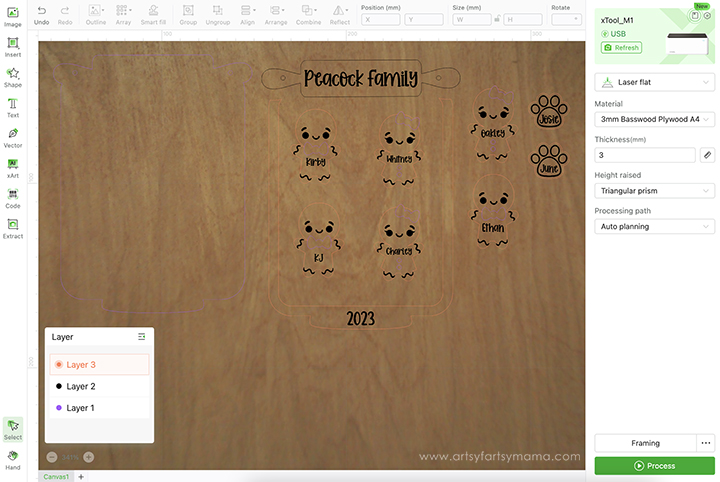
Upload the Gingerbread Family Cookie Sheet Ornament laser cut file into xTool Creative Space. Just FYI, there are two different design files: one is horizontal and the other is vertical. Both files include a boy and girl gingerbread character, and a paw print to add a pet to your ornament. If you don't have a pet with paws, you can find something that will work for you in the "Shapes" tab (on the left menu bar).
Copy and paste the gingerbread characters and pet paws to represent each family member. Make sure to select the entire thing, including the "Name". All of the text in the cut file is editable, so you can type the names for each person or pet, and fill in the family name on the rolling pin. The font I used on my ornaments is "Pumpkin Butter". Next, select all of the characters, and resize them as a group to fit on the "cookie sheet"
Download Gingerbread Family Cookie Sheet Ornament Laser Cut File
**Cut files are for PERSONAL USE only**
Printables and cut files from Artsy-Fartsy Mama are for personal use only. You may use these files for personal projects, but you may not sell them. If you'd like to share this project digitally, share a link to this post/website only. Do not share a direct link to the file.
Place your piece of wood into the xTool M1 machine, on top of the triangular prisms. When you close the lid, the image of the inside of the machine should show on your screen. If it isn't, click "Refresh" in the top right (green) section of the menu and it should show up.
Next, select the material type from the drop-down menu on the right side of the screen. I used the pre-loaded settings for "3mm Cherry Plywood" material. Make sure that you also select "Triangular Prism" from the "Height Raised" drop-down menu. By selecting the material before you get started, it will automatically adjust the settings for cutting, scoring, and engraving your project.
If you open the xTool Creative Space (.xcs) files in the download, the pieces will already be set. However, if you are uploading the SVG design, you need to make sure each part of the design is set for cutting, scoring, and engraving. Each shape outline needs to be set to cut. The gingerbread frosting/face, text, and paw print need to be engraved, and the gingerbread bows and buttons need to be scored.
Once everything is set and ready to go, click on the green "Process" button in the bottom right corner.
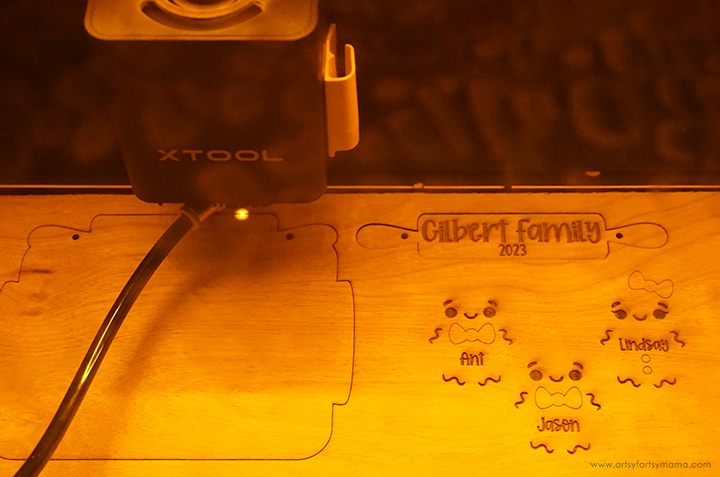
Press the large, lit button on the front of the machine to start the cutting, scoring, and engraving process. It's so fun to watch the laser in action, and to see how precise the xTool is for even the smallest of details.
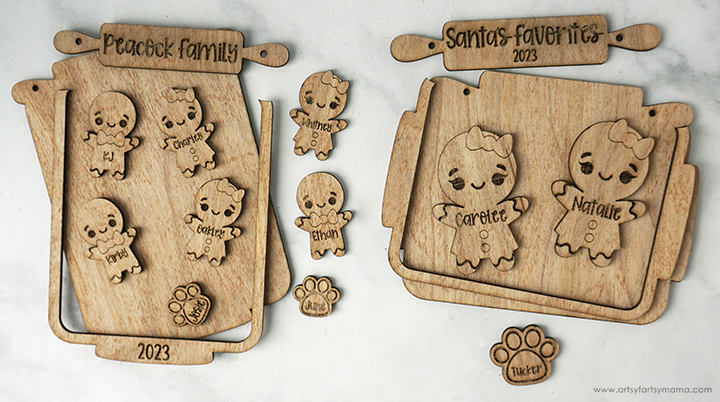
Remove the ornament pieces from the machine. Before assembling the project, I would recommend cleaning the soot away from around the edges of the wood using a Magic Eraser or baby wipe to prevent making marks all over your hands.
Gather all of the gingerbread people, pet pieces, and rolling pin and cover them with a thin coat of clear sealant. Not only will this make the engraving and wood grain really pop, but it also allows you to add color to the project without it bleeding into the porous wood.
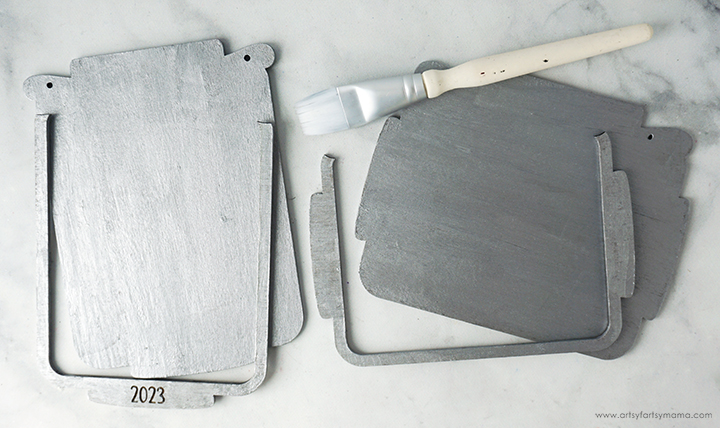
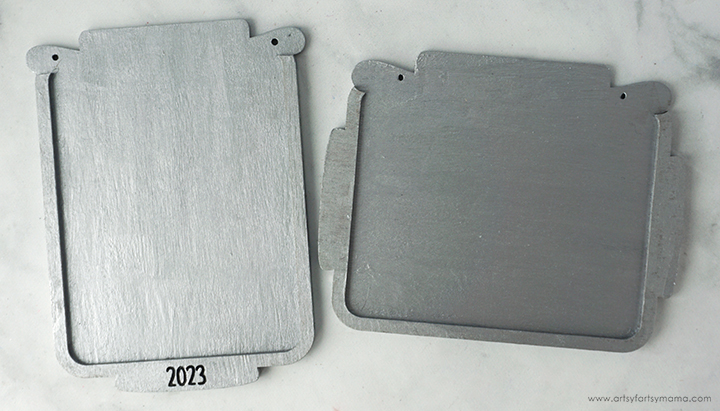
Paint the cookie sheet pieces with a metallic silver acrylic paint. I painted two coats on mine for full coverage. Make sure to let each coat of paint dry completely before adding another.
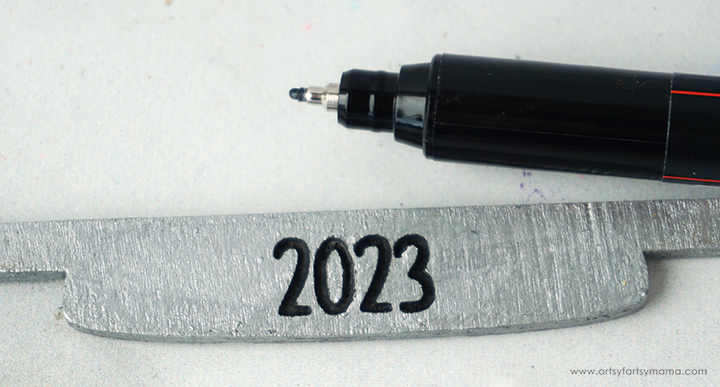
Use an ultra fine black acrylic paint marker to fill in the engraved year on the cookie sheet.
Apply a thin layer of strong adhesive to the back of the top cookie sheet layer. Align the pieces together along the bottom edge. If necessary, clamp the pieces together until the adhesive has had plenty of time to set.
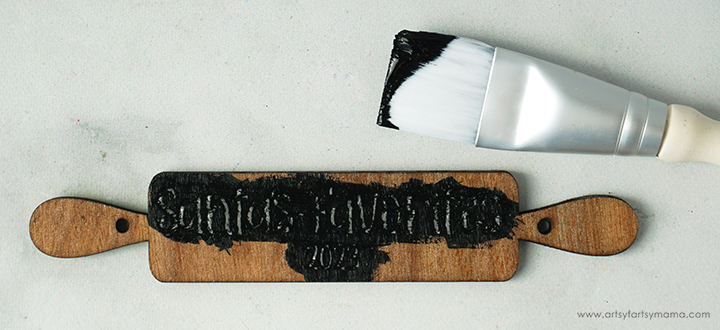
To make the engraving on the rolling pin pop, paint some black acrylic paint over the words. Allow the paint to dry completely. Next, use sandpaper to remove the paint from the top layer. The clear sealant that was applied earlier should protect the rest of the wood around the engraving from absorbing the paint.
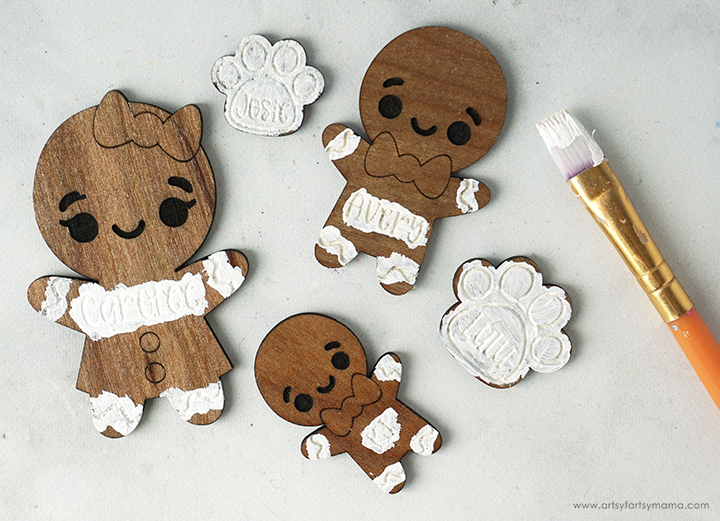
I repeated the process with the frosting and name engravings on the gingerbread people with white paint. However, I filled in the faces with the black acrylic paint marker - but you could do the same process as the rolling pin with black paint.
Once the paint has been sanded away from the surface, apply another thin coat of clear sealant.
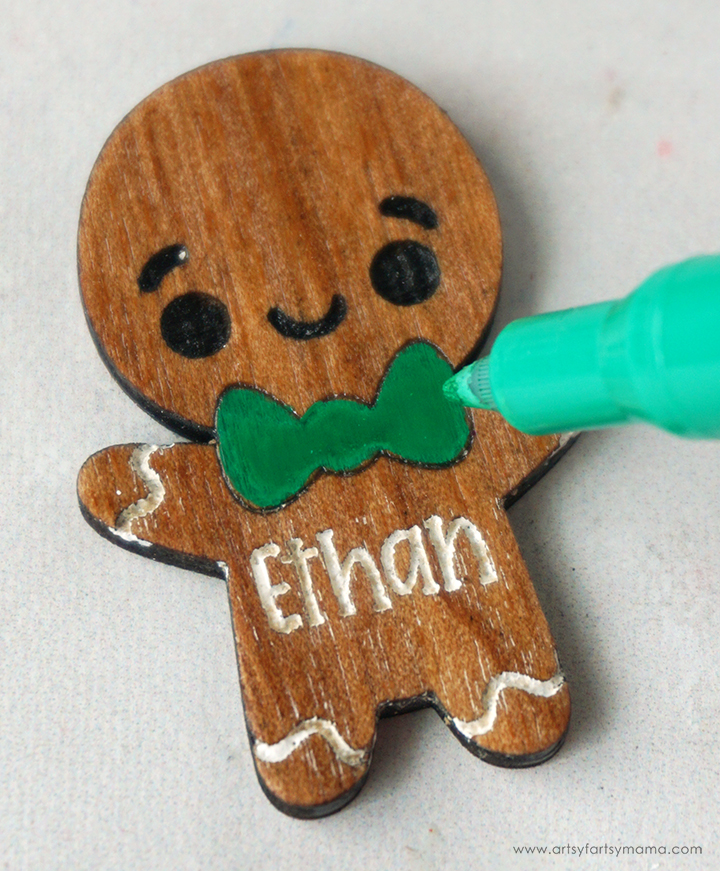
Last, but not least, color the bows/bowties and buttons with acrylic paint pens and allow them to dry completely.
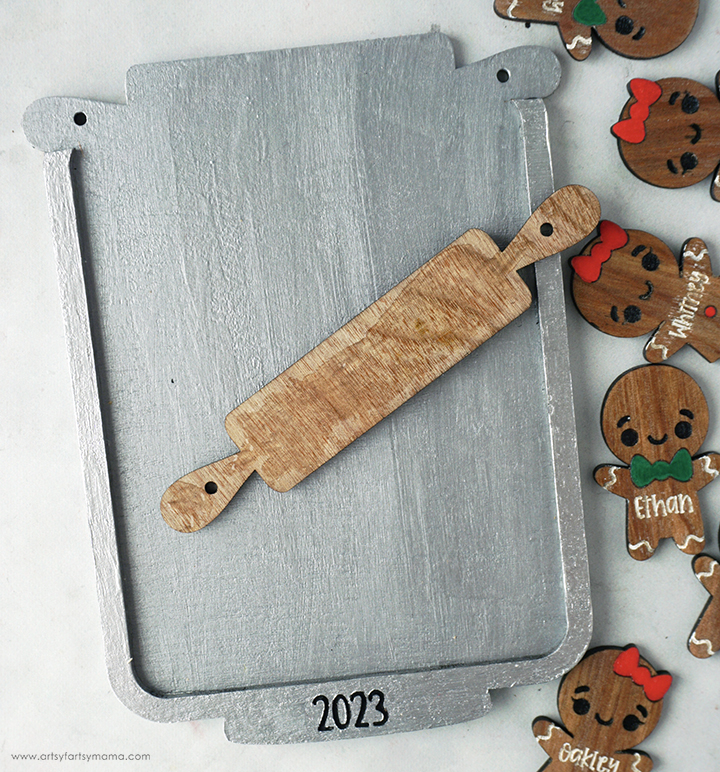
Now that everything is painted, it's time to assemble the ornament(s)! First, apply a thin layer of strong adhesive to the back of the rolling pin. Place it at the top of the ornament, aligning the top edges and making sure the holes are lined up.
If necessary, clamp the pieces together until the adhesive has had plenty of time to set.
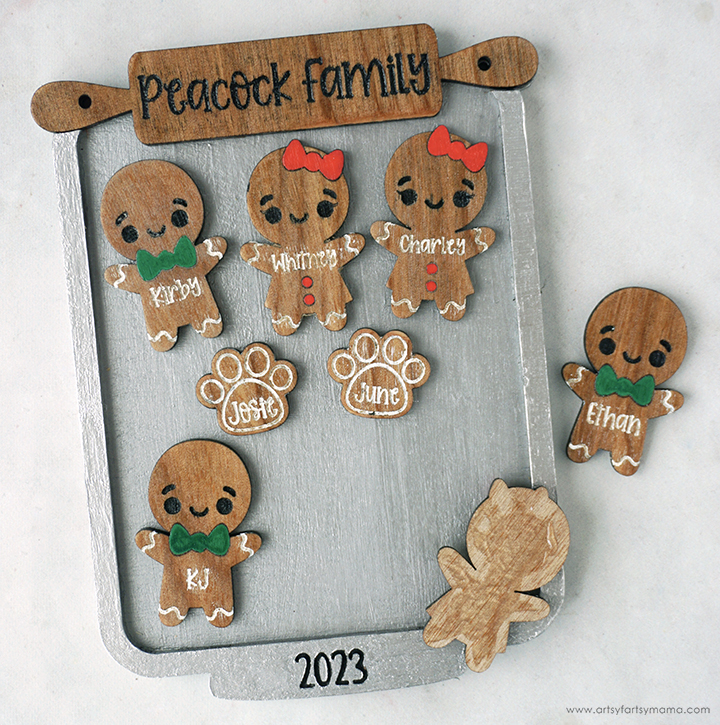
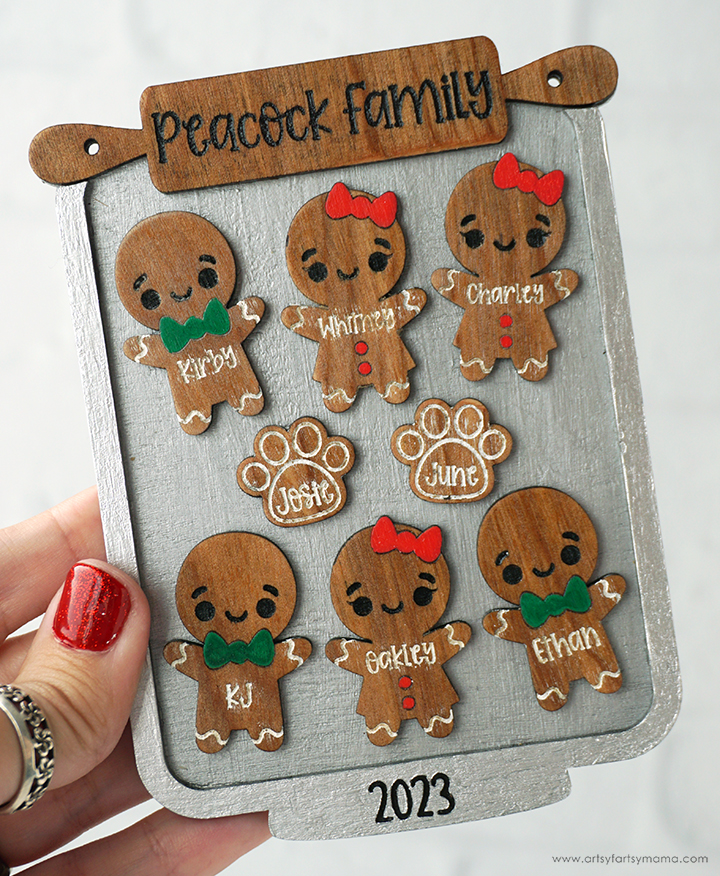
Isn't this the cutest little gingerbread family you've ever seen?! I was just so excited to see my project idea come to life that I had to stop and take a picture of it.
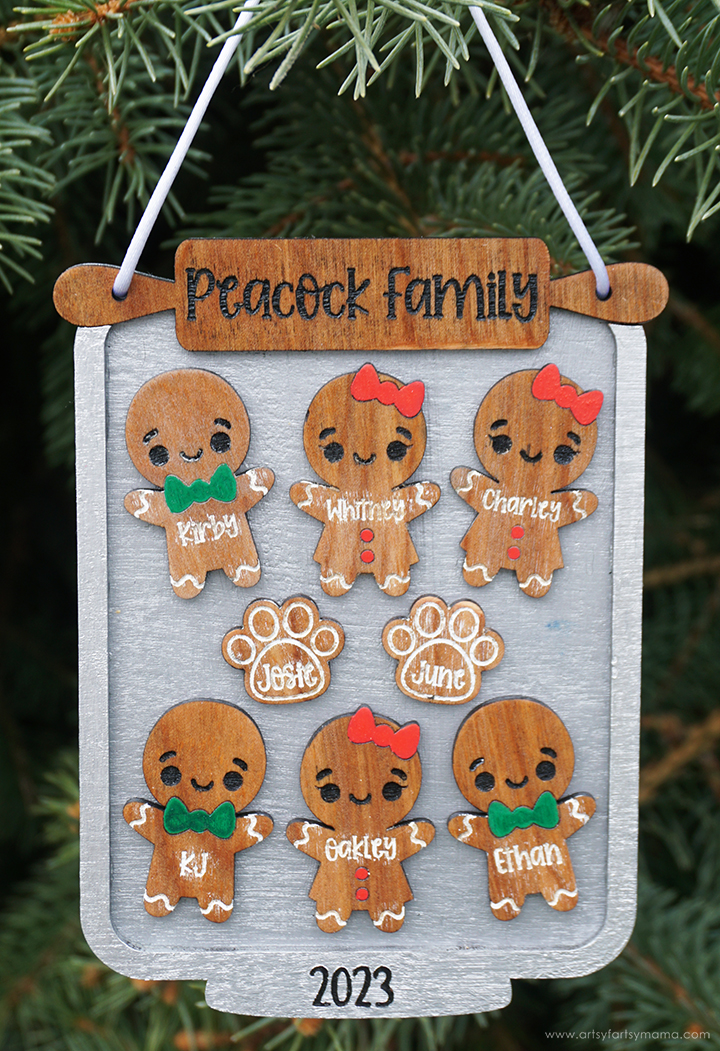
Don't you think these Gingerbread Family Cookie Sheet Ornament are so "sweet"? I am thrilled with how I could bring my project to life using my xTool M1, and I am so excited to make a set for my siblings to add to their Christmas trees! As always, I would love to see what you're making! Share your creations on Instagram, Facebook, or leave a comment/photo on the project pin on Pinterest! #AFMCrafts!
Looking for more Christmas ornament inspiration?
Check out this collection of OVER 100 creative ornament ideas!!
Don't forget to Pin, Like, and Share!