
This custom Halloween Pumpkin Resin Shaker Keychain is a spooky treat everyone will love!

Happy Spooky Season! Creating with resin is one of my favorite hobbies, and I especially love making shaker keychains with it. If you aren't familiar with shakers, they are a charms made of resin that are filled with small fillers that move around inside when "shaken". This Halloween Pumpkin Resin Shaker Keychain can be used as a keychain or even a phone grip, and is a great gift idea. There are quite a few steps to complete the project, but it's actually really simple to make and has adorable results!
New to resin? Be sure to check out Resin 101: Getting Started with Resin!
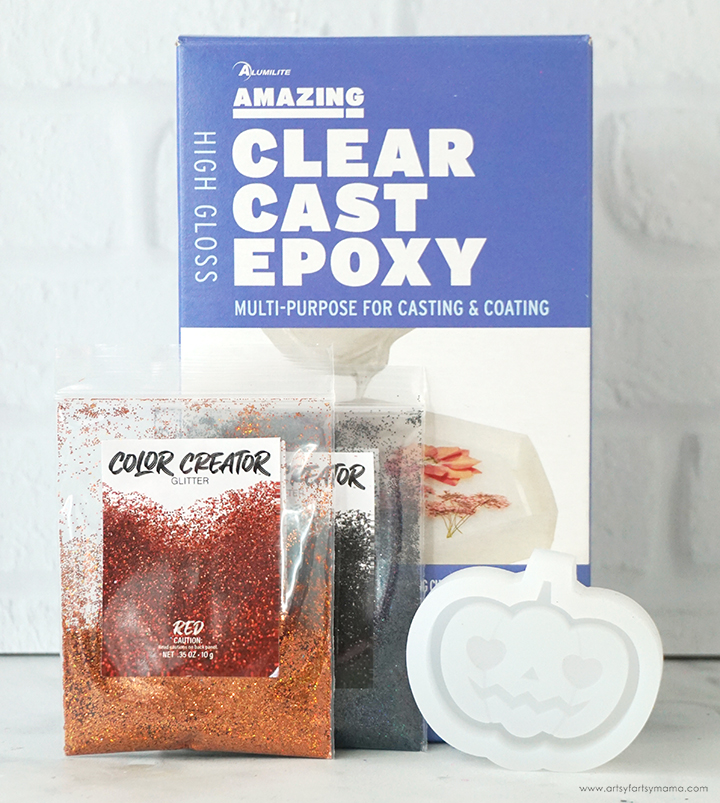
To make your own Halloween Pumpkin Resin Shaker Keychain, you will need these supplies:
- Amazing Clear Cast Epoxy
- Measuring Cups
- Stirring Sticks
- Disposable Gloves
- Pumpkin Shaker Mold
- Color Creator Glitter - orange, black
- Toothpick
- Transparency Film
- Permanent Marker
- Chunky Glitter, Polymer Clay Slices, and/or Sequins
- Hand Drill Tool
- Unscented Baby Oil or Glycerin
- Oiler Bottle
- UV Resin
- Jewelry Eye Screw
- Key Ring with Chain or Phone Grip
*Save 10% on resin supplies when you shop ETI with code AFM
SAFETY FIRST: Before getting started, wear disposable gloves, protect your workspace, and be sure to work in a well-ventilated area!
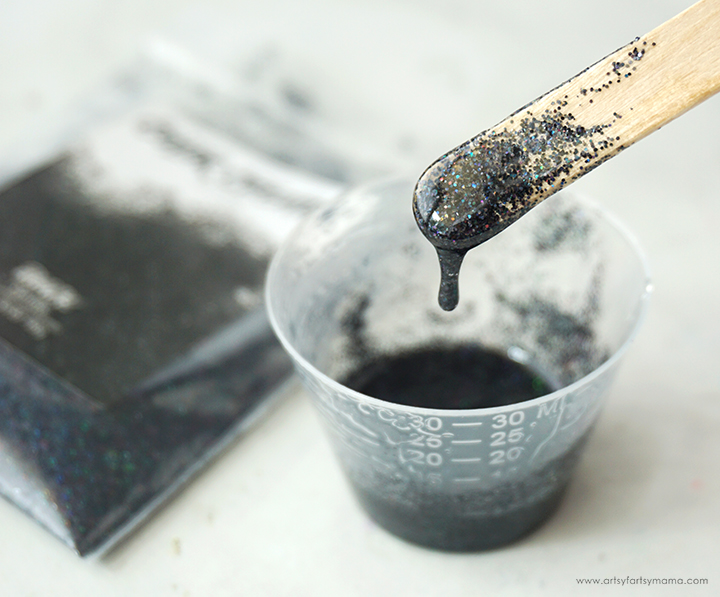
Prepare about 10ml of Amazing Clear Cast according to package directions. Be sure to work in a well-ventilated area and wear disposable gloves. Pour in equal parts of resin and hardener to the mixing cup. Slowly stir the resin together with a stir stick for two minutes. If the resin looks cloudy or has any streaks running through it, you need to keep stirring it until it becomes clear.
Add a generous amount of holographic black Color Creator glitter into the mixing cup. Stir the resin mixture well for a minute or two until the glitter is evenly incorporated. Give the resin a few minutes to "rest" and allow the bubbles to rise to the top.

Use a toothpick to carefully fill the pumpkin face and lines with the black resin. Be careful to not overfill.
Pop any bubbles that rise to the top by spritzing with alcohol. Leave the resin to cure in an undisturbed, well ventilated area for at least 4 hours. Do NOT remove any of the resin from mold!!

Next, prepare 1 oz (30ml) of Amazing Clear Cast resin according to package directions. Pour in equal parts of resin and hardener to the mixing cup. Slowly stir the resin together with a stir stick for two minutes. If the resin looks cloudy or has any streaks running through it, you need to keep stirring it until it becomes clear. Add a generous amount of orange Color Creator glitter into the resin and stir until combined.
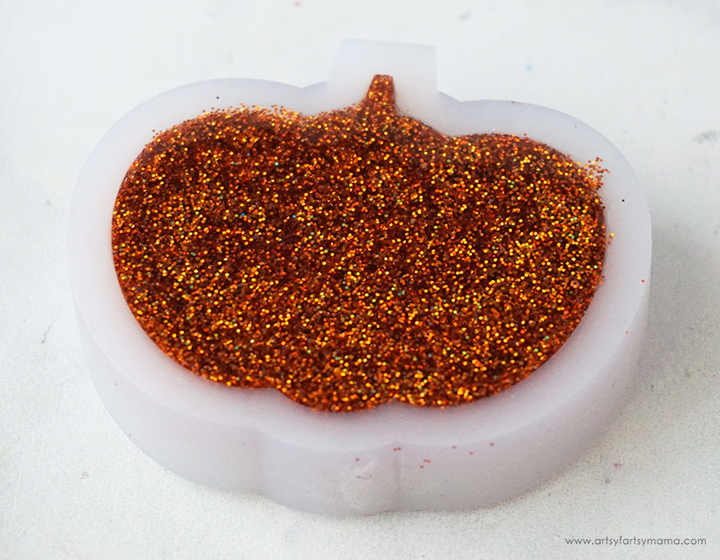
Slowly pour the resin into the mold and fill it all the way to the top. Be careful to not overfill.
Pop any bubbles that rise to the top by spritzing with alcohol. Leave the resin to cure in an undisturbed, well ventilated area for 12-24 hours. You will know that the resin is cured and ready to remove when it is no longer tacky to the touch and pulls away from the edges of the mold.
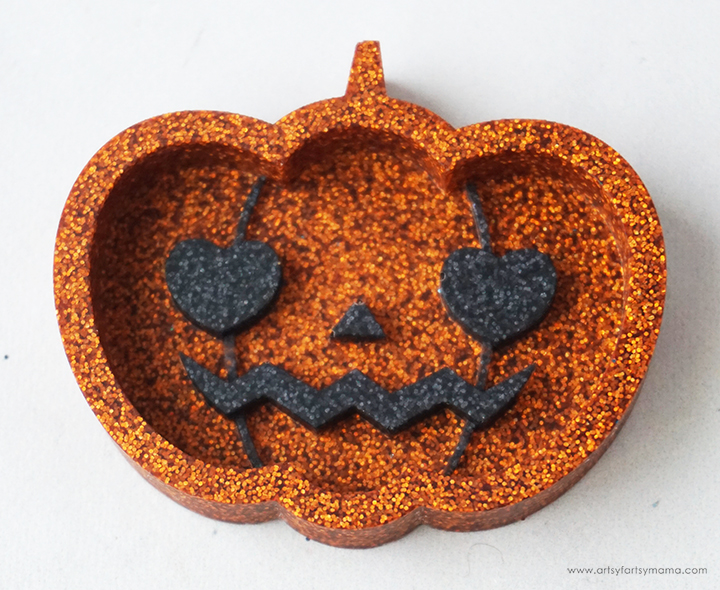
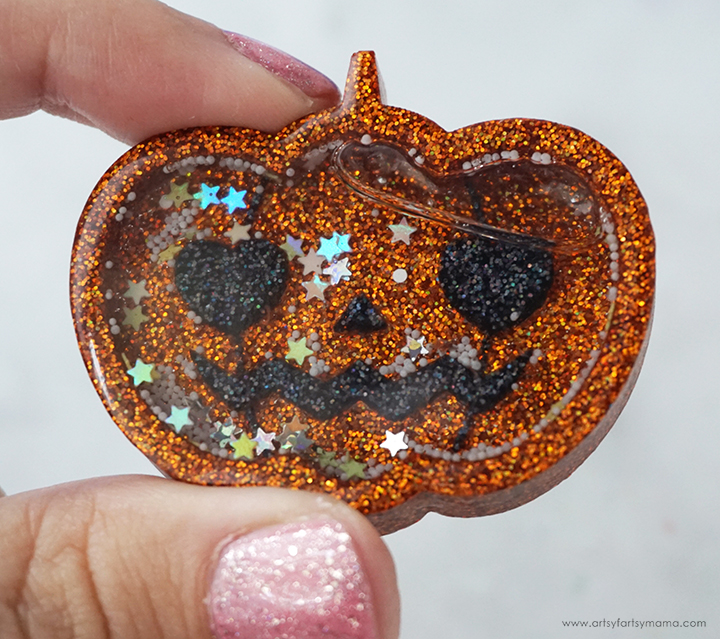
"Demolding" is my favorite part of the process. Carefully remove the pumpkin piece from the mold. Trim away any excess resin with scissors or a craft knife. I love all of that shimmery sparkle and that adorable jack-o'-lantern face!

If the resin still feels flexible, it may just need more time to cure. Let the piece sit in a warm, flat area to cure for a few hours (or days).
Fillers are what make shaker charms so much fun, and there are SO many options out there, like chunky glitter or small resin shapes. I used a pinch of star sequins and white microbeads. Get creative and have fun with it!

Cut a piece of transparency film larger than the pumpkin and place it on top of the charm. Carefully trace the opening with a permanent marker. Cut the transparency film a little bit larger than the traced shape. Remove the marker lines with a little bit of alcohol and a lint-free cloth.
Use a toothpick to apply a thin line of UV resin around the top edge of the pumpkin. Place the transparency film cutout over top and press it down well. Place the charm under the UV light for a couple of minutes. Make sure that the edges of the transparency are completely sealed. If there are any gaps, the charm will leak! If you need to cover any areas to stick back down, use the toothpick to re-apply resin and then cure it again.
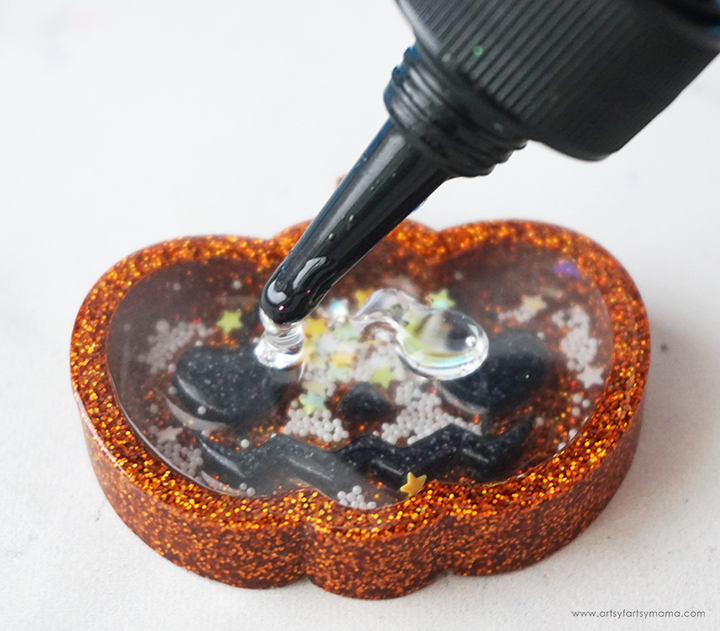
Lay the charm flat on its back. Carefully cover the top of the charm with UV resin and use a toothpick or a stir stick to drag the resin to the edges. Be careful to not spill any resin over the edges. This will give your charm a smooth "domed" top that also completely seals the edges of the transparency film. Use a lighter or spritz the surface with alcohol to remove any bubbles.
Place the charm under the light for a couple of minutes until the dome layer is completely cured.

You can keep the charm as-is and give it a shake, but I prefer to give the shaker charm a "waterfall" effect, which makes the fillers slowly float back down to the bottom. To do this, you need to fill the charm with baby oil or glycerin.
Since the opening of the charm has been sealed off, we need to make an opening to fill it. Turn the charm over and use a hand drill tool to carefully drill down through the back of the charm. You can actually drill the hole anywhere on the charm (I usually drill at the top), but I've found that drilling the back side is a lot easier.
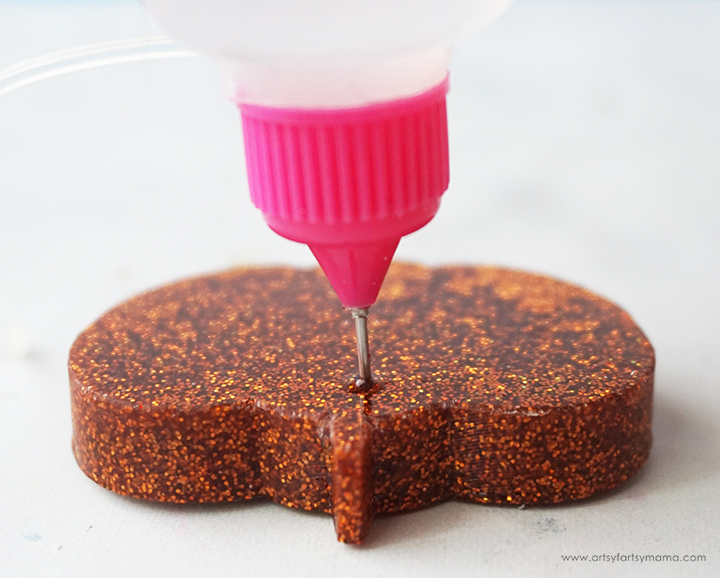
Fill an oiler bottle with baby oil or glycerin. Put the needle through the opening and slowly squeeze the bottle to fill the charm with the oil. Take your time - sometimes the oil will go back up through the opening and spill out everywhere!
With the needle still in the charm, hold the charm up to see how full it is. Once full, lay the charm back down and slowly pull the needle back out. Clean up any oil residue from the back of the charm with a paper towel.
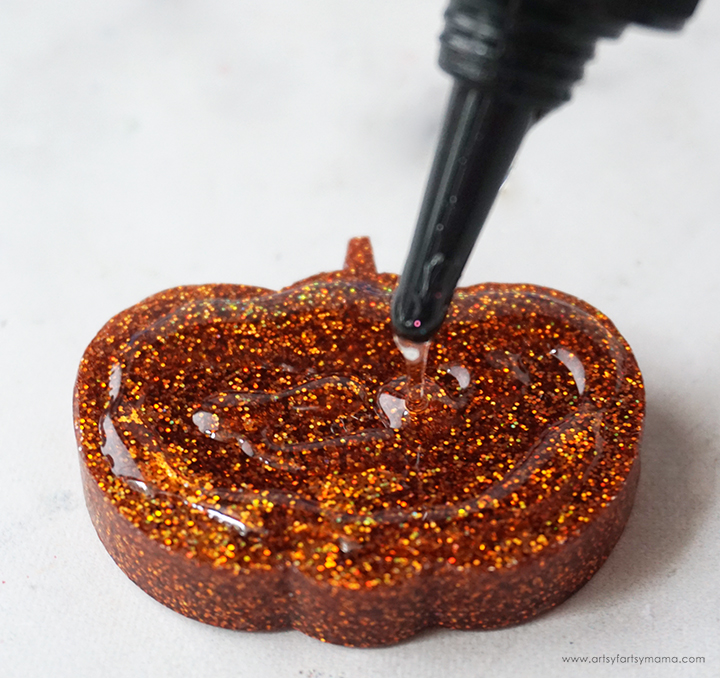
Dome the back of the charm the same way as the front. Keep the layer thin, and use a toothpick or stir stick to bring the resin to just the edges. Not only will this make the charm look professional, but it will permanently seal up the drilled hole at the same time!
Place the charm under the light for a couple of minutes until completely cured.
Give the charm a good shake and watch the fillers slowly float down to the bottom! This is also the perfect time to check for any leaks. If you find any, seal them back up with some UV resin.

Use the hand drill to make a small hole near the stem of the pumpkin charm. Remove the drill, and then twist an eye screw into the hole. For a more permanent hold, put some super glue on the screw before putting it in.
Use pliers to hook a jump ring through the eye screw, and then attach the key ring chain to the jump ring. Close the jump ring to connect the key ring to the charm.

Isn't this such a fun project to welcome Spooky Season?! I would love to hear what you think of this Halloween Pumpkin Resin Shaker Keychain in the comments below. As always, if you make any of these projects for yourself, I'd love to see your creations! Tag me on Instagram and Facebook, or leave a comment/photo on the project pin on Pinterest #AFMCrafts!
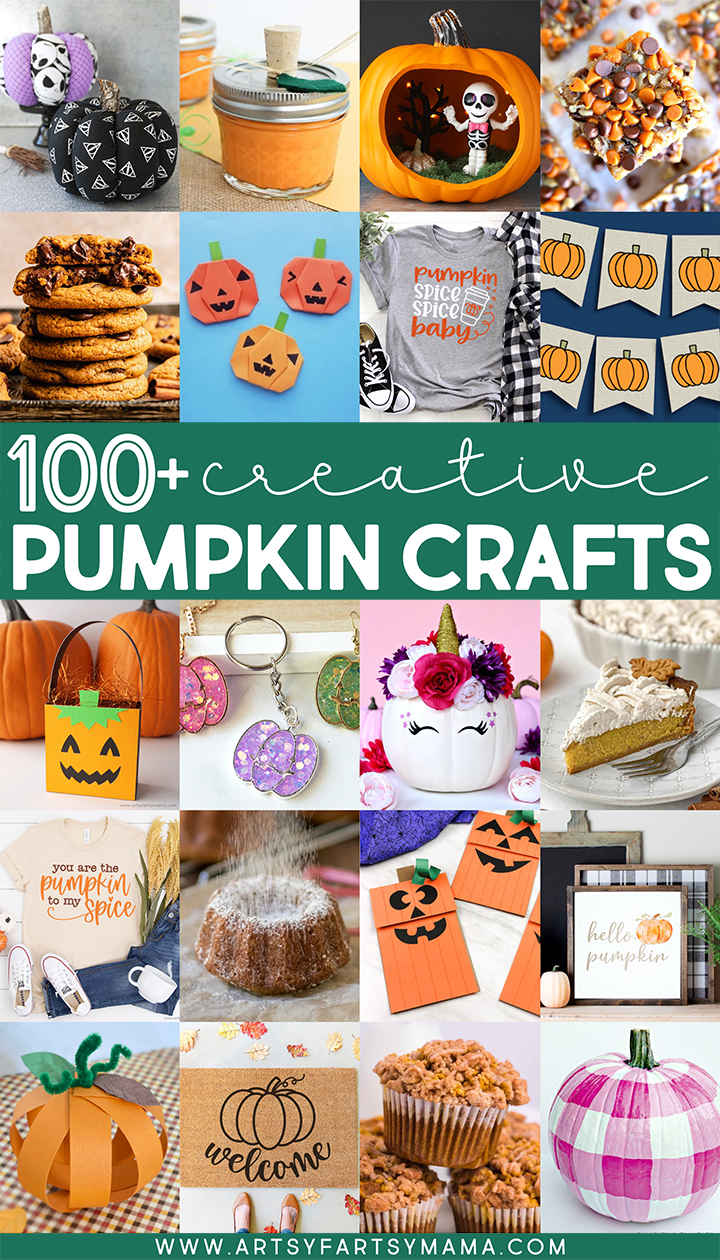
Looking for more pumpkin craft inspiration?
Check out this collection of OVER 100 creative pumpkin craft ideas!!
Don't forget to Pin, Like, and Share!


