
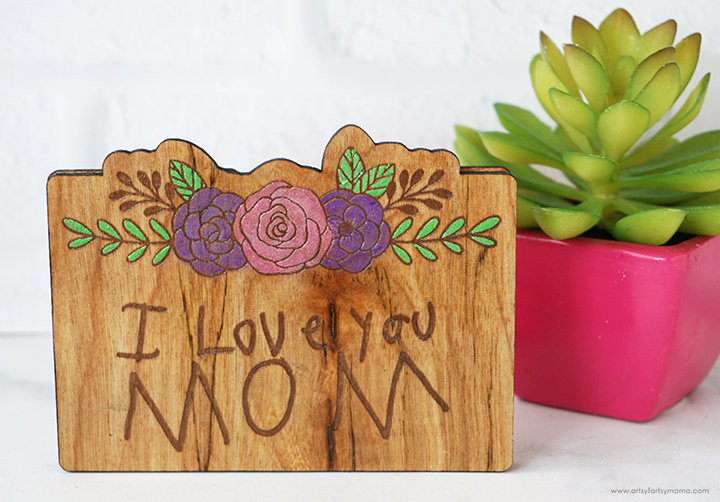
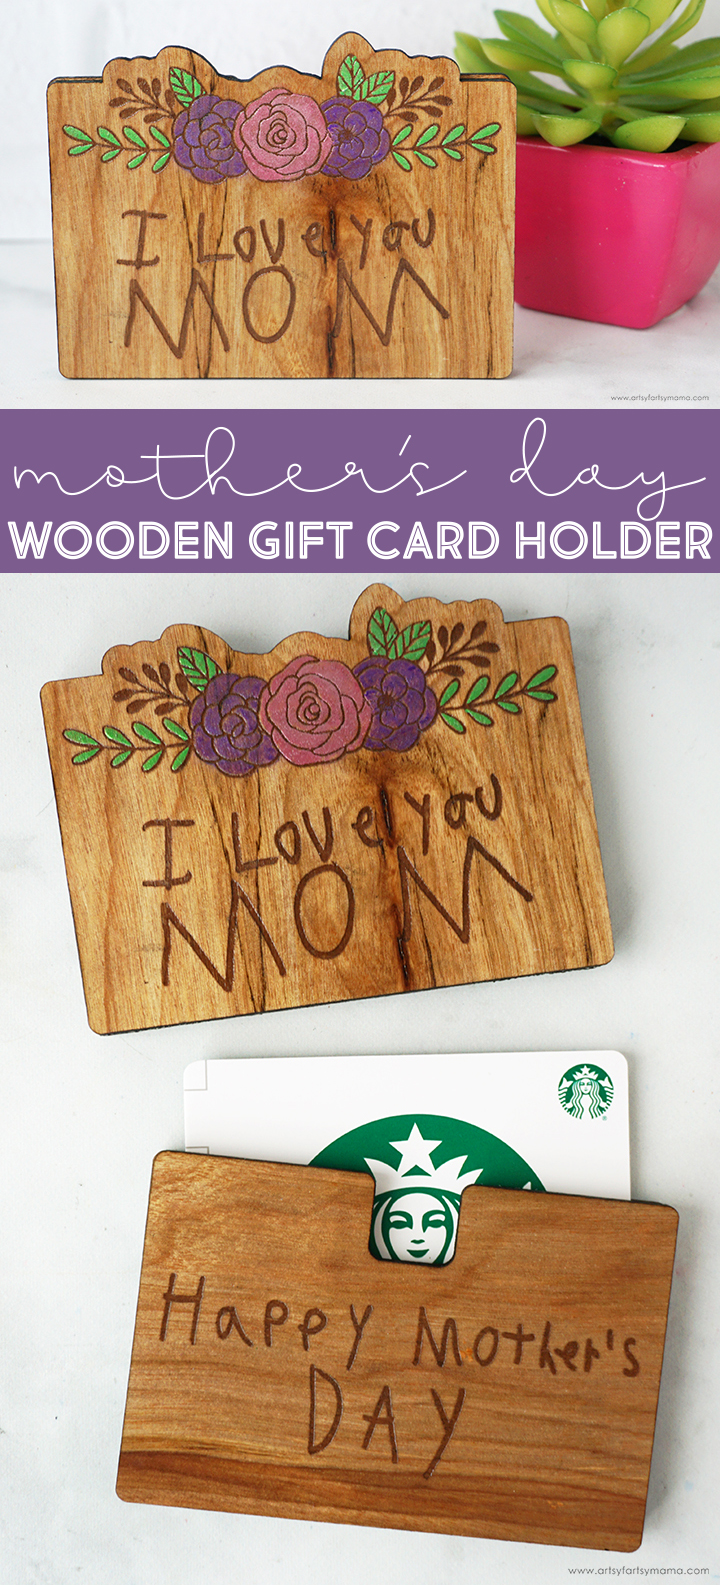
Make mom feel extra special this Mother's Day with a custom Wooden Gift Card Holder!
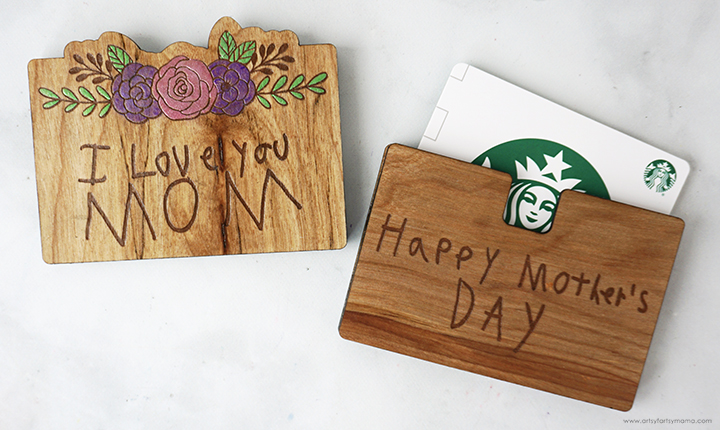
It's almost Mother's Day, and it's likely that you are wondering what kind of gift to give mom to show your appreciation. As a mom myself, I personally love gift cards. They might seem like an impersonal gift, but I actually love them because it means I get to go to my favorite place alone! Besides, when the gift card to mom's favorite place is packaged in a custom Mother's Day Wooden Gift Card Holder, she might love it more than the solo shopping spree! This project is easy to make using the xTool M1, and I'm sharing the FREE laser cut file so that you can make a custom wooden gift card holder for the big day!

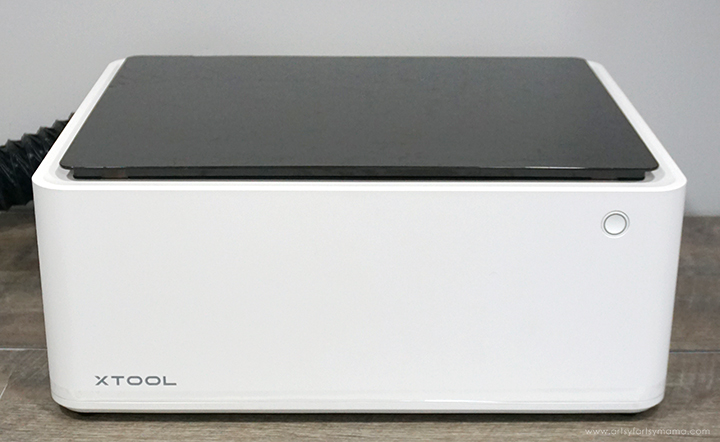
There are SO many projects you can make using the xTool M1 laser cutting machine, and it's actually very easy to use! Once you have one of these, the hardest thing you'll have to do is decide what to make first. If you want to learn more about how this incredible machine works, be sure to check out my complete xTool review.
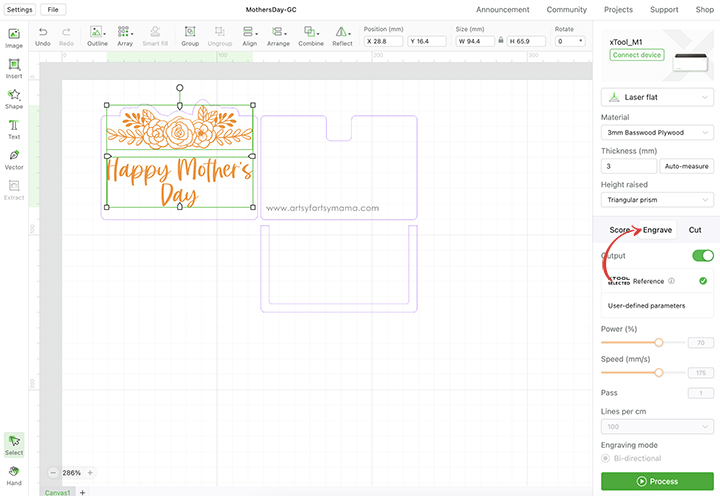
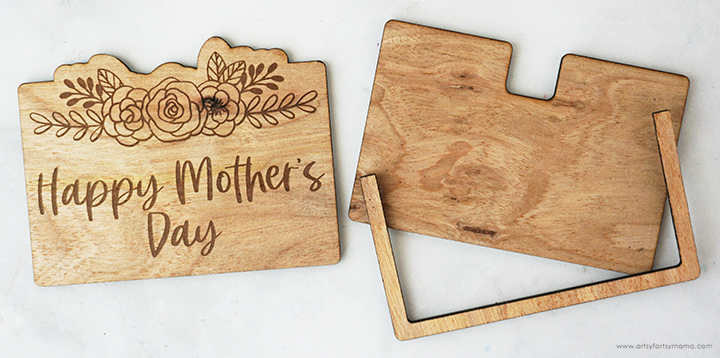
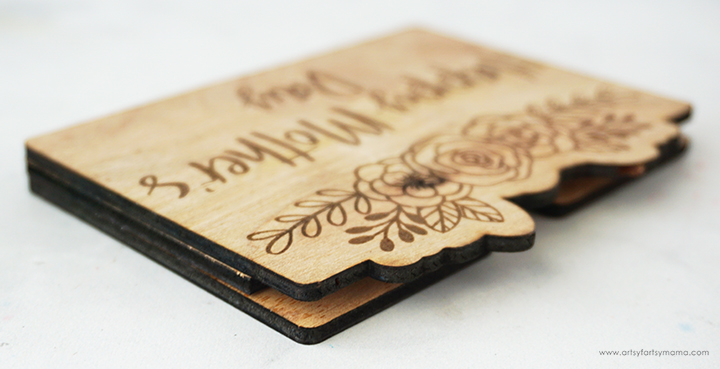
Upload the Mother's Day Gift Card Holder laser cut file into xTool Creative Space. The gift card holder itself is three separate pieces: front, back, and center piece to be cut out of wood. There is also a "Happy Mother's Day" and floral design that can be engraved on the front of the holder.
Next, select the material type from the drop-down menu on the right side of the screen. I used the pre-loaded settings for "3mm Basswood Plywood" material. Make sure that you also select "Triangular Prism" from the "Height Raised" drop-down menu. By selecting the material before you get started, it will automatically adjust settings for cutting and engraving your project.
Select the 3 gift card holder pieces, and click on the "Cut" option in the right menu bar. As long as you set the material first, the settings will automatically adjust. Anything set to "Cut" will change to have a purple outline. Then select the floral design and the "Happy Mother's Day", and click on the "Engrave" option in the menu bar. These should change to an orange color once changed to this setting.
Download Mother's Day Gift Card Holder Laser Cut File
**Cut files are for PERSONAL USE only**
Printables and cut files from Artsy-Fartsy Mama are for personal use only. You may use these files for personal projects, but you may not sell them. If you'd like to share this project digitally, share a link to this post/website only. Do not share a direct link to the file.
Place your piece of wood into the xTool M1 machine, on top of the triangular prisms. When you close the lid, the image of the inside of the machine should show on your screen. If it isn't, click "Refresh" in the top right (green) section of the menu and it should show up.
Arrange the gift card holder pieces on the wood however they fit best. If you are making multiple gift card holders, copy and paste the set or upload the design as many times as needed. Once you are happy with the layout, click the green "Process" button in the bottom right corner. But wait....
Want to add a personal message or customize the gift card holder? It may surprise you to learn how easy it is to engrave your projects with custom-drawn or written designs! Follow along with the following steps to find out how:

One of my favorite things about Mother's Day gifts is the incorporation of your child's handwriting. If your child is too young to write, this would also work with a simple drawing. Using a blank piece of paper and a black marker*, have your child write or draw. It can be any size, so don't worry about making it on the gift card holder right now.
*Pen or pencil could also work, but the thickness from a marker will work a lot better.
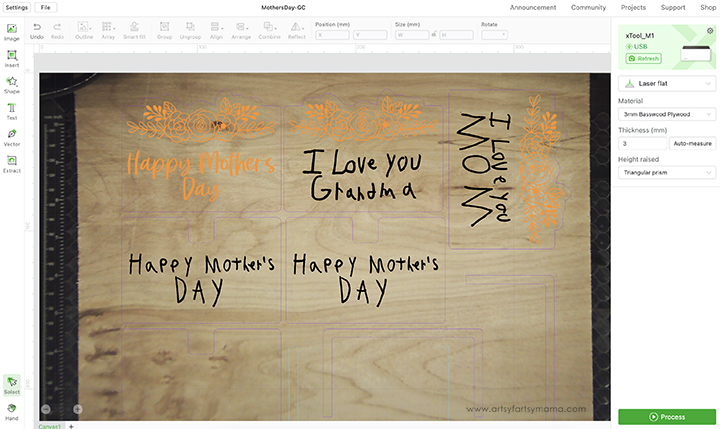
Take a photo or scan the paper to get a photocopy of the writing/drawing. Save the image as a PNG, if possible. Crop the image to just the message, and upload it into xTool Creative Space. The image will likely be large, so just select it to fit the canvas if prompted. With the image selected, click the green "Edit Image" in the right menu bar.
Now you can use the tools in the menu bar, like the magic wand and eraser tool, to remove the white background and anything else you don't need in the design. For multiple messages or drawings, I would upload and edit each one separately. Once you're done editing, click the green "Save" button.
Now you have an image of handwriting with a clear background that can be adjusted to fit on the gift card holder. Scroll up to the previous step, and you can see where I've added all of my handwritten message images to make custom gift card holders! Because these images are PNG, they can only be set to be engraved, so you don't need to make any adjustments.
Once you are happy with the layout, click the green "Process" button in the bottom right corner.
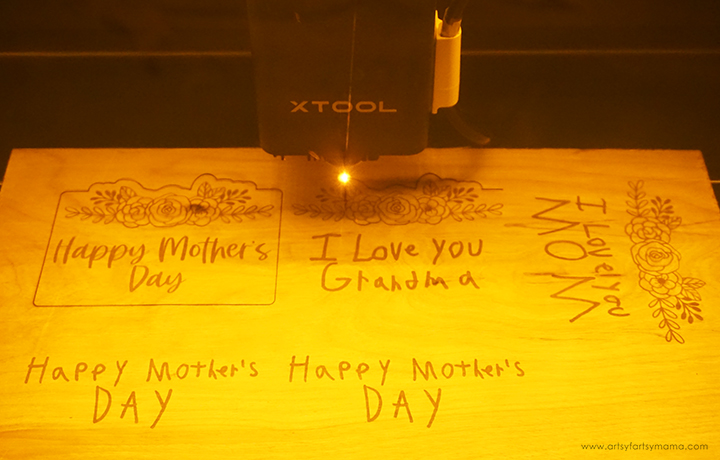
Press the large, lit button on the front of the machine to start the cutting and engraving process. It's so fun to watch the laser in action, and the kids will be especially thrilled to see their handiwork come to life! No matter what I'm making, I am always so impressed with the how precise the xTool is for even the smallest of details.
Once the cutting and engraving process is complete, you can remove the gift card holder pieces from the machine. Before assembling the project, I would recommend cleaning the soot away around the edges of the wood using a Magic Eraser or baby wipe to prevent making marks all over your hands.
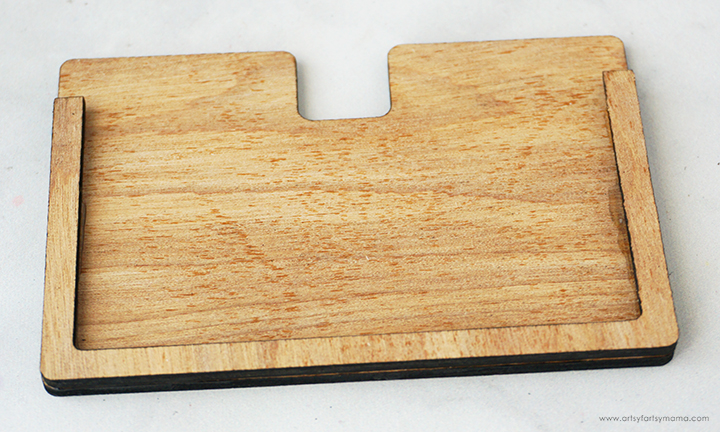
Lay the back piece of the gift card holder face-down on your work surface. Add some adhesive to the center piece, and line it up with the bottom edge of the back piece. Add another thin line of adhesive to the front of the center piece, and place the front piece of the gift card holder on top.
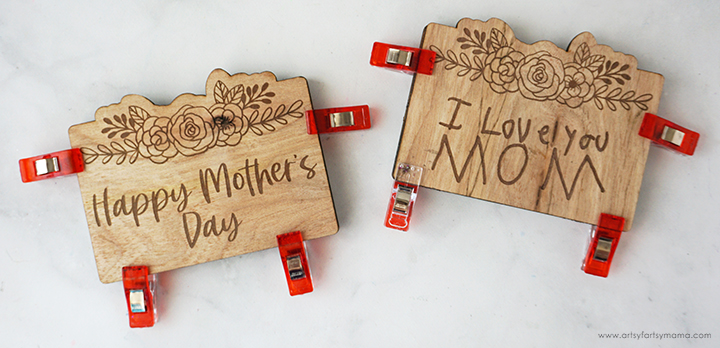
Once the adhesive has had enough time to dry completely, remove the clips. If the pieces are coming apart, add more adhesive and repeat the process.
Seal both sides of the gift card holder thin coat of clear sealant. Not only will this make the engraving and wood grain really pop, making the gift card holder look professional, but it also allows you to add color to the project without it bleeding into the porous wood.
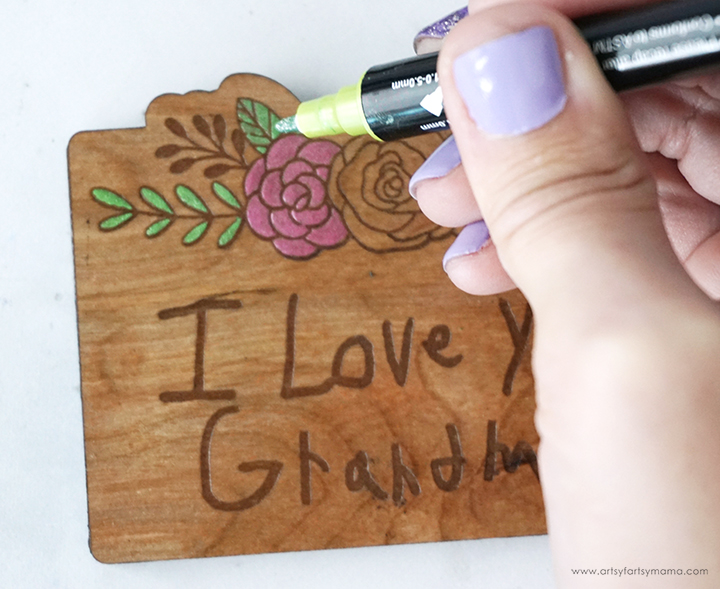
An easy and effective way you can add color to the floral design on the gift card holder is with fine tip acrylic paint pens. This also makes it easy for kids to help, because the pen is a lot easier to use on a small piece like this than a paint brush.
If you use the "Happy Mother's Day" design provided in the download, you can also opt to use these pens to add a custom message to the back of the gift card holder instead of uploading an image for engraving.
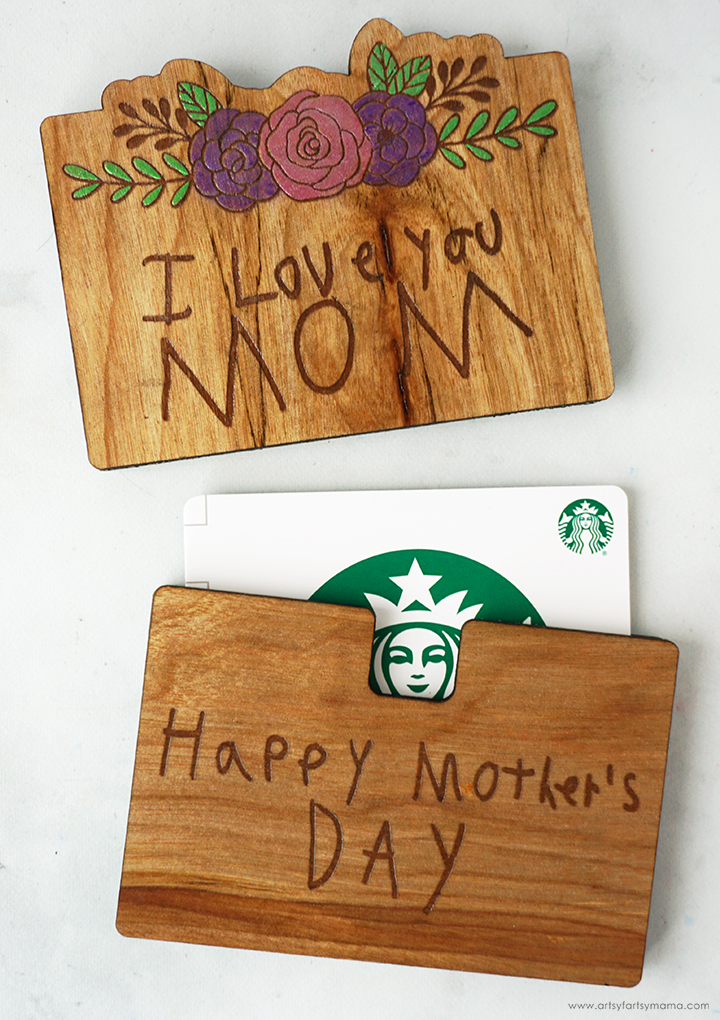
Choose a gift card that mom can spend at her favorite restaurant, shopping location, or anywhere that she can treat herself. Once the card is placed into the gift card holder, the gift is ready for mom, aunts, or grandmas to receive on Mother's Day!
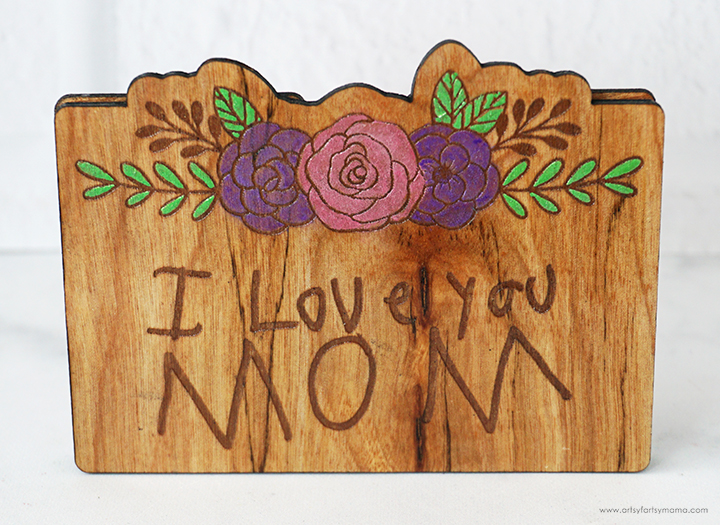
You might notice that I put the "I love you Mom" on the front of the gift card holder. I did this on purpose because I was thinking that this creation would be a fantastic thing to display after Mother's Day is over! Because of the thickness, it can stand on its own, and it's a perfect size to keep on a nightstand, work desk, or shelf to display with other handmade gifts!
I am beyond thrilled with these Mother's Day Wooden Gift Card Holders, and would love to hear what you think. If you are looking to start a small business using the xTool M1 machine, these would also be a great product to sell. As always, if you make any of these projects for yourself, I'd love to see your creations! Tag me on Instagram and Facebook, or leave a comment/photo on the project pin on Pinterest!!
Looking for more Mother's Day inspiration?
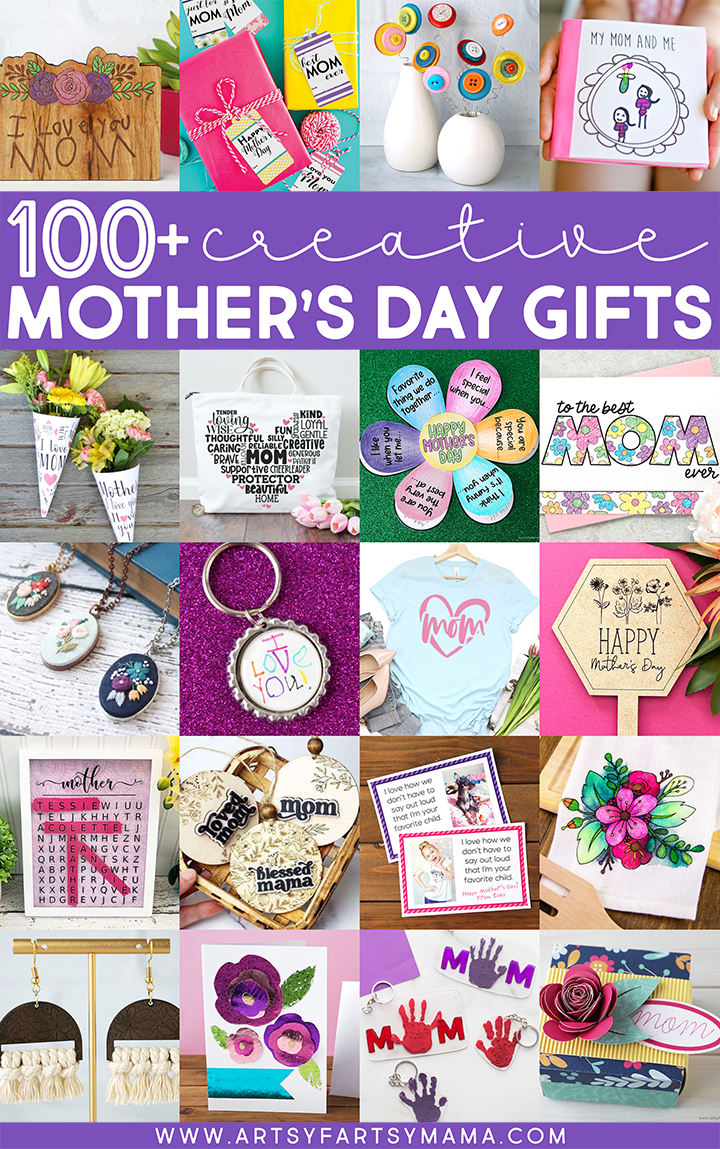
Check out this collection of OVER 100 creative Mother's Day gift ideas!!
Don't forget to Pin, Like, and Share!


The more neat DIYs that you share that use the xTool Laser Machine, the more I want one! This is such a sweet Gift Card Holder that would be perfect any time of year for personalized gifts, especially from littles.
ReplyDeleteAlexandra
EyeLoveKnots.com
OnRockwoodLane.com