
"Spruce" up your holiday decor with a handmade Macrame Christmas Tree!

I love macrame projects, and this Macrame Christmas Tree is a simple and festive one! It' a beautiful piece to include in your holiday decor as an ornament or wall hanging, and would also make a wonderful handmade gift. At first glance, this project may look a little complicated, but I promise that it's actually pretty simple! Another great thing I love about macrame is that you really don't need any special tools - just your hands and some cord!

To make a Macrame Christmas Tree, you will need these supplies:
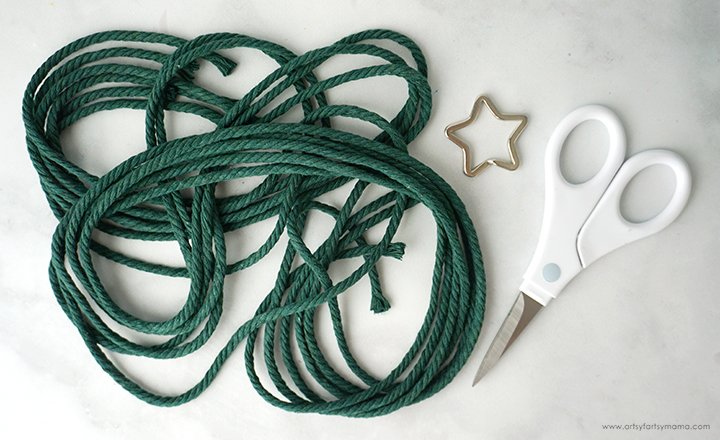
You will need to cut a total of 9 lengths of 4mm cord:
8 pieces - 100cm
1 piece - 50cm
Use tape, a binder clip (and board), or clipboard to hold the ring in place. This will help to keep it from moving around as you work on your project.

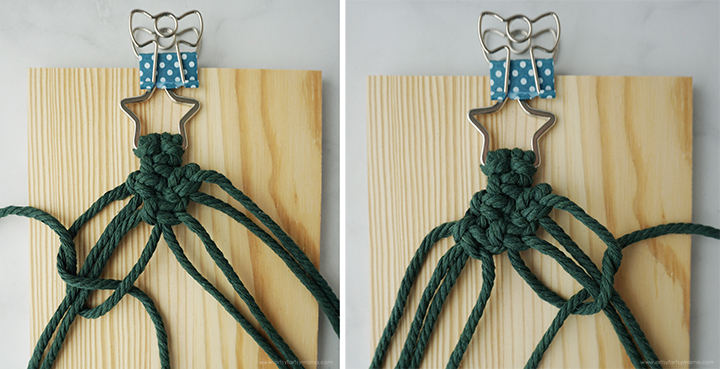
Tie two lengths of cord onto the star key ring using a Lark's Head Knot. To do this, fold the single rope in half, lining up the ends. Place the folded end behind the ring, and fold the ends over the front. Bring the ends through the "loop" and pull to create the knot at the top.

For this project, we are going to be using multiple square knots to get the macrame design. Because there are so many cords, the project may look complicated at first glance. However, it's actually quite simple and I will walk you through it, one step at a time. If you ever get confused at any step, just refer to the photos for each step as a visual aid.
Step 1:
Tying a square knot takes two easy steps. Start with the first cord on the left side, and bring it over the center cords, making a "4" shape. With the second cord over the end of the first cord, bring it under the center cords and up and through the triangle of the "4". Hold the ends of the cords and pull to tie the knot. Bring the knot up to the top so that it's right underneath the Lark's Head Knots.
Step 2:
To make a complete square knot, you need to tie the cords again, but in the opposite direction. Fold the cord on the left side under the center cords, making a "4" shape. Bring the second cord under the end of the first cord, and then bring it over the center cords and down and through the triangle of the "4". Hold the ends of the cords and pull to tie the second knot. Bring the knot up underneath the previous knot.

Step 3:
Separate the four cords in half. Center a new piece of cord underneath the two cords on the left, and tie it into a square knot around the cords. Bring the knot up so that it is right up against the previous knot.

Step 4:
Center another new piece of cord underneath the two cords on the right. Tie the cord into a square knot, the same way as the previous step.

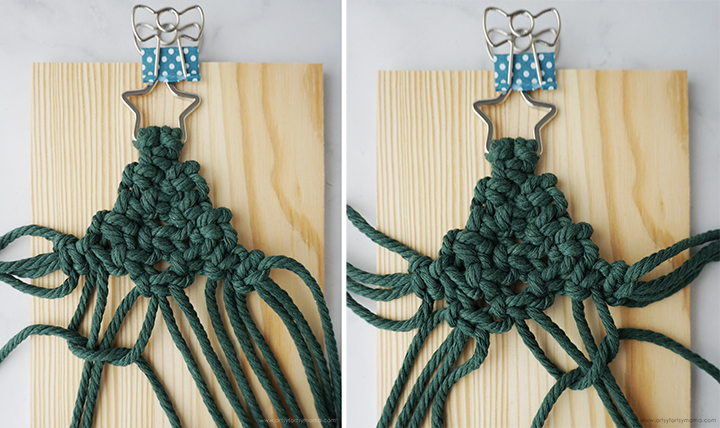
Step 5:
There should now be a total of 8 cord lengths to work with. Bring the two cords on each end out horizontally, and the two in the center straight down. Using the two cords on each side of the center pair, tie a square knot (follow steps 1-2).
Step 6:
Use the four cords on the left to tie a square knot. Keep the second and third cords in the center, and tie the knot with the first and fourth cords.
Repeat the same thing with the four cords on the right side.

Step 7:
Center a new piece of cord underneath the first two cords on the left, and tie it into a square knot. Don't forget to bring the knot up to the edges of the previous knots.
Repeat this process with another new piece of cord and the last two cords on the right.

Step 8:
There should now be a total of 12 lengths of cord. Pull the first and last four cords out horizontally, and leave the center four cords in the center. Tie a square knot around the two center cords.

Step 9:
Move the first two cords out of the way, and tie a square knot with the third through sixth cords. Next, move the last two cords out of the way, and tie a square knot with the seventh through tenth cords.
I know there are a lot of cords, so refer to the images above if you need to.

Step 10:
Next, tie a square knot with the first four cords on both the right and left sides.

Step 11:
Move the four cords on either sides out of the way, and tie a square knot using the four cords in the center.

Step 12:
Center a new piece of cord underneath the first two cords on the left, and tie it into a square knot. Don't forget to bring the knot up to the edges of the previous knots.
Repeat this process with another new piece of cord and the last two cords on the right.
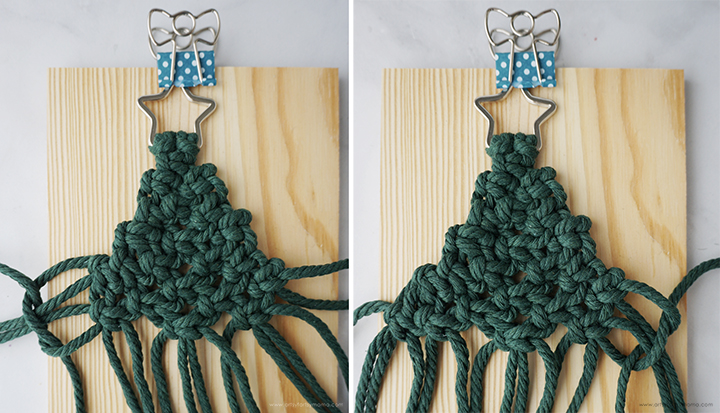
Step 13:
Now there should be a total of 16 cords on the project. Move the first four cords on the left out of the way, and tie a square knot using the fifth through eighth cords. Next, move the four cords on the end out of the way, and tie a square knot with the ninth through twelfth cords.

Step 14:
Move the first two cords out of the way, and tie a square knot with the third through sixth cords. Next, move the last two cords on the right out of the way, and tie a square knot with the eleventh through fourteenth cords.
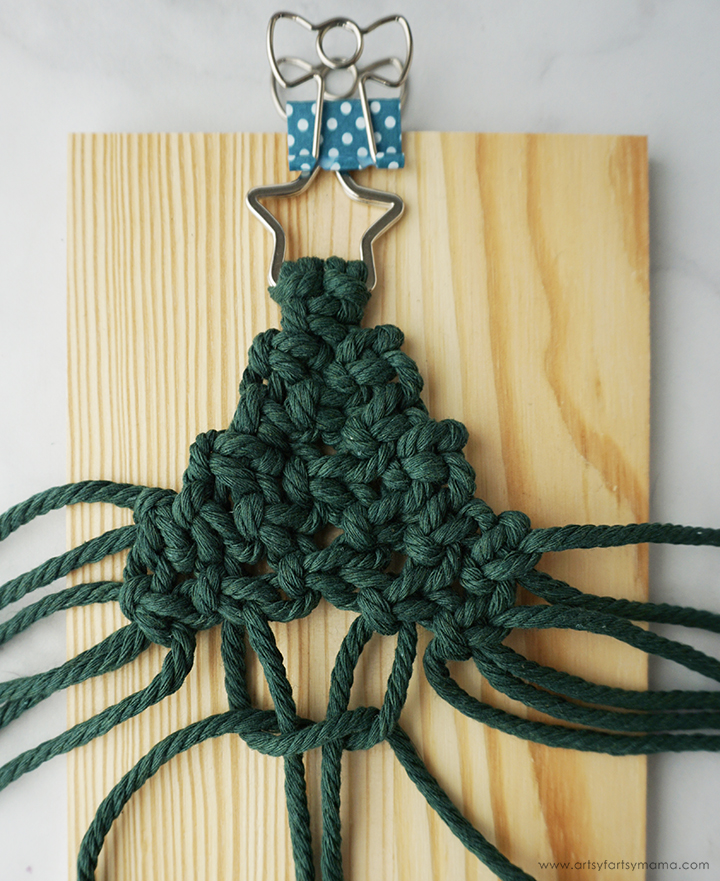
Step 15:
Now, move all of the cords out of the way, except for the four in the center. As you might be able to guess at this point, tie a square knot with these four center cords.
Step 16:
Next, tie a square knot with the first four cords on both the right and left sides.
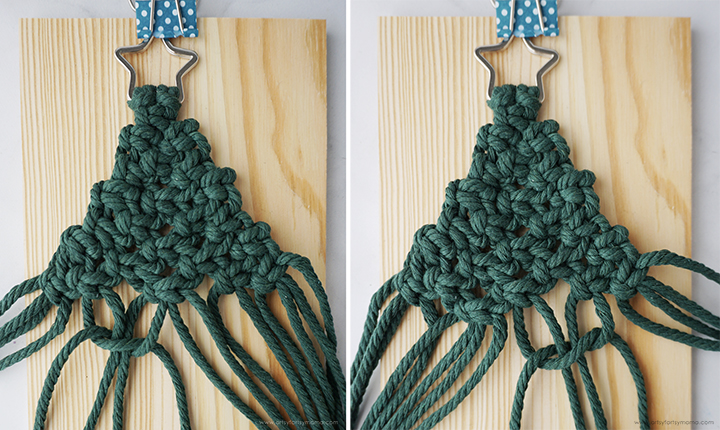
Step 17:
Move the first four cords on the left out of the way, and tie a square knot using the fifth through eighth cords. Next, move the four cords on the end out of the way, and tie a square knot with the ninth through twelfth cords.
Guess what? We're almost done!!

Step 18:
Now that the main knotting process is complete, it's time to tie up the bottom of the tree - literally and figuratively.
Starting on the left side, bring the end cord around the one next to it (like a "4"), and the bring the end up and through. Pull the knot tight.
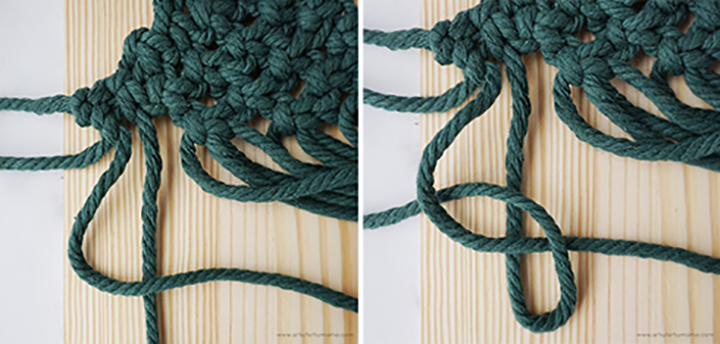
Step 19:
Bring the next/second cord over the third, like a "4". Bring the end of the third cord up and through the hole of the "4" and pull tight. Repeat this knot until you get to the eighth and center cord.
In the image example above, I have tied a few knots to show you how it should look.
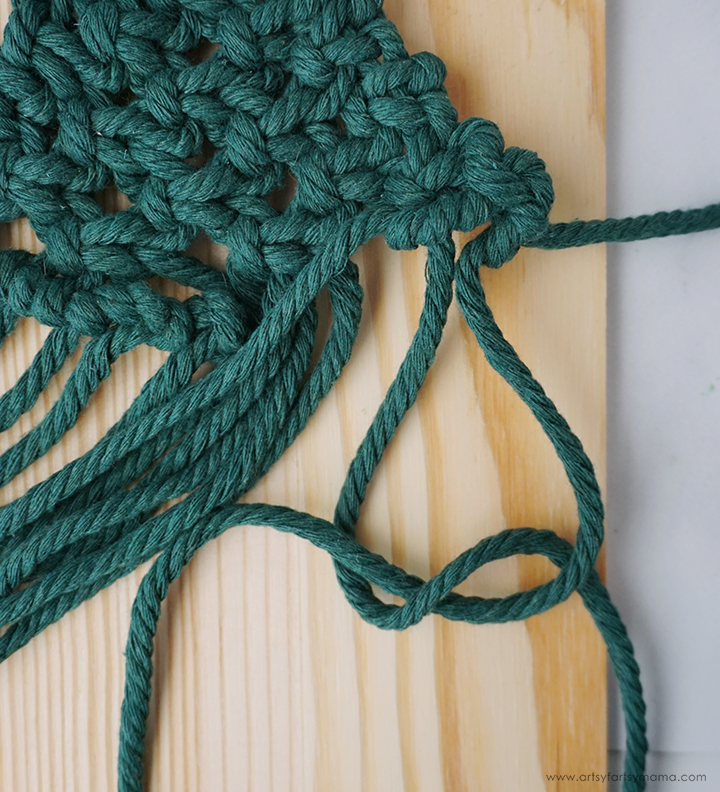
Step 20:
Starting on the right side, repeat steps 18-19, but tie the cords in the opposite direction. This would mean creating a backwards "4" with the cords instead. Tie all of the cords until you get to the ninth and center cord.
Step 21:
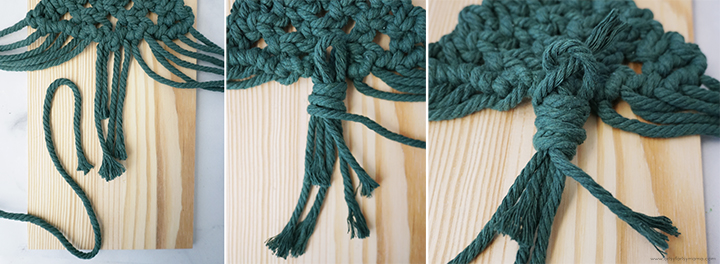
Now, we are going to make the "trunk" of the tree! Bring the four center cords straight down, and move the others out of the way. Fold the end of the last and smaller cord over a few inches (1st image). Place the folded cord over the four center cords, with the loop facing up.
Step 22:
Hold the folded cord in place. Start about an inch below the loop and wrap the cord tightly around the four center cords (2nd image), winding toward the top. When you're done wrapping, bring the end of the wrapping cord through the loop (3rd image).

Step 23:
Hold the cord that is coming through the loop tightly, and then pull the bottom of the loop/folded cord to bring it through the center. When you can no longer see the top of the loop, carefully trim away the excess cord poking up through the wrapped cord (1st image). If needed, use your scissors or something pointed to push in any cord ends so that you can no longer see them (2nd image).

Step 24:
Use sharp scissors to trim the tree cord ends to the same length, and then trim the trunk cords to about an inch long at the most.

Step 25:
Use a macrame comb to carefully comb through all of the cord ends to fluff them out. Use scissors to trim any uneven ends.
Now the Macrame Christmas Tree is complete! This would be a fantastic ornament or piece of decor to hang on a wall. Even though it is made using a star key ring, I don't know that I would use this with your keys because it's a little large (mine is about 6" tall). As always, I would love to see your macrame creations! Share yours on Instagram, Facebook, or leave a comment/photo on the project pin on Pinterest! #AFMCrafts
Don't forget to Pin, Like, and Share!


