
Add a bit of magic to your coffee table with these Mickey Mouse-inspired coasters made of resin!

When it comes to anything Disney, I can't get enough! These Mickey Mouse Coasters are made using extra-sparkly resin to bring a touch of Disney magic to any coffee table or workspace. Coasters are one of my favorite things to make, and I think these ones might be in my top favorites. This is a great project for any level of resin crafter, and think these coasters would be such a fun gift idea for your fellow Disney friends!

To make these Mickey Mouse Resin Coasters, you will need these supplies:
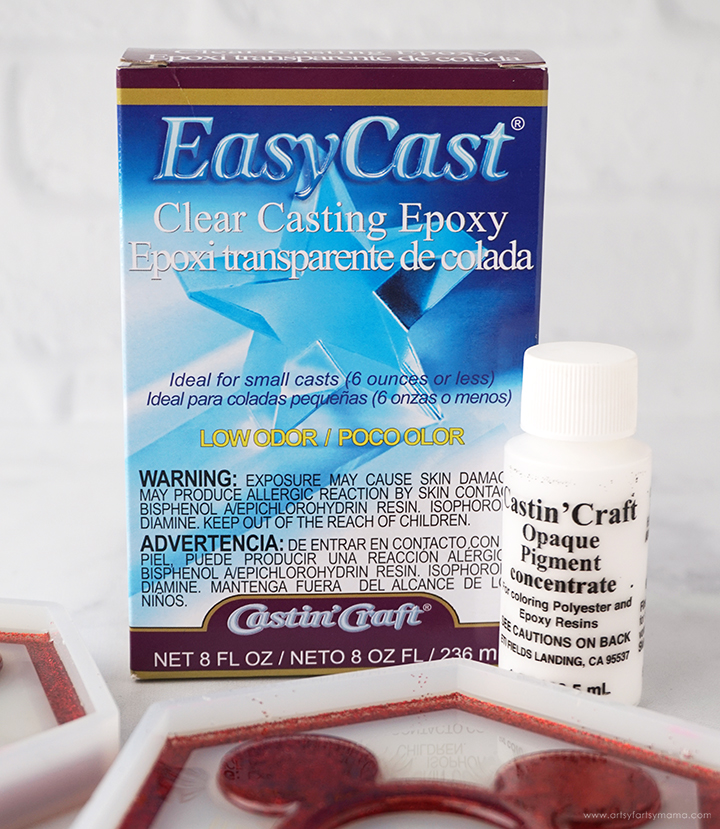
- EasyCast Clear Casting Epoxy
- Measuring Cups
- Stirring Sticks
- Disposable Gloves
- Hexagon Coaster Molds
- Mickey Heart Molds (having 2-3 is convenient)
- Castin’ Craft Transparent Resin Dye – Red
- Castin' Craft Opaque Pigment - White
- Fine Glitter – red, white
*Save 10% on resin supplies when you shop ETI with code AFM

Prepare about 3-4 ounces of EasyCast Clear Casting Epoxy according to package directions. Be sure to protect your workspace, work in a well-ventilated area, and wear disposable gloves. Pour in equal parts of resin and hardener to the mixing cup. Slowly stir the resin mixture together with a stir stick for two minutes.
Pour the resin into the clean mixing cup and mix again with a clean stir stick for another few minutes. If you still see ethereal-like streaks through the resin, keep mixing until it becomes clear. Add a drop of red resin dye and sprinkle in a generous amount of fine red glitter. Stir the resin mixture again for another minute or two until evenly incorporated.

Slowly pour the resin into just the borders of the hexagon coaster molds, and into the Mickey Heart Mold(s). You don't have to have multiple Mickey molds, but this project goes quicker having 2-3 of them. Don't worry about cleaning up any drips at this time. We'll take care of it later.
Pop any bubbles that rise to the top using a lighter, heat gun, or by blowing through a straw. You could also lightly spritz the molds with 91% alcohol to remove surface bubbles.

Cut away any excess resin from the Mickeys using using scissors or a craft knife. Carefully remove any cures drips from the center of the coasters. To make clean-up a little easier, you can use some packaging tape, and gently press it sticky-side down onto the coaster to remove the small debris left behind. Clean up the coasters the best that you can.

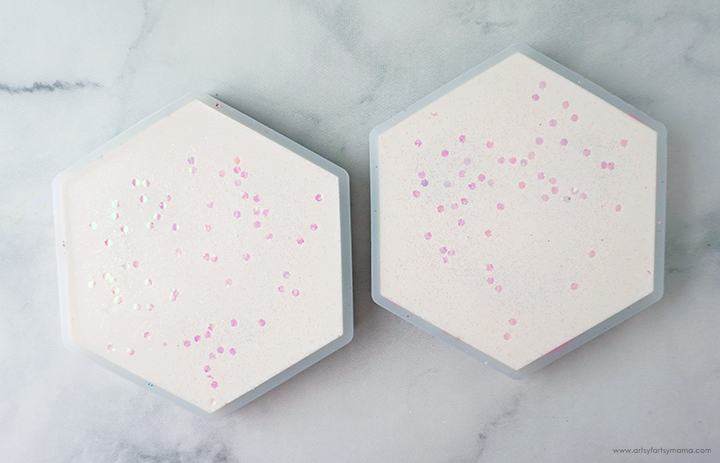
Fill the molds all the way to the top with the white resin mixture. I ended up using a little over 1 1/4 ounce of resin* for each mold.
Mix up another 1 1/2 ounces of EasyCast Clear Casting Epoxy, following the same directions as above. Be sure to protect your workspace, work in a well-ventilated area, and wear disposable gloves.
Pour 1/2 ounce of resin into each of the coasters. Carefully place the Mickey pieces face-down in the center of the coaster. Use your fingers or a clean stir stick to press the Mickey down to bring out any bubbles from underneath. Pop any bubbles that rise to the top using a heat gun, by blowing through a straw, or by lightly spritzing the molds with 91% alcohol to remove surface bubbles.
Leave the resin to cure in an undisturbed, well ventilated area for at least 4 hours. The next step can be done once the resin has had time to thicken or completely cure. Again, do not try to remove the resin from the molds yet!
Mix up about 4-5 ounces of resin and add a drop of opaque white pigment and generous amount of fine white glitter. Mix the resin well, following the same directions as before!
Leave the resin to cure in an undisturbed, well ventilated area for 24 hours. You will know the resin is cured when it is no longer tacky to the touch and will pull away from the edges of the mold. If it is still tacky, let it cure for a longer time.
*Just for fun, I had added a chunky hexagonal glitter to my mixture. This obviously didn't work that well, because it all just floated to the top. Don't be like me, unless you want the back of the coasters to look like this!

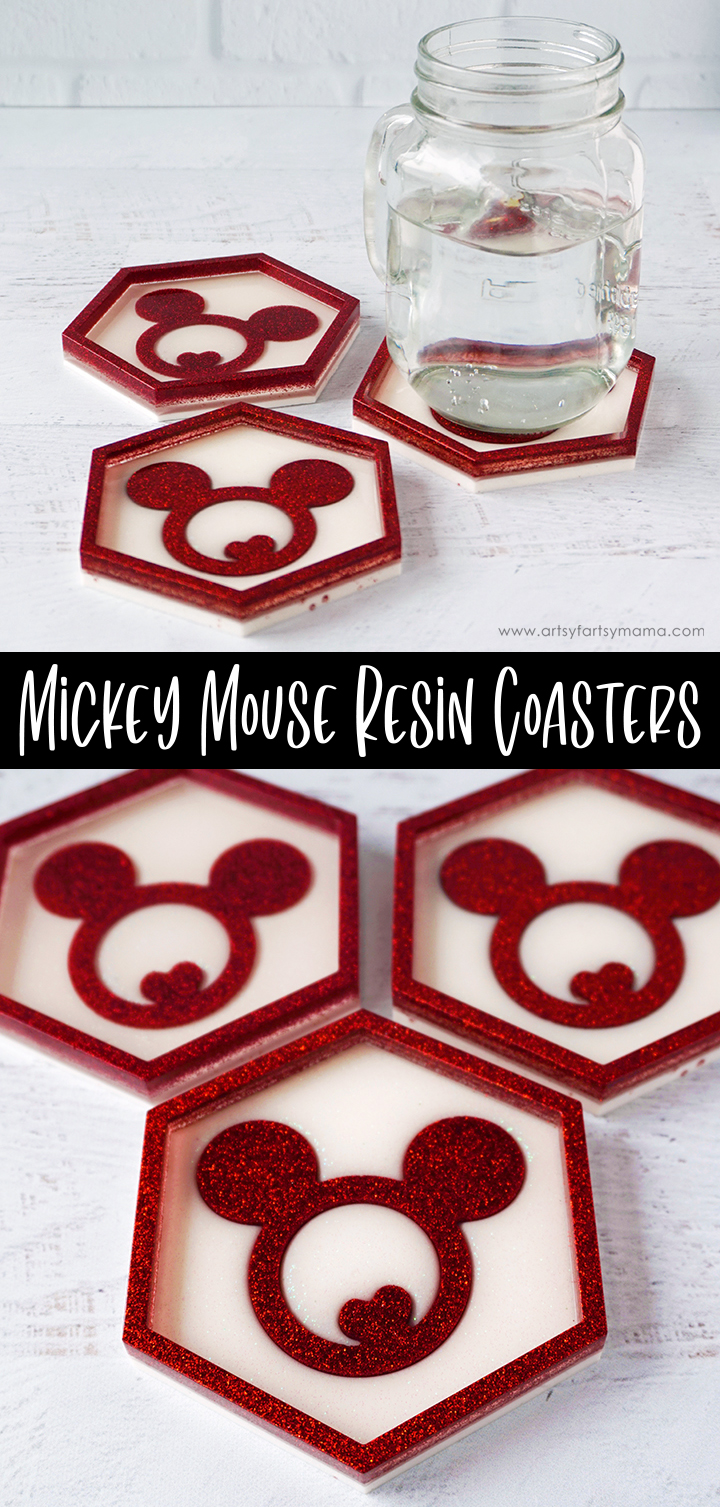
Carefully remove the coasters from the mold and admire the magic! Remove any over-poured resin with scissors, and sand down edges, if necessary, and re-seal them with spray sealer. I am absolutely in LOVE with these coasters! They are so sparkly, and are a simple, yet obvious way to display your love of Disney. I think they will look fantastic on any Disney lover's coffee table or workspace!
As always, I would love to see your creations! Leave me a comment and let me know, or tag a photo on Facebook, Twitter, or Instagram! #AFMcrafts
Don't forget to Pin, Like, and Share!


Those are just adorable!
ReplyDeleteThese are adorable! Mickey and glitter. Two of my favorite things!
ReplyDelete