
Make a Lucky Shamrock Wood Sign to greet your guests with the luck o' the Irish!

Looking for something new to add to your St. Patrick's Day decor? I had a lot of fun making this Lucky Shamrock Wood Sign, and I love that it's a quick afternoon craft! All you need is a little paint, and some help from a Cricut machine. By the way, you can grab the "lucky" cut file here in the post to make your own version of this Lucky Shamrock Sign!

To make this Lucky Shamrock Wood Sign, I used these supplies:
- Wood Slatted Shamrock Sign - I found mine at Target Dollar Spot $3
- FolkArt Multi-Surface Acrylic Paint - Classic Green
- FolkArt Treasure Gold Paint - Gold
- Paint Brushes
- "Lucky" Cut File (personal use only)
- Any Cricut Machine
- HTV/Iron-On Vinyl OR Glitter HTV/Iron-On Vinyl
- EasyPress Mini
- EasyPress Mat
- Weeding Tools

Lightly sand the wood shamrock, especially in the grooves. Wipe off any dust, and then paint the front and sides of the shamrock with green acrylic paint. Make sure the paint is completely dry before adding another coat.
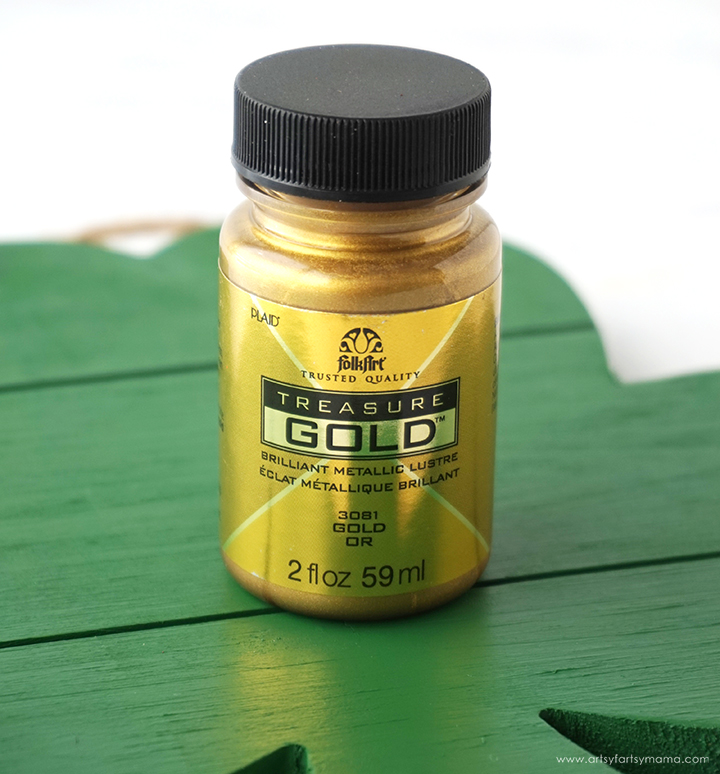
The plain green looks great, but I decided to use this gorgeous metallic Treasure Gold paint to add a bit of gold to this lucky shamrock project!

First, I painted all around the edges with two coats of Treasure Gold paint. Be sure to let each coat dry before adding another! For the next step, I placed the shamrock down on a silicone mat to make clean-up a whole lot easier. Use a stiff paint brush or an old toothbrush to splatter the gold paint on the front of the shamrock. If you want to be more bold, you could paint stripes, dots, or any other pattern out of gold paint!
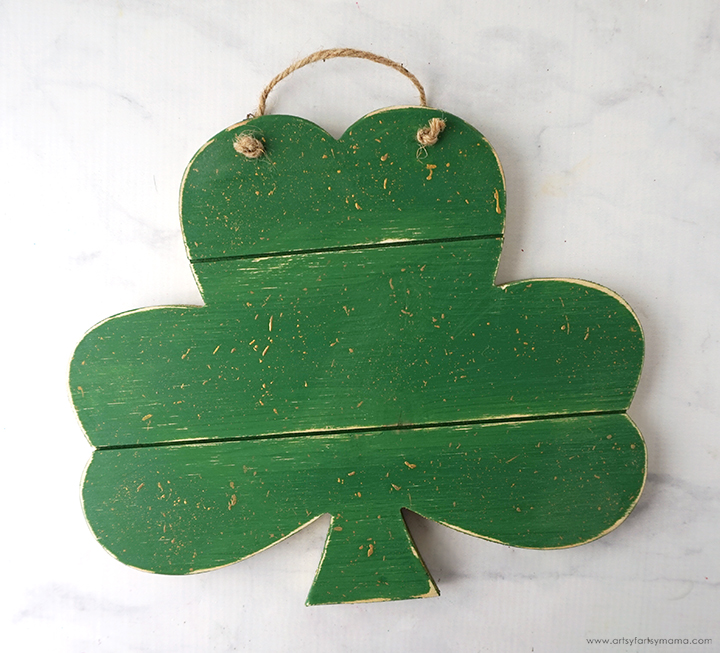
Let the splatters dry completely (shouldn't take too long). Next, I lightly sanded the edges and a little bit along the grooves to rough it up a little bit. Don't sand too much, or you could take off all of the splatter!
After this, I liked it, but it needed something....more. So I decided to brush a light coat of gold around the edges and everywhere I had sanded for a little bit of extra shimmer. You'll be able to see the difference in the final photo!

Measure the width of the shamrock. Upload the "Lucky" cut file into Design Space and size the image to fit the sign. With the design still selected, change colors as necessary to fit your material. Click the green "Make It" button in the top right corner.
The cut file includes multiple file types, so you can actually cut the design with any cutting machine. All I ask is that this file is for personal use only. I hope you enjoy using this cut file, and I would absolutely LOVE to see your creations!!
*Here's a great tutorial on how to upload your own images into Cricut Design Space.
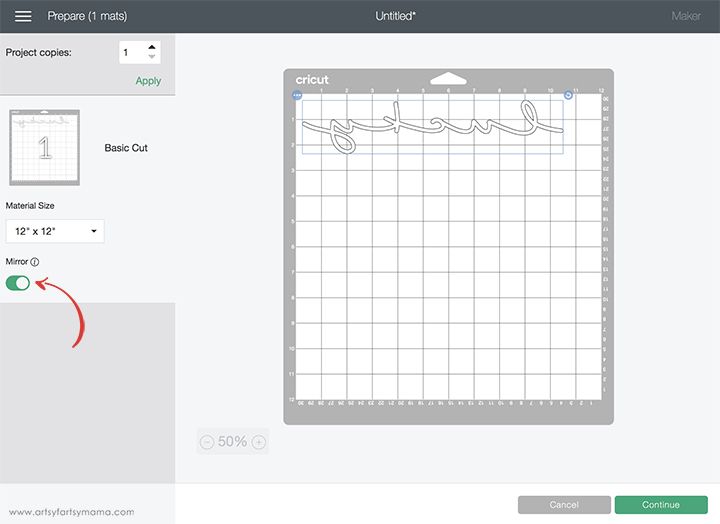
If you want to use adhesive vinyl, you can skip this step. I personally love using iron-on vinyl on my wood projects because I don't always have the best of luck applying adhesive vinyl. If you're this way, too, make sure to mirror the image before cutting the iron-on vinyl! Otherwise, your design will be backwards when you put it on the wood. To do this, select the mat thumbnail and click the "Mirror" toggle to reverse the image.

For this sign, I used I used white Glitter HTV. Place the vinyl face-down on the mat, and load it into the machine. You can change the material settings to the type of vinyl you are cutting in the "Browse All Materials" link. Then click the "Go" button to start cutting the vinyl.


Plug in the EasyPress Mini. Each kind of HTV has a different heat and time setting, so be sure to check the recommended EasyPress settings before getting started. Adjust the heat setting to your material and vinyl specifications. Once the light turns green and the machine beeps, it's ready to use.
When the EasyPress is up to temperature, place the sign on the EasyPress Mat and preheat the area for 5-10 seconds. Center the HTV down on the sign, with the clear carrier sheet facing up. Set the EasyPress over the vinyl and gently move it around over the vinyl as the timer counts down. Peel off the carrier sheet while the vinyl is still warm.
I made my vinyl a little bit wider than the sign, so I used a craft knife to carefully cut off the ends of the vinyl at the edges of the sign.
Now you can hang this sign up for a little bit of luck this St. Patrick's Day. I hope you enjoyed this tutorial, and as always, I would love to see your creations if you make one for yourself! Leave me a comment, or tag a photo on Facebook, Twitter, or Instagram! #AFMcrafts
Don't forget to Pin, Like, and Share!


Very cute sign. So perfect for the upcoming St. Patrick's Day. I am happy to feature your DIY sign at Love Your Creativity on Sunday.
ReplyDelete