
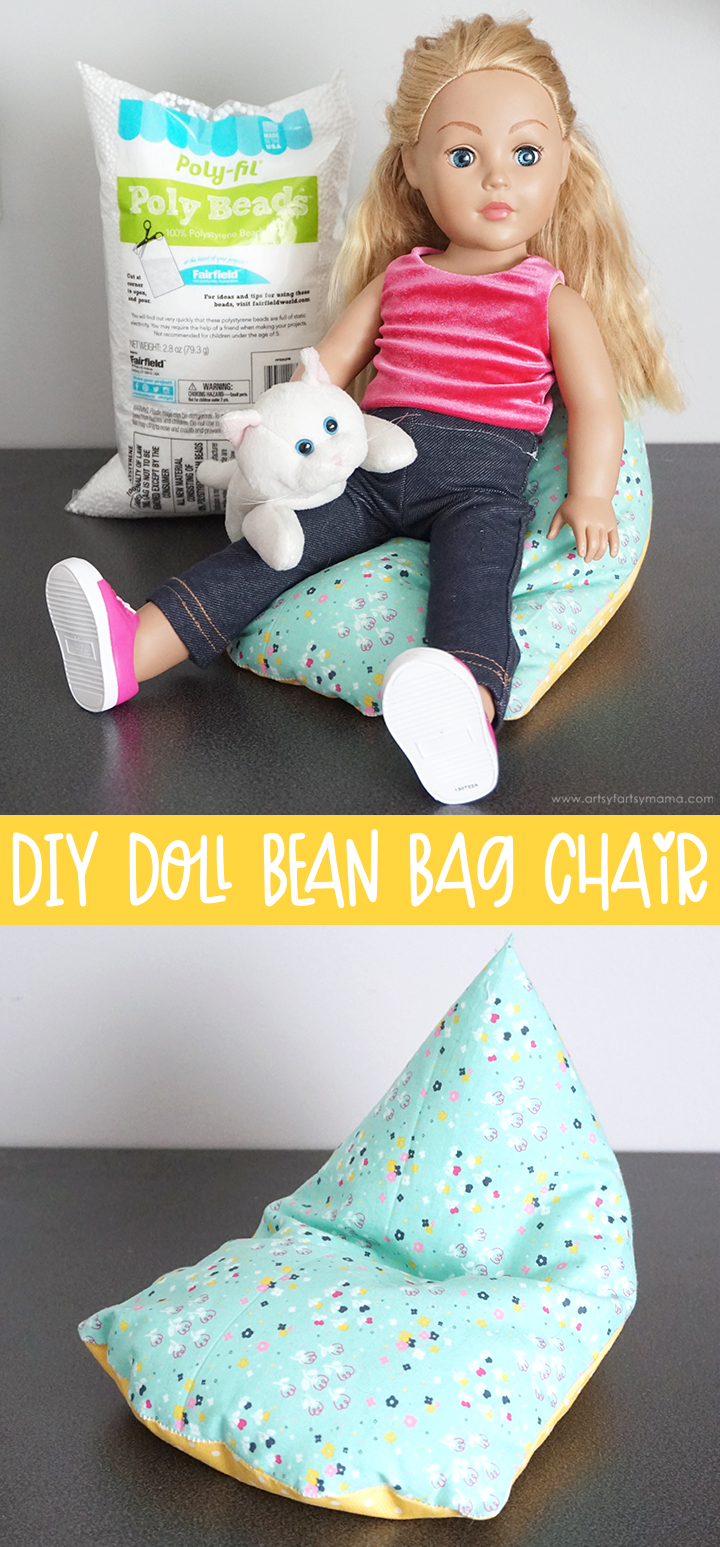
This comfy Bean Bag Chair is simple to make for your favorite 18" doll to relax in!

I'm excited to be a part of the Fairfield Design Team this year, and this month's theme is finding a creative way to use bead fillers. My daughter and I love finding new things to make for her 18" dolls. Everything is so little, and always come out looking so adorable! We decided to use Poly-fil Poly Beads to make this comfy-cozy bean bag chair that will fit any 18" doll! You can use any fabrics you want, and it's such a simple project for those who are new to sewing.
To make this 18" Doll Bean Bag Chair, you will need these supplies:
- Cotton Fabric - one 1/3 yard piece, fat quarters, or two coordinating patterns
- Sewing Machine
- Basic Sewing Supplies
- Rotary Cutter
- Poly-fil Poly Beads


Lay the two pieces of fabric down with right sides together. Pin, and then sew a zig zag stitch along the the two long edges.

Fold the fabric in half (like a hot dog bun) so that the two sewn edges are touching. Measure down 2 inches on the side with the stitches and mark with a fabric pen. Use a plate, bowl, or freehand a rounded shape to the opposite corner. Cut along the marked line with the rotary cutter or scissors.

When you open the fabric back up, you should have a rounded, symmetrical curve. Sew a zig zag stitch along the curved edge, connecting the seams with the ones on each side.
Clip along the curved edge and at the corners. Turn the fabric right-side out and press the seams.

Next, you will need something to fill the bean bag chair with. This 2.8 oz bag of Poly-fil Poly Beads is the perfect amount of beads. These are actually used for larger bean bag chairs, so it gives this smaller bean bag chair a realistic feel!

If you want, you can sew along the bottom edge and leave a small opening before turning it right-side out. I tried it this way first (I'm sure you can see my picked seams), and then used a funnel to fill the bag. It was very difficult, and I made a huge mess! Needless to say, I recommend leaving the whole end open instead to make life easier.
Carefully pour the Poly Beads into the fabric. There's really no way to do this without spilling some. The beads are loaded with static, so I recommend wiping the opening of the bag, the fabric edge, and your hands with a dryer sheet first to help prevent the beads from sticking to everything nearby. Have someone hold the fabric open as you pour, and go slowly. Once you're done, vacuum up any spilled beans!


Lay the bean bag chair down with the rounded end laying flat, and the opposite pointed edge poking up at the top. By having two coordinating fabrics, it makes the bean bag chair reversible! Doesn't it look so cozy?!
Now your doll can relax in their new bean bag chair! Our 18" doll is always hanging out with her pet cat, Snowball!
*See those pants? Make your own DIY Doll Leggings with my FREE pattern!

Not only is it a comfortable chair, but it can also be used for naps or sleepovers!

Check out these other 18" doll sewing projects:


This is so dang cute!!!
ReplyDeleteSo cute! Looks like a comfy spot to sit.
ReplyDeleteAlexandra
EyeLoveKnots.com
I recently came across your blog and have been reading along. I thought I would leave my first comment. I don't know what to say except that I have enjoyed reading. Nice blog. I will keep visiting this blog very often.customized sling bag supplier singapore
ReplyDeleteI just made one for my granddaughter's doll so she can pretend her doll is gaming with her. I picked up some gaming themed fabric in gray, red, orange, light blue and white. Turned out great! Thanks so much for this tutorial.
ReplyDelete