
Make a custom, handmade DIY Domino set to play with the family!
My family loves playing games together, and we've been working our way through our game cupboard while staying at home. From family game nights, to camping trips and more, homemade games are a ton of fun, especially these DIY Dominoes! These dominoes are easy to make using your Cricut Maker machine, and is a great use of paper scraps! Depending on the paper designs you use, domino sets can be customized for hours of fun with your family or to even give as a gift!


To cut your Scrapbook Paper/Cardstock, select "Medium Cardstock" from the materials list, and use a fine-point blade.
Once everything is cut out, it's time to start assembling the dominoes! Gather seven blank chipboard dominoes and choose one of your paper pattern/colors to start with. Add a little bit of adhesive to the back of one of the pieces and place it on the top (or bottom) half of a domino with the same amount of space on both sides and the top. Hold it down well until the glue sets. On one of the dominoes, put the same color on both ends.

I'm joining my friends Angie from The Country Chic Cottage, Jen from 100 Directions, Carolina from 30 Minute Crafts, and Jessica from Mad In Crafts in a blog hop full of family-friendly projects made with the Cricut! Check out all of the creative projects in the link party at the end of this post!
To make your own custom set of dominoes, you will need these supplies:
- Dominoes Cut File (for personal use only)
- Cricut Maker machine with Knife Blade
- StrongGrip Mat (purple)
- Masking Tape
- Chipboard 2mm
- Scrapbook Paper/Glitter Cardstock - 7 coordinating colors or patterns
- Adhesive
- Mod Podge Ultra and Brush OR Clear Acrylic Spray Sealer
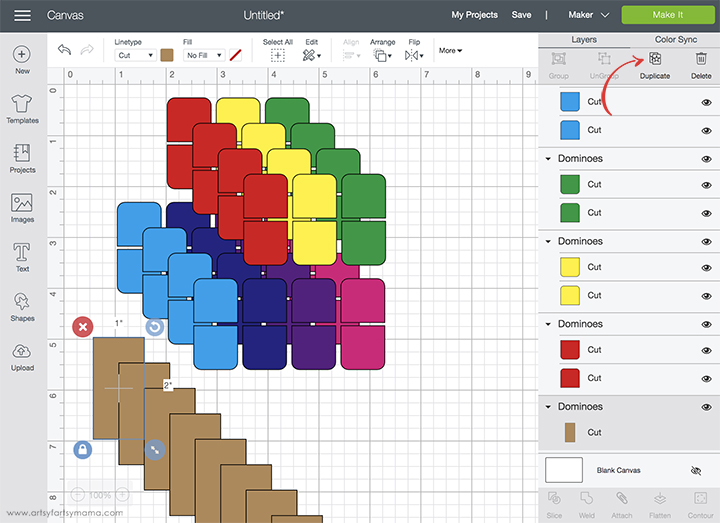
Upload the "Dominoes" cut file into Design Space. There is a single rectangle and a seven pairs of colored pieces included in the design. Select the single domino rectangle (brown) and then click "Duplicate" in the menu bar to the right until you have 28 (yes, 28) dominoes total. Next, select all seven pairs of colored pieces and "Duplicate" them until you have four sets of each.
If you don't want to use the cut file, no problem! You can easily create these shapes in Design Space on your own. Standard dominoes are about 2"x1", but you can adjust the size to fit your style! Then, make seven pairs of two smaller squares (or any shape you want).
If you don't want to use the cut file, no problem! You can easily create these shapes in Design Space on your own. Standard dominoes are about 2"x1", but you can adjust the size to fit your style! Then, make seven pairs of two smaller squares (or any shape you want).
*Here's a great tutorial on how to upload your own images into Cricut Design Space.
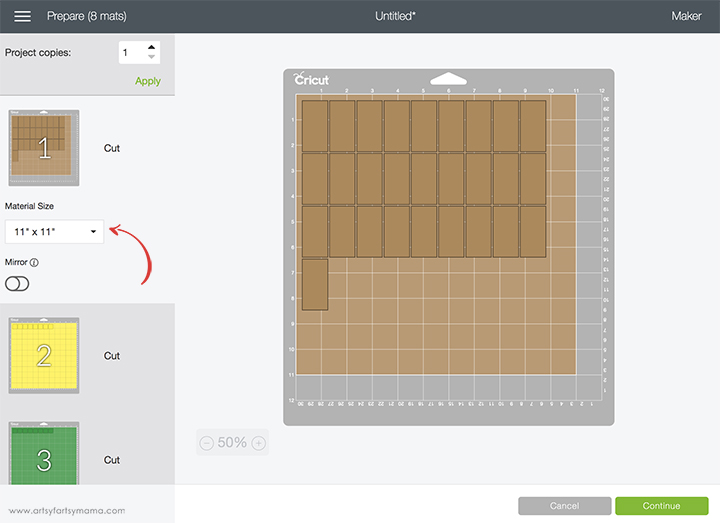
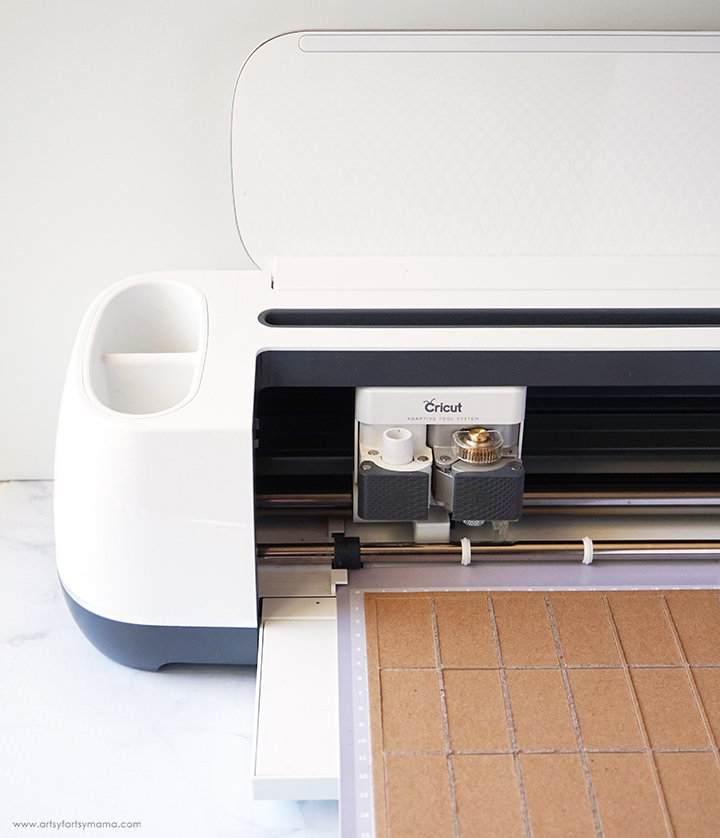
After clicking "Make It" (top right corner), it will take you to the mat preparation screen. This is where you can preview your mats and see exactly what materials you need. Cutting chipboard takes a lot longer than cutting paper, so I like to start with that first. Click on the brown mat thumbnail to bring up the preview. Chipboard is smaller, so you need change the Material Size in the dropdown menu from the default 12"x12" to 11"x11". Click "Continue" in the bottom right corner.
To cut chipboard, you need to use the Knife Blade. This blade is similar to a craft knife. Before cutting, be sure to change the material setting to "Chipboard 2mm". Install the Knife Blade into your machine by opening the Adaptive Tool System clamp B and place the blade inside. Move the white star wheels on the roller bar all the way to the right so they won't make marks on the chipboard, and then load the mat into the Maker.
*Learn all about the Cricut Knife Blade in this post!
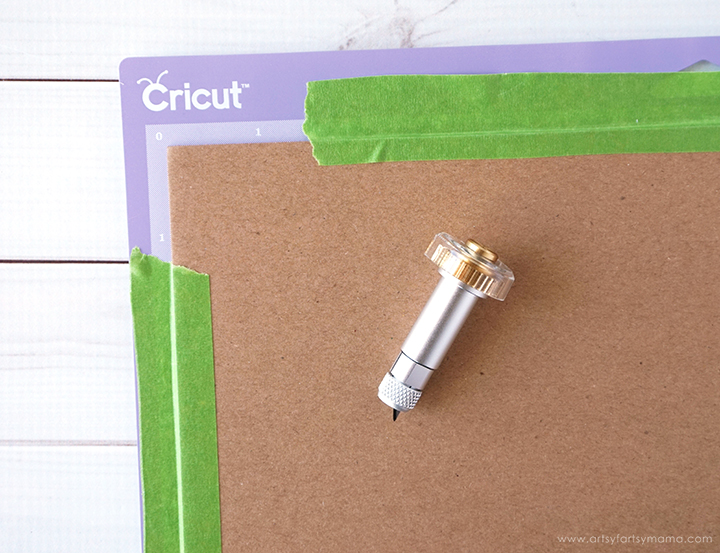
You'll also need to take a few precautions to ensure you get a successful cut. First, you need the StrongGrip Mat (purple), which is the stickiest mat there is to keep heavy materials in place. Place the chipboard in the top left corner of the mat, and use a brayer to press it on well. The Knife Blade cuts in multiple passes (like you would with a craft knife), so I recommend using some masking tape around the edges of the chipboard to make sure nothing shifts during the cutting process.
Connect to your machine chipboard takes a lot longer than cutting paper, so I like to start with that first.
*Learn all about the Cricut Knife Blade in this post!
You'll also need to take a few precautions to ensure you get a successful cut. First, you need the StrongGrip Mat (purple), which is the stickiest mat there is to keep heavy materials in place. Place the chipboard in the top left corner of the mat, and use a brayer to press it on well. The Knife Blade cuts in multiple passes (like you would with a craft knife), so I recommend using some masking tape around the edges of the chipboard to make sure nothing shifts during the cutting process.
Connect to your machine chipboard takes a lot longer than cutting paper, so I like to start with that first.
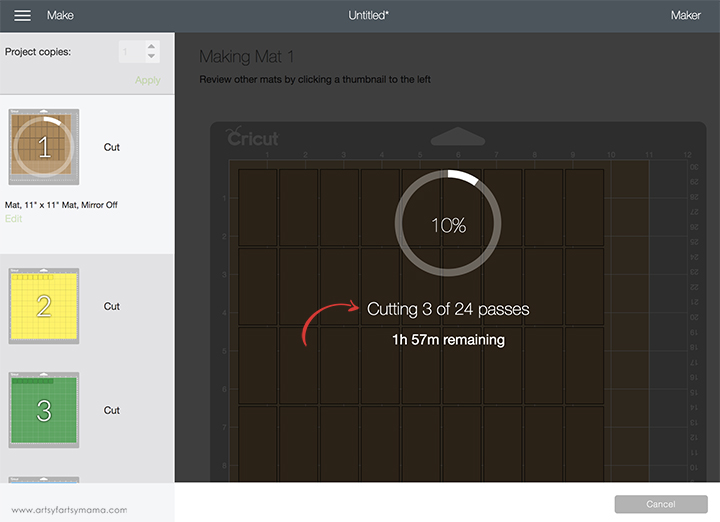
Because the material is thicker, there will be multiple cut passes. Make sure you have a strong bluetooth connection, or connect directly to your machine by cord if needed. Also make sure that your computer doesn't "sleep" during the cutting process. If you lose connection, you'll have to start over.
The machine defaults about 24 passes, but you can pause the cut (do NOT unload the mat) and check the chipboard to see if it has cut through before then. I noticed mine was finished cutting through at about 14-16 passes.
Once the material has been cut through, unload the mat and carefully remove the cut design. If for some reason you have unloaded the mat and the design isn't cut completely, you can use a craft knife and finish it by hand.
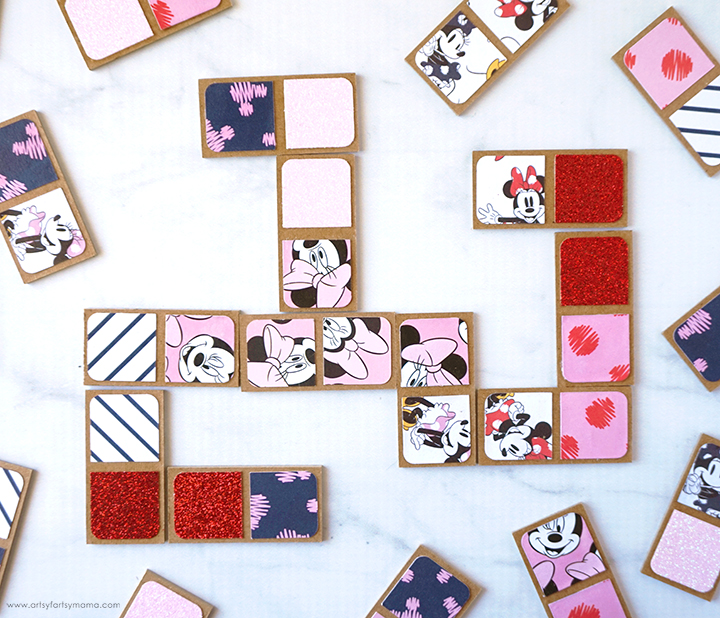
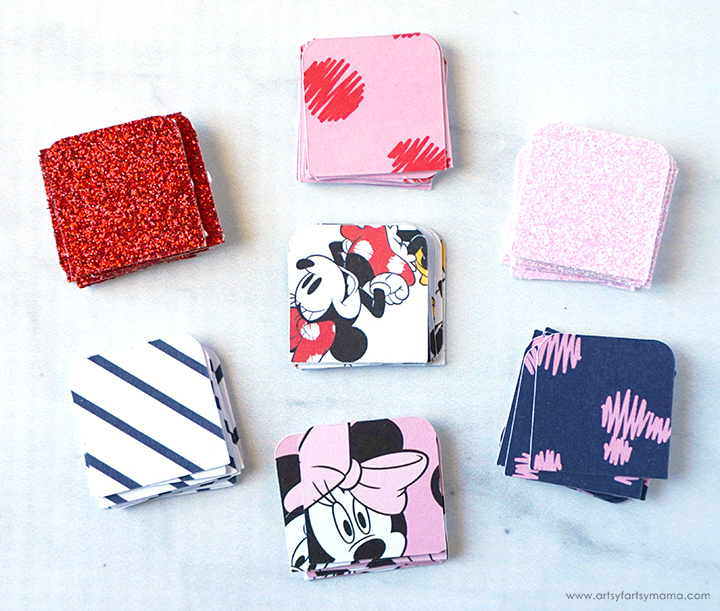
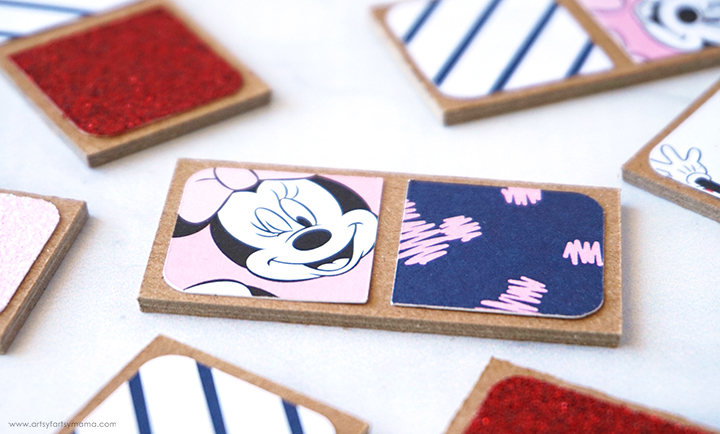
Standard domino sets use numbers 0-6, but I am using patterned paper instead. More specifically, I am bringing my love of Disney to dominoes with adorable Minnie Mouse patterned papers! To make your dominoes look like a "set", I recommend using coordinating colors/patterns for all seven paper designs. Along with the Minnie Mouse papers, I also used some glitter cardstock for a bit of extra sparkle! This is also a great way to use up some of your paper scraps!
To cut your Scrapbook Paper/Cardstock, select "Medium Cardstock" from the materials list, and use a fine-point blade.
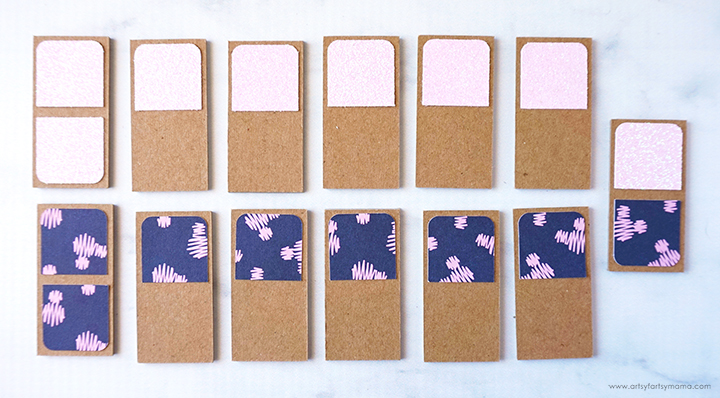
Once everything is cut out, it's time to start assembling the dominoes! Gather seven blank chipboard dominoes and choose one of your paper pattern/colors to start with. Add a little bit of adhesive to the back of one of the pieces and place it on the top (or bottom) half of a domino with the same amount of space on both sides and the top. Hold it down well until the glue sets. On one of the dominoes, put the same color on both ends.
Repeat the process again for the next color/pattern paper, but place one of the pieces on the opposite end of the paper pattern from before. See the image above for a visual: I started with the pink glitter cardstock. There are seven dominoes total, one of them with double pink papers. The next group is the navy paper with pink Mickey ears. There is one doubled, five with just the top half, and the last piece goes on the bottom half of one of the pink paper dominoes.
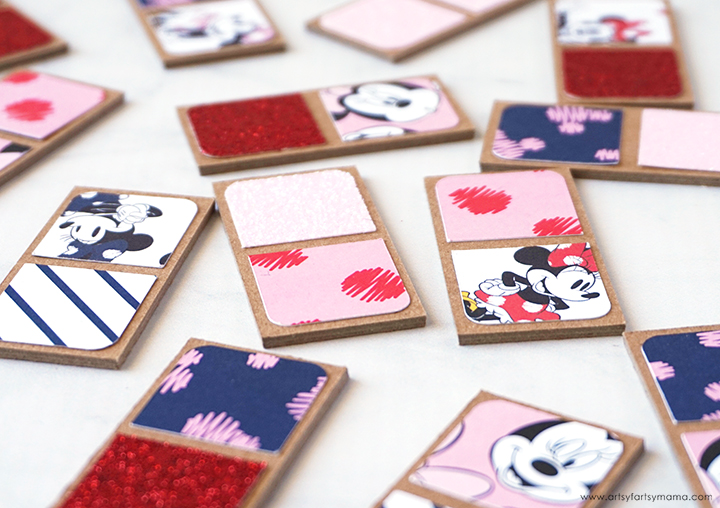
Keep repeating the process, one paper pattern/color at a time until all of the dominoes have been covered. Let the glue set completely before moving on to the next step.
After a bunch of trial and error, I highly recommend using a THIN layer of a clear and quick-drying adhesive (like this one) instead of tape runner, glue stick, or glue dots.
After a bunch of trial and error, I highly recommend using a THIN layer of a clear and quick-drying adhesive (like this one) instead of tape runner, glue stick, or glue dots.
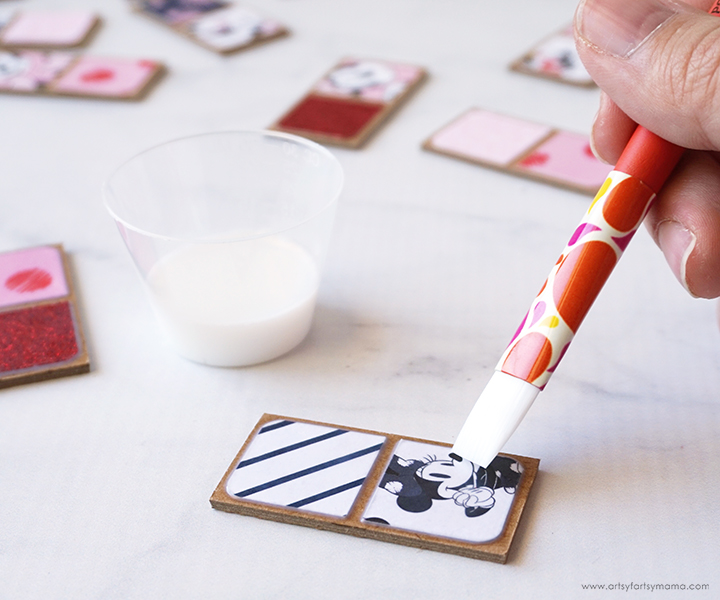
Since these are going to be played with, and handled by the whole family, you will need to protect the dominoes from damage. Mod Podge Ultra is a new formula that can be sprayed onto your projects and will seal them without getting tacky later. Usually I spray it on, but I decided to use a brush since these are so small. The Mod Podge Ultra self-levels and won't show brush marks once it dries, so it was an easy decision!
There are a few things I learned though...
There are a few things I learned though...
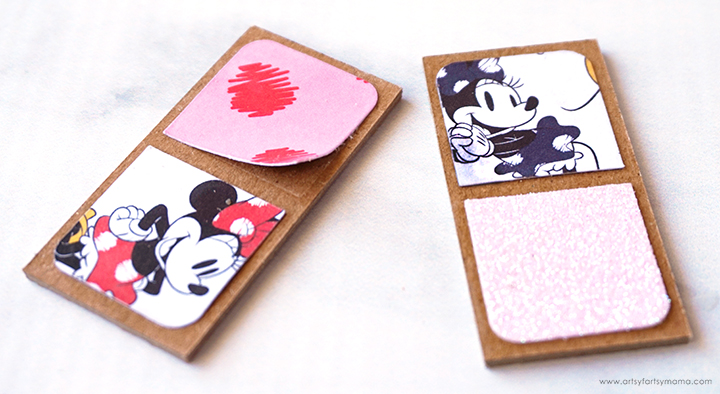
1. Paint a THIN coat of Mod Podge Ultra on top of the dominoes. Thicker coats can seep underneath and make the paper lift. The domino on the left had paper attached with tape runner. For some reason, the Mod Podge and tape runner definitely do NOT get along! You can always re-attach the papers with some other adhesive if you have this problem.
2. Don't go over the same area too much. This will start to mess up the paper pattern and/or rip your paper. The domino on the right shows how some of the pattern on the back started to show through. It wasn't as bad once it dried though!
3. Make sure that each coat of Mod Podge is dry before adding another! I recommend 2-3 coats since they are going to be used a lot.
4. If you have trouble with Mod Podge, you can use a couple coats of Clear Acrylic Spray Sealer instead.
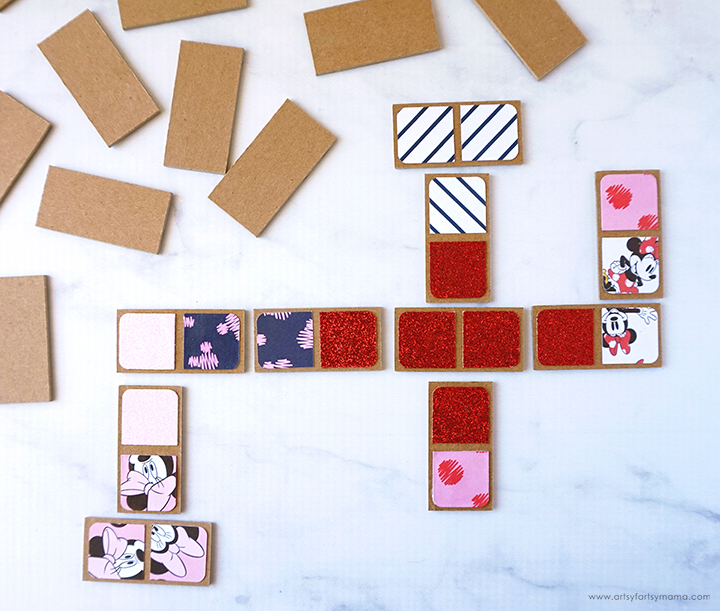
Now that your domino set is complete, it's time to play!! With this set, you can have 2-4 players or team up into 2-4 groups. Since these dominoes don't have numbers, we don't keep score (or make up your own scoring system).
How to Play Dominoes:
- Place the dominoes face-down and shuffle them around. The first person to pick up a "double", or a domino with the same pattern on both sides, gets to go first! Put the dominoes back down and reshuffle.
- With 2 players, each player draws seven dominoes. With 3-4 players, each player draws five dominoes. The remaining dominoes (the boneyard) are left face-down on the table.
- The first player can put any domino down from their hand to start the game.
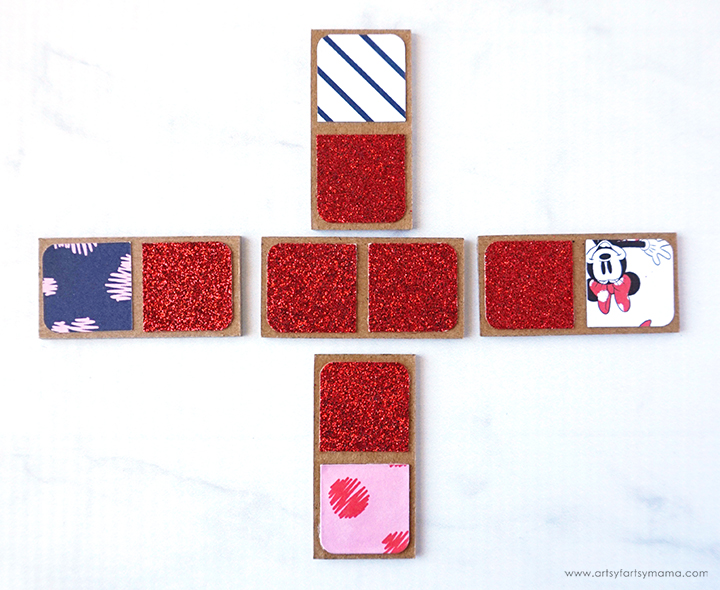
- Going clockwise, each player must place a domino down to match one end ONLY of the domino already on the table. If you start running out of room, you can place a domino down at a right angle. "Doubles" may be placed perpendicularly, and can be matched on all four sides (as shown above).
- If a player cannot make a match, they must select a domino from the "boneyard" and forfeits their turn.
- The game ends when a player uses all of their dominoes, and the "boneyard" is empty. If moves can no longer be made, the player with the least amount of dominoes left in their hand is the winner and goes first in the next round!
This version of dominoes is so much fun, and is perfect for family members of all ages, especially younger kids who have a love for "matching"! Depending on the paper designs you use, you could make a personalized set of dominoes for anyone, which makes this a great gift idea!
What have been your favorite ways of having fun together at home with your family? Have you been using your Cricut more since being sheltered at home? I would love to hear your ideas!
As always, I would love to see your creations! Tag me on Instagram and Facebook, and leave a comment or a photo on my project pin!
Don't forget to Pin, Like, and Share!


Well this is spectacularly fun and personalizable. XO
ReplyDelete