
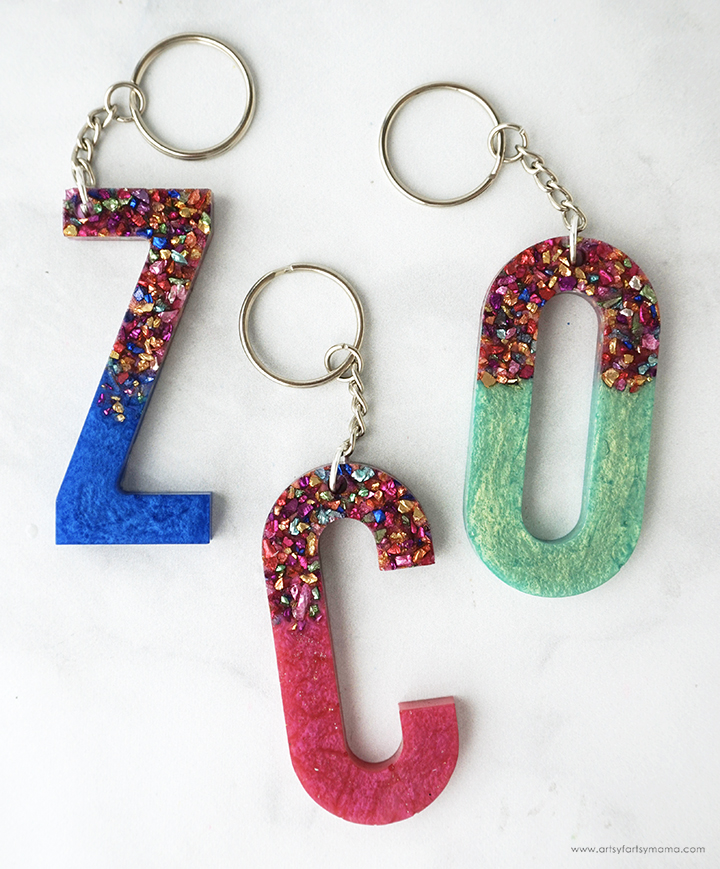
DIY Resin Letter Keychains are a fun way to customize your personal items!
New to resin? Be sure to check out Resin 101: Getting Started with Resin!
Prepare 5-7ml (per keychain) of Amazing Clear Cast resin according to package directions. Pour in equal parts of resin and hardener to the mixing cup*. Slowly stir the resin together with a stir stick for two minutes. If the resin looks cloudy or has any streaks running through it, you need to keep stirring it until it becomes clear.
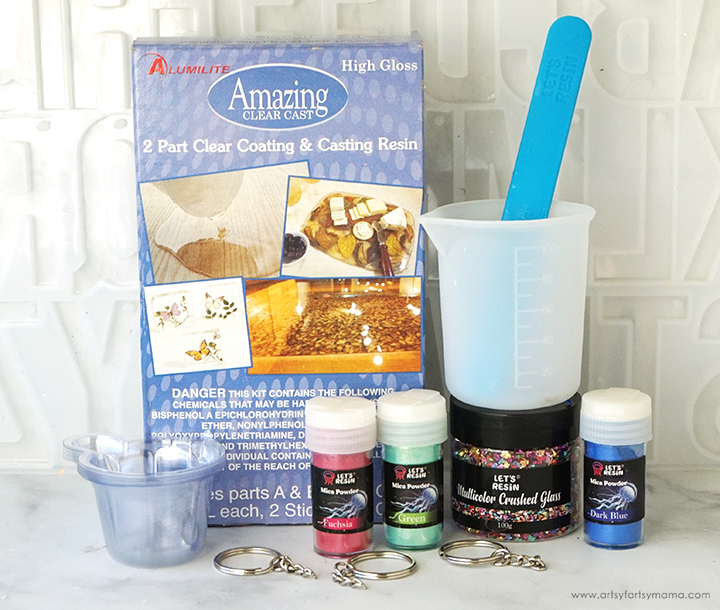
To make these Resin Letter Keychains, you will need these supplies:
- Alphabet Silicone Mold
- Amazing Clear Cast Resin
- Mixing Cups
- Stirring Sticks
- Disposable Gloves
- Multicolor Crushed Glass
- Mica Powders
- Jewelry Pliers
- Jump Rings
- Key Rings
*Save 10% on resin supplies when you shop ETI with code AFM
SAFETY FIRST: Before getting started, wear disposable gloves, protect your workspace, and be sure to work in a well-ventilated area!
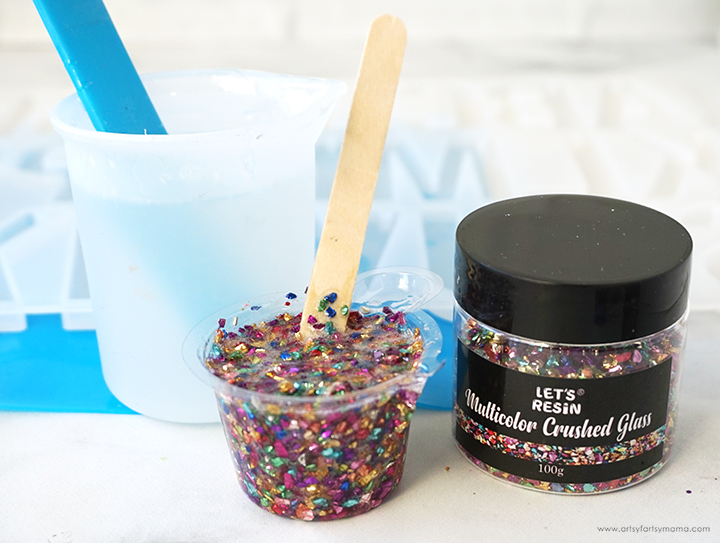
Pour some of the resin into a smaller mixing cup and pour in a generous amount of crushed glass. Stir together with a clean stir stick until evenly incorporated.
*These silicone mixing cups are my new favorite! They are reusable, so there is there less waste - which is a big deal for me. There are easy to read measuring marks on the outside of the cup, it's flexible for easy mixing, and clean-up is a snap once the resin has cured! If you use resin often, I highly recommend giving them a try.
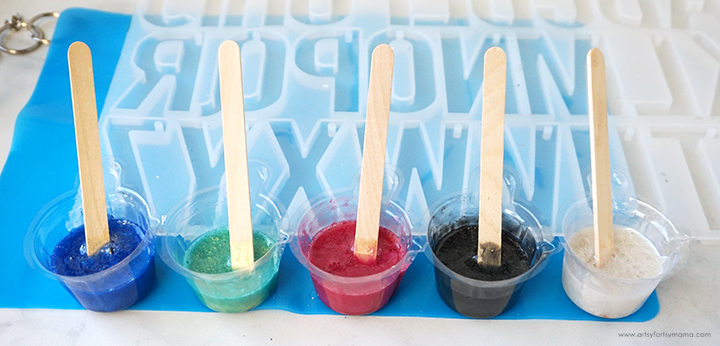
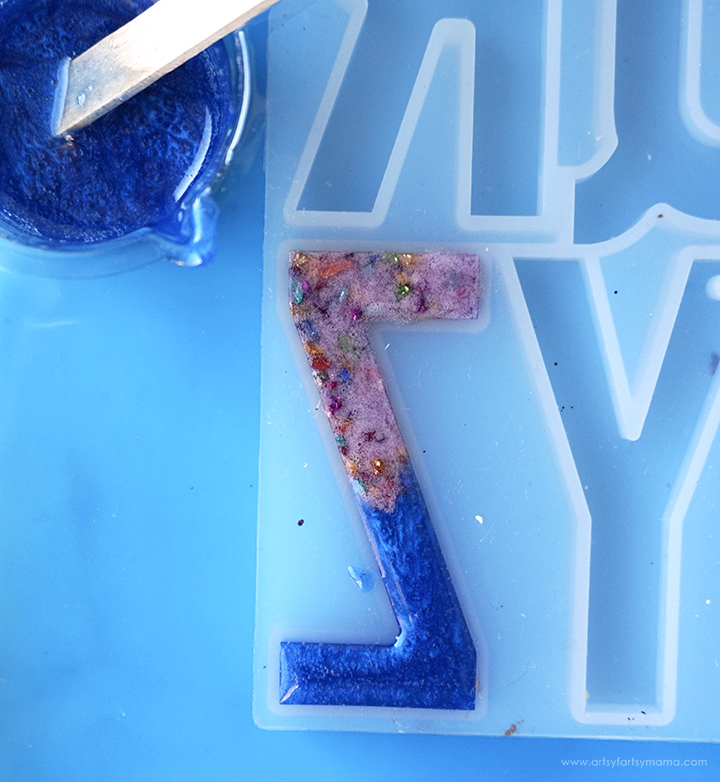
I am making a bunch of keychains in different colors. If you want to do the same, grab a mixing cup for each color you want to use. Pour clear resin into each cup, and add a generous amount of mica powder into each mixing cup. Stir the resin mixtures well for a minute or two until the powder is evenly incorporated. Give the resin a few minutes to "rest" and allow the bubbles to rise to the top.
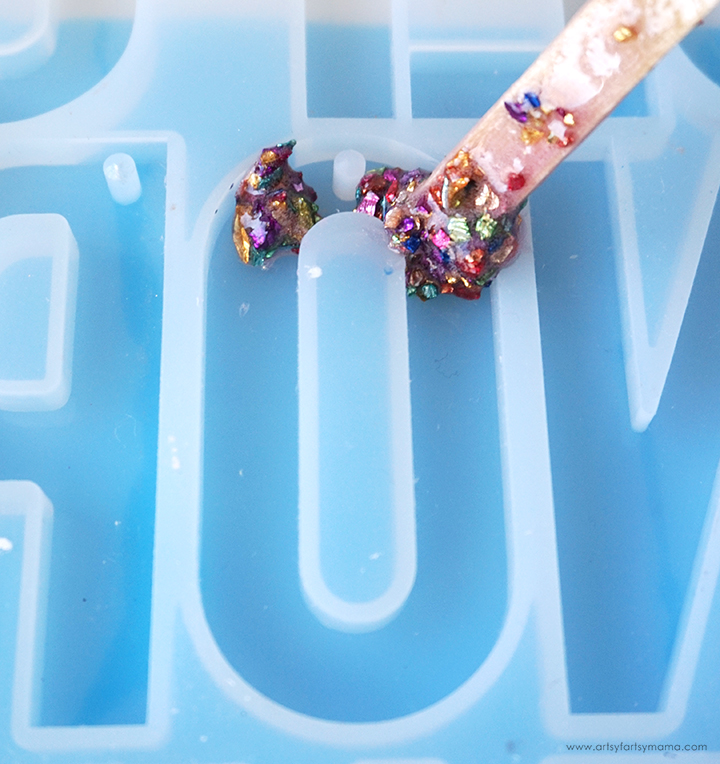
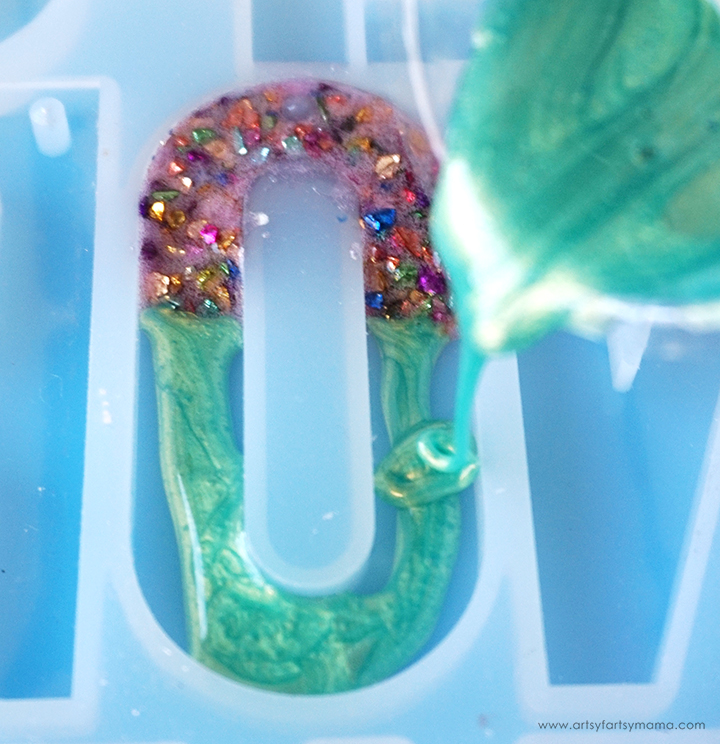
Next, slowly pour the colored resin into the the mold. Don't pour the color over the crushed glass! If you need more resin to fill up the mold, alternate adding the glass and colored resin until it's completely full. Be careful to not overfill.
Repeat this pouring process for all of the letter keychains you want to make, or until you run out of resin.
Pop any bubbles that rise to the top using a heat gun, blowing through a straw, or by spritzing with alcohol. Leave the resin to cure in an undisturbed, well ventilated area for 12-24 hours. You will know that the resin is completely cured when it is no longer tacky to the touch.
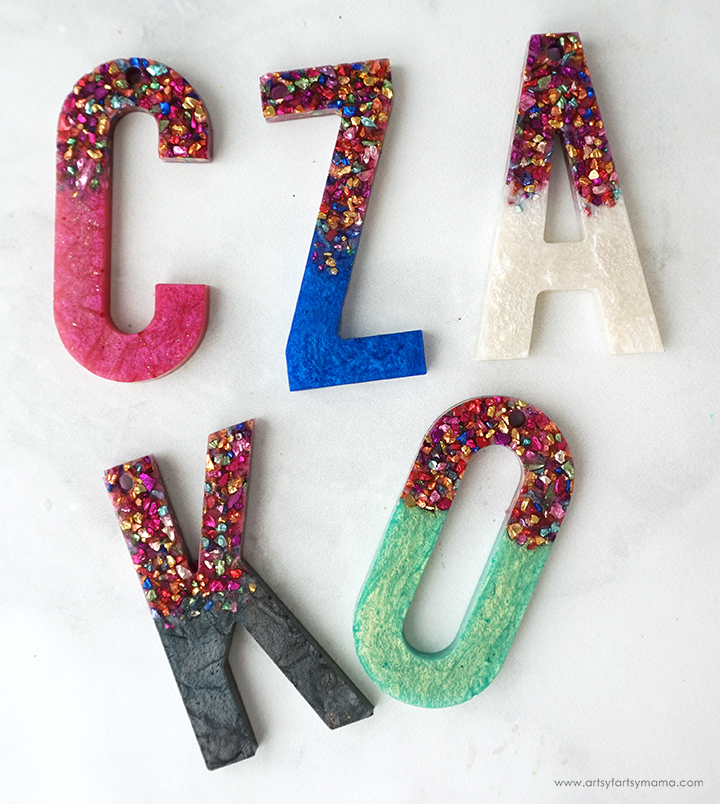
"Demolding" is my favorite part of the process! Carefully remove each of the letters from the mold. Trim away any excess resin with scissors or a craft knife. If the resin still feels flexible, it may just need more time to cure. Let the pieces sit in a warm, flat area to cure for a few hours (or days).
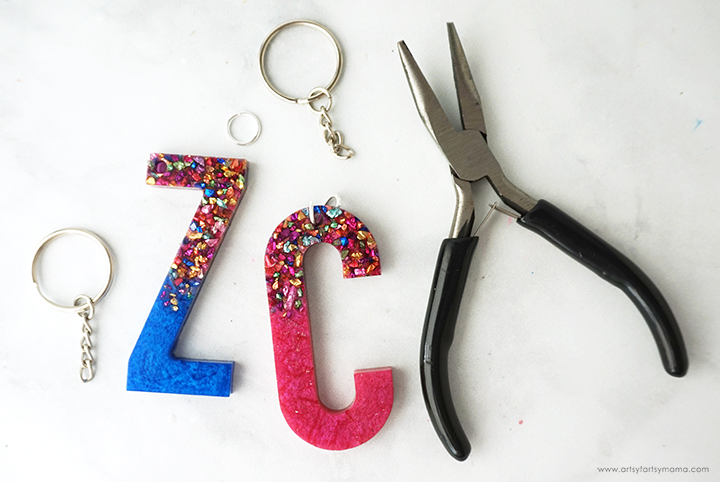
Use pliers to hook a jump ring through the hole in the letter, and then attach the key ring chain to the jump ring. Close the jump ring to connect the key ring to the letter charm.
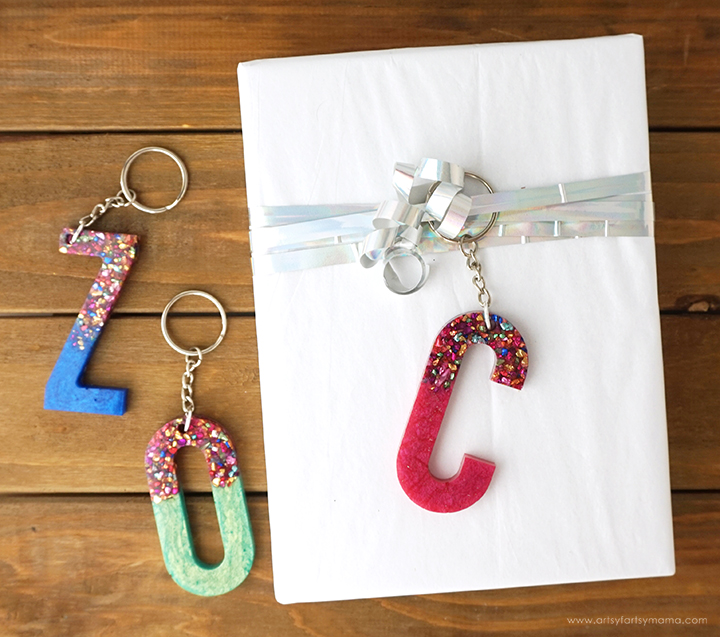
These resin letter keychains also make a great gift idea for friends and family!! I love using keychains as an extra surprise for birthday and holiday gifts by attaching them to the top of the gift. Not only is it a fun gift topper, but it also automatically labels the gift for the recipient. Clever, no?!
Don’t forget to Pin, Like, and Share!


Another fun resin project! Pinned.
ReplyDeleteWhen I make my earrings, the edges are sharp when hardened. Do you sand the edges or is there a better way to make them smooth?
ReplyDeleteHi Sharon! If it's just a couple of small areas, you can cut the sharp edges away with a craft knife. If it's around the entire project, you can sand the edges with extra fine sandpaper, and then spray them with some clear sealant afterwards to bring the gloss back.
Delete