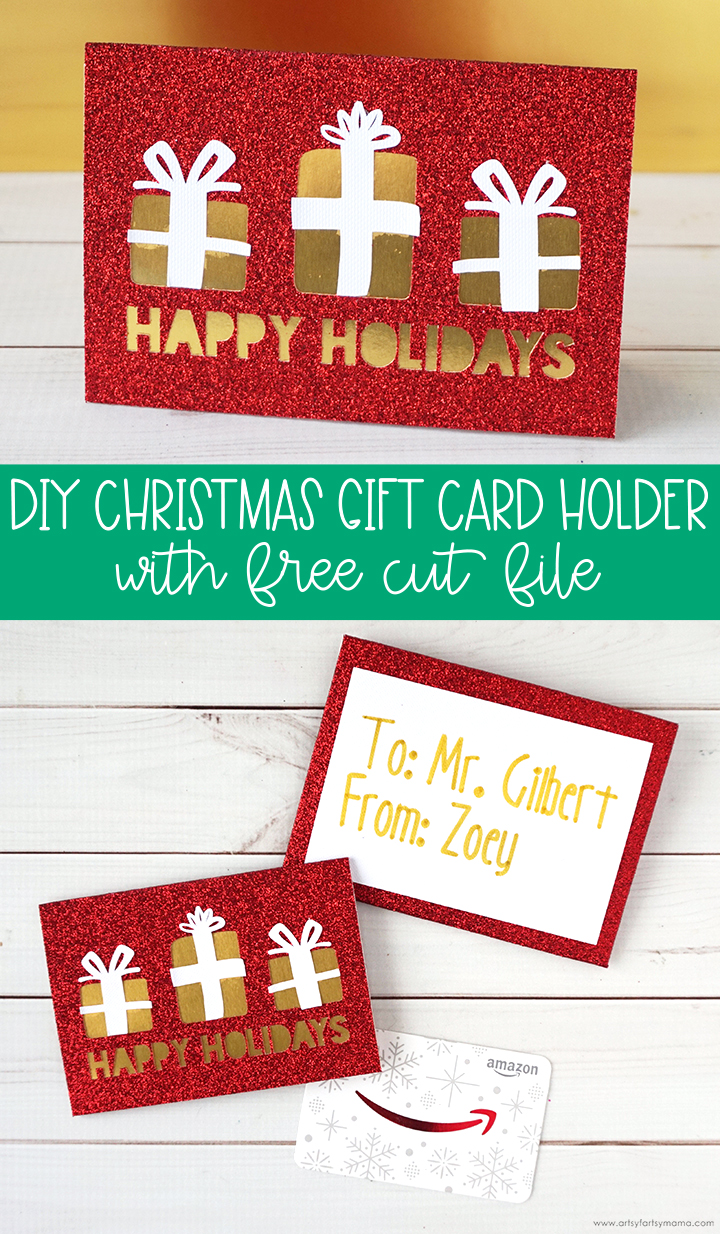
Give a gift card this holiday with this DIY Christmas Gift Card Holder with Free Cut File!

Need a last-minute gift idea? My go-to favorite is gift cards! It may seem impersonal to some, but I think it can be a great way to let someone choose whatever they want. No matter what type of gift card you choose to give, this DIY gift card holder allows you to add that personal touch!
- Christmas Gift Card Holder SVG Cut File
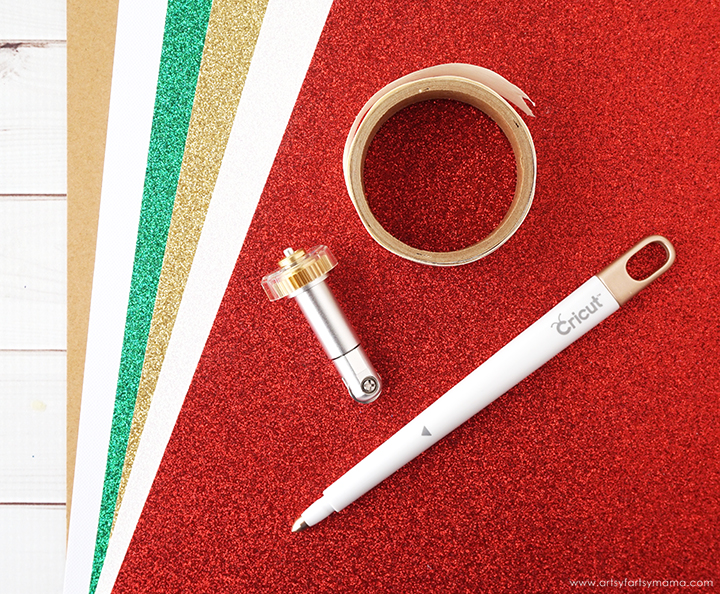
- Cricut Explore or Cricut Maker machine
- Scoring Stylus or Double Scoring Wheel
- LightGrip Mat (Blue)
- Cardstock - White
- Glitter Cardstock - Red
- Foil Poster Board - Gold
- Cricut Pen - Metallic Gold
- Paper Adhesive or Glue Dots
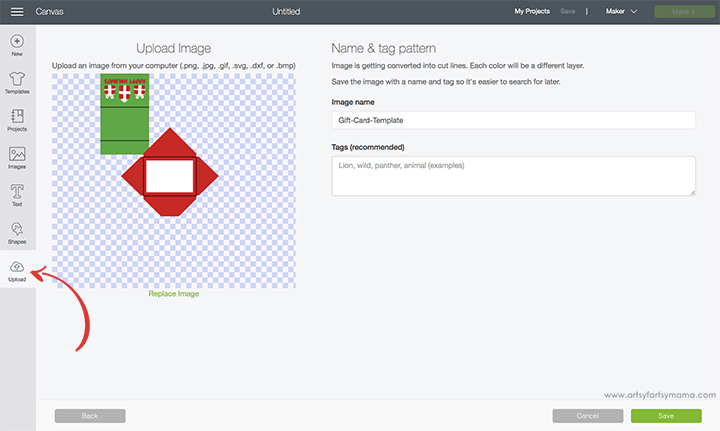
Upload* the Christmas Gift Card Holder cut file into Design Space by clicking the "Upload" button in the left menu bar and uploading the cut file. Rename the design if you want, and then click on the green "Save" button in the bottom right corner.
*Here's a great tutorial on how to upload your own images into Cricut Design Space.
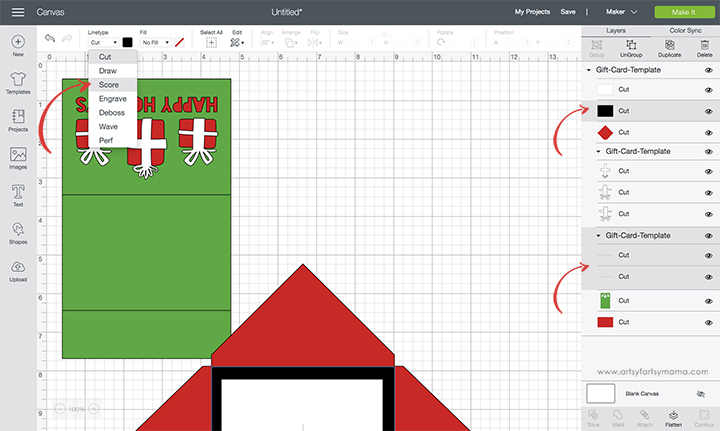
When you upload the cut file, all of the lines will be made to "cut". Since this is a card and envelope set, you need to change 3 lines to score: the black rectangle on the envelope, and the two lines on the card. Select those 3 parts in the Layers menu (on the right- see arrows above). Next, click on the "Linetype" drop-down menu at the top (see arrow above) and change from "Cut" to "Score". It's as easy as that!
After that is done, select the score lines on the card and the just the green card piece. Click "Attach" at the bottom right so that the card will cut and score together. Do the same thing with the red envelope piece and the envelope score line.
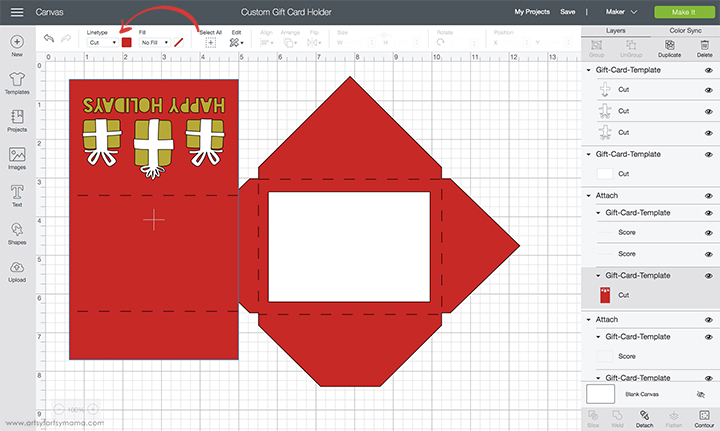
To change the colors of the card or envelope design, select each part of the design and choose a new color from the menu bar (see the red arrow above).
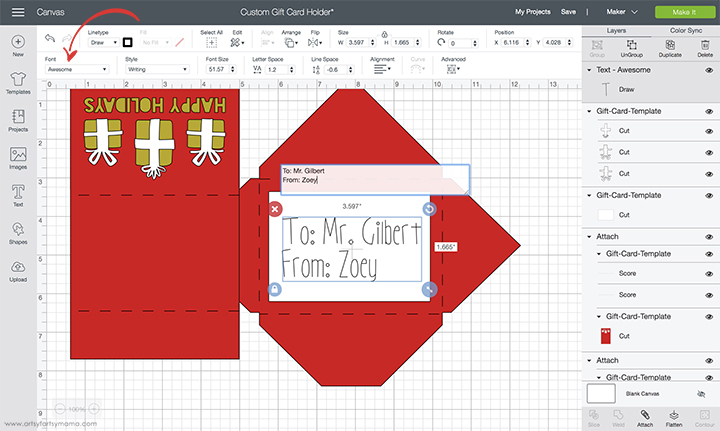
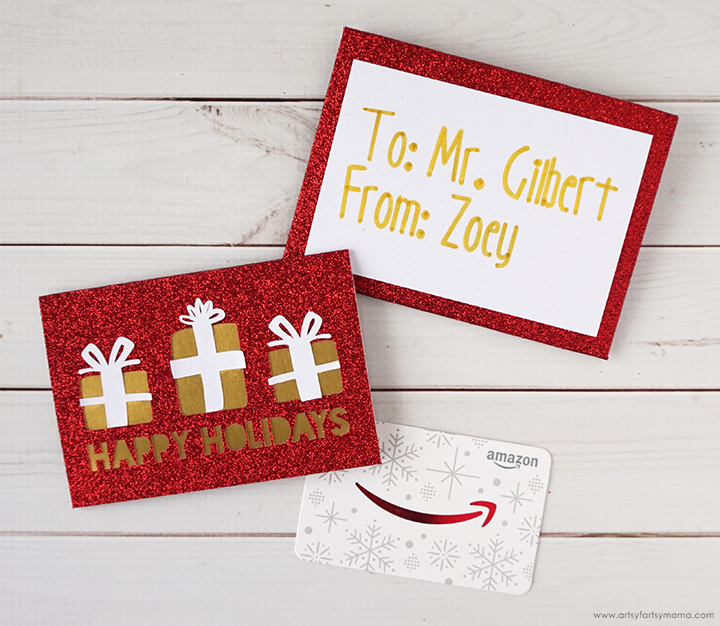
Next, create a text box to add to/from names or a message to the front of the envelope. Glitter cardstock can't be written on, so I need to put the writing on a piece of regular cardstock instead. If you use cardstock, the Cricut can write directly on the envelope.
You can change the font (make sure it's a writing style font!) in the drop-down menu at the top of the screen (see arrow above). Once you're done with the text, "Attach" it to the cardstock piece or the envelope. Now you can click on the green "Make It" button in the top right corner to cut!
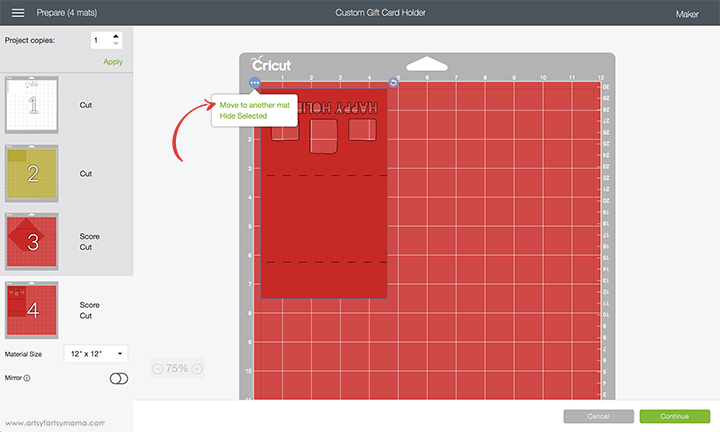
In the next screen, you can get your mats ready for cutting. Design Space sets up mats how it thinks your project will fit best, but you can always make your own adjustments. Go to the mat with the card on it and click the circle with 3 dots in the top right corner and select "move the image to another mat".
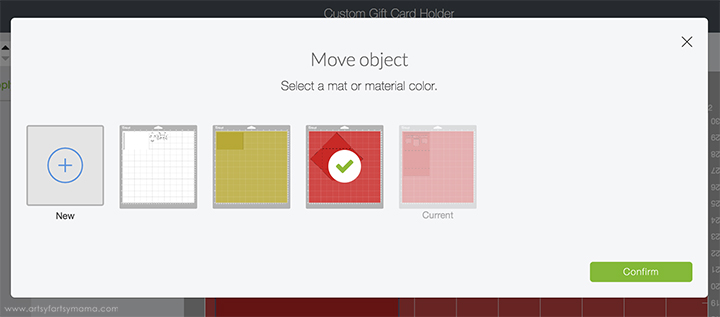
After you click "Move to another mat" you can choose which mat to move it to. Select the mat with the envelope and then click the green "Confirm" button.
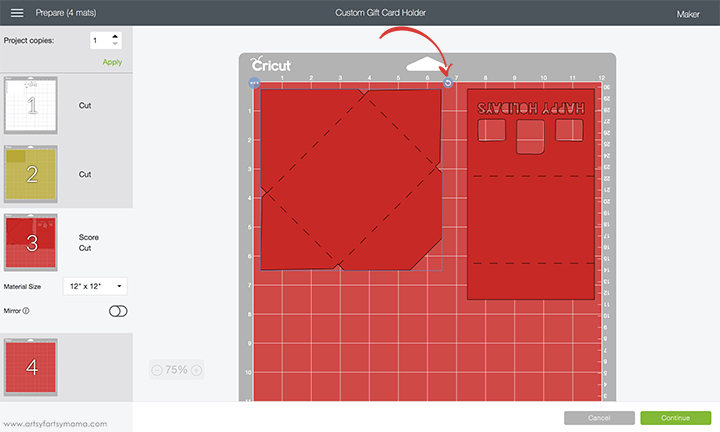
Next, you'll need to rotate the envelope so that the pieces fit better on the mat. When you click on the envelope image, click on the rotate icon in the top right corner and hold down the "Shift" button on your keyboard at the same time to rotate it 90º. Move the envelope all the way to the left top corner and then move the card next to it.
After you click "Continue", you will be taken to the cutting process. Make sure that you select the correct materials so that your project cuts perfectly! If you are using an Explore machine, turn the Smart Dial to "Custom" and select your material from the menu and have your Scoring Stylus or Pen loaded. With a Maker, select the material from the menu and make sure that you have the Double Scoring Wheel and Pen handy so that you can load it into the machine when prompted.
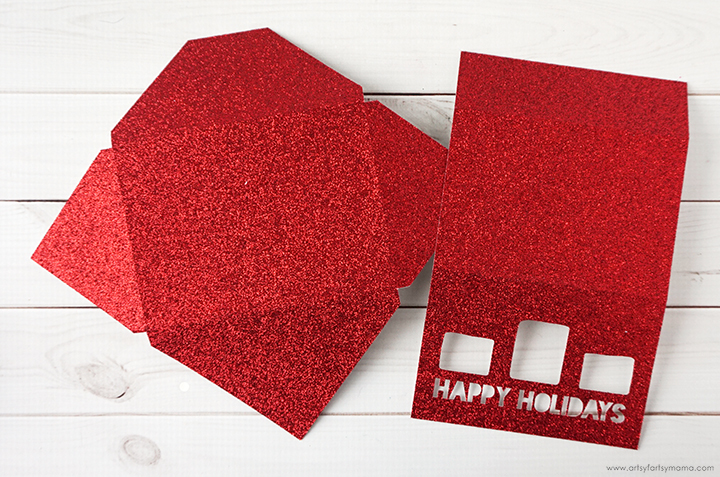
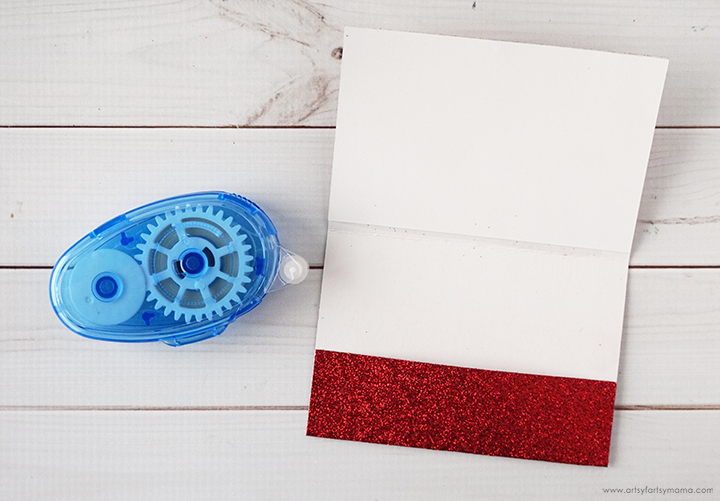
After everything has been cut, separate all of the pieces and make sure you have everything you need. Fold along all of the score marks and make good creases on both the envelope and the card.
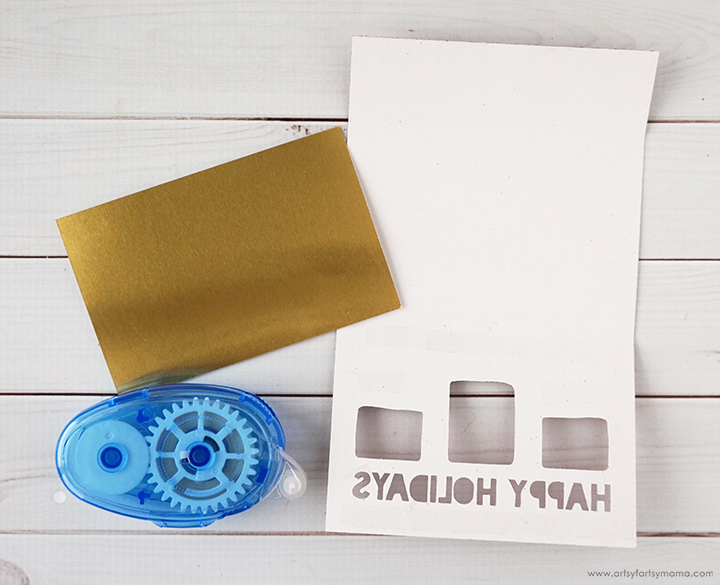
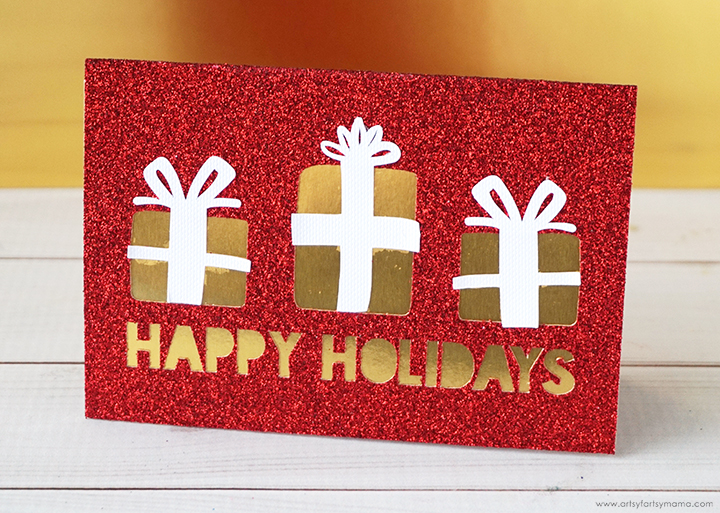
Turn the card over and add some of your favorite paper adhesive (I love a good tape runner) or a couple of Glue Dots around the end of the card with the cutouts. Line up the piece of gold foil poster board face-down with the edge of the card and press the paper down well.
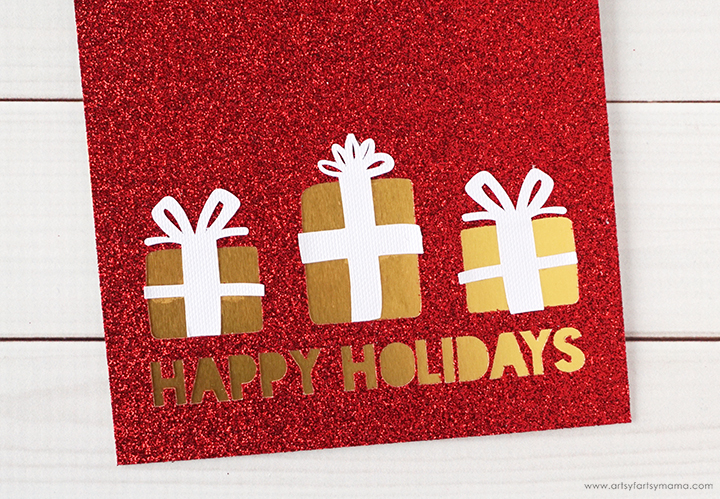
Turn the card over to see the foil showing through the cutouts! Put some adhesive to the back of the gift bows and place them over the gift box squares. Press them down well.
Turn the card back over and fold the edge up at the other end. Place a line of tape runner on each side of the tab, and then fold it up and press it down to make a little pocket.
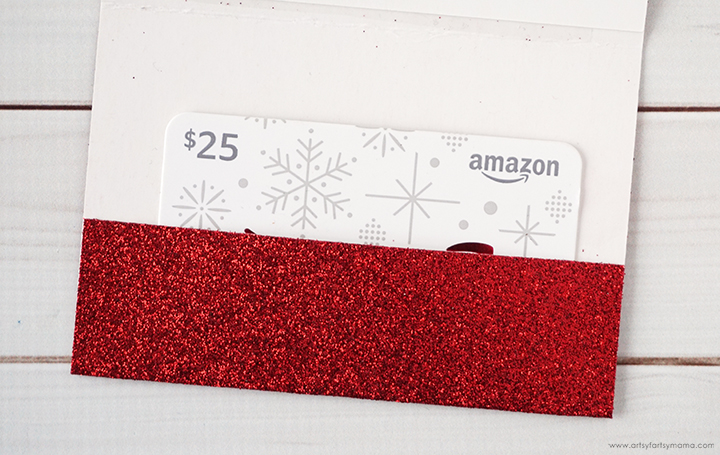
Place your gift card into the pocket to make sure it fits well, and make any adjustments as necessary. You can also write a little note inside the card, or add a slip of paper in the pocket with the gift card!
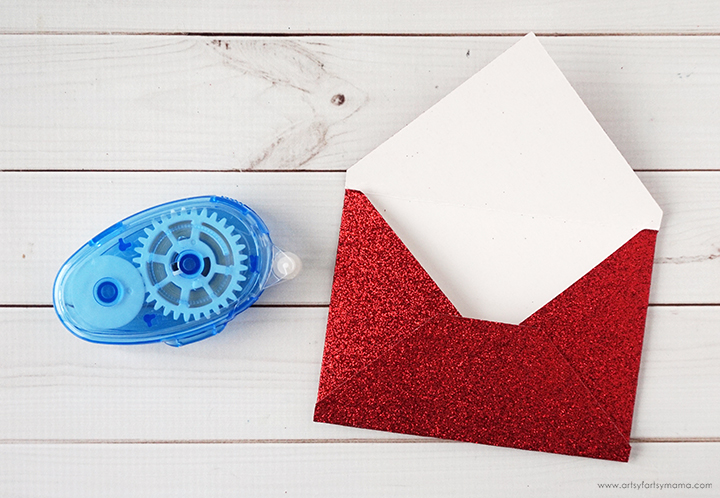
To assemble the envelope, start by turning the paper over. The envelope should be laying diagonally, with a pointy corner at the top, and the squared off corner at the bottom. Fold in the side flaps first, and then add some adhesive to the sides of the bottom flap. Fold the bottom flap up and press it down well. That's all you need to do!
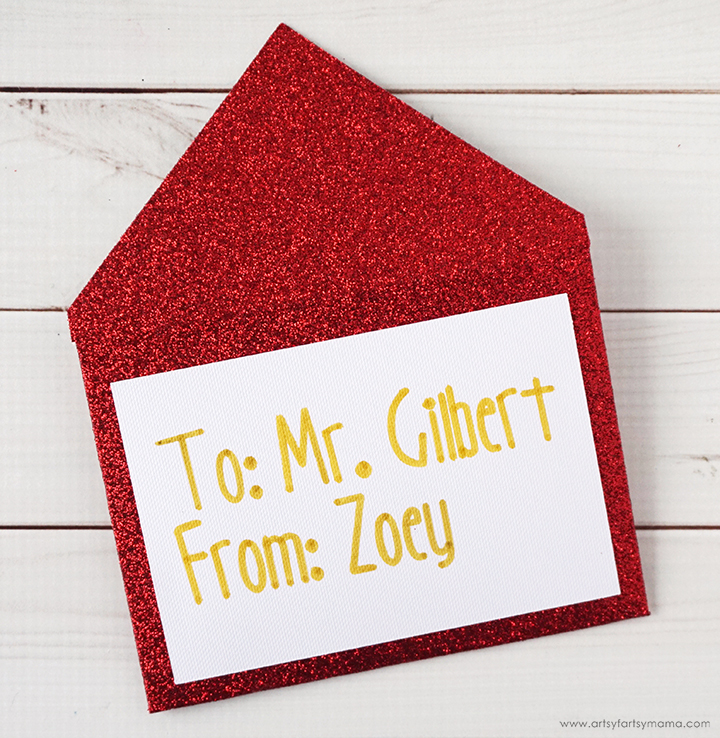
Turn the envelope over and attach the to/from paper to the front with adhesive or tape runner. If you use a different kind of paper that can be written on by the Cricut, you can skip this step!
This is such a simple gift, but the way it is put together makes it mean so much more! It is the perfect last-minute gift idea!
What do you think about giving gift cards for gifts? I think it's fun to receive them, only because I usually don't even know what I want, so it's fun to go choose something for myself. I'd love to hear what you think!!
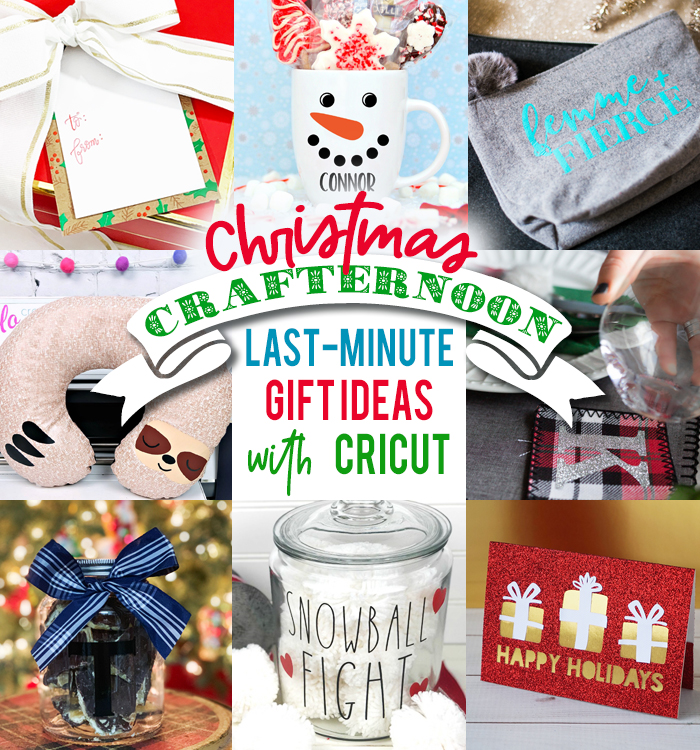
I've teamed up with some of my fellow blog friends to share creative last-minute gift ideas using a Cricut machine. This gift card holder was my idea, so be sure to check out everyone else's creations following the links below:
- Gift Tags from Pineapple Paper Company
- Personalized Snowman Mug from Happy Go Lucky
- Upstyle a plain Felt Pouch with your Cricut from Celebrating Everyday Life
- DIY Sloth Travel Pillow from Hello Creative Family
- Custom Fabric Coasters from Kingston Crafts
- Personalized Candy Jars from Everyday Party Mag
- Have your own Snowball Fight from Me and My Inklings
- Christmas Gift Card Holder from Artsy Fartsy Mama
Don't forget to Pin, Like, and Share!