
Bring a little extra magic to Christmas Eve with a Christmas Eve Box filled with personalized items!

Ever since I was a kid, it has been tradition to open up some new Christmas pajamas on Christmas Eve. This year, we're going to try something new with a Christmas Eve Box! This would be a container or crate of some kind filled with surprises to be gifted on Christmas Eve. I've filled the Christmas Eve Box I made for my daughter with some fun items that have been personalized using my Cricut machine!
This is a sponsored conversation written by me on behalf of Cricut. The opinions and text are all mine.
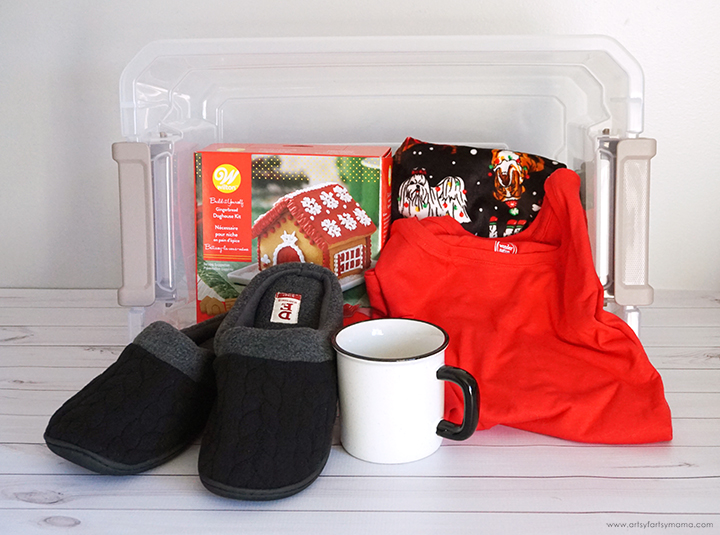
For this Christmas Eve Box, I bought some blank supplies that could be personalized using vinyl. You can add in anything you want for your own Christmas Eve activities. I started with a medium-sized container with a lid, then added pajama pants, a blank shirt, fabric slippers, a blank mug, and a gingerbread house kit.
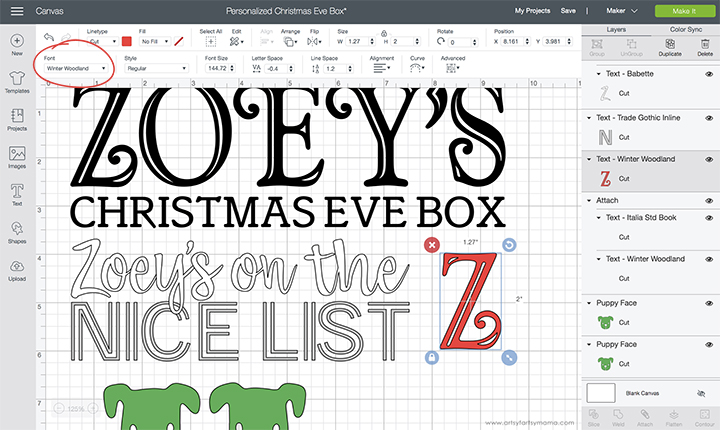
Open the customizable Christmas Eve Box Project in Design Space. Here, you can customize the file to personalize the items in the box with your own child's name. If you double-click where the name is in the project, a text box will pop up and you can change the name. You can also change the font, font size, spacing, and more by clicking the drop-down menus in the menu bar.

When using cursive fonts, you need to remember to do a few extra steps before cutting. For some fonts, you will need to adjust the letter space to make the letters touch properly. You can make this adjustment by clicking on the text box, and then press the up/down arrows next to the "Letter Space" box in the menu bar. If the spacing still isn't how you want it (hey, it happens!), you can manually adjust the spacing by clicking on the "Advanced" drop-down box to ungroup the letters.
Once your spacing is how you want it, select the text box/all of the letters and click on the weld and attach tools at the bottom right of the layers panel. Then, select the name and Attach it to "on the". This will make sure that the line of text cuts as it is shown here.
Now that the words are just how you want them, adjust the different groups to fit your projects. For example, the red "Z" is going on a mug, I measured my mug to see what size would fit best. The top "Zoey's Christmas Eve Box" group goes on the box lid, so measure for that, etc.
Once that's done, click on the green "Make It" button in the top right corner.
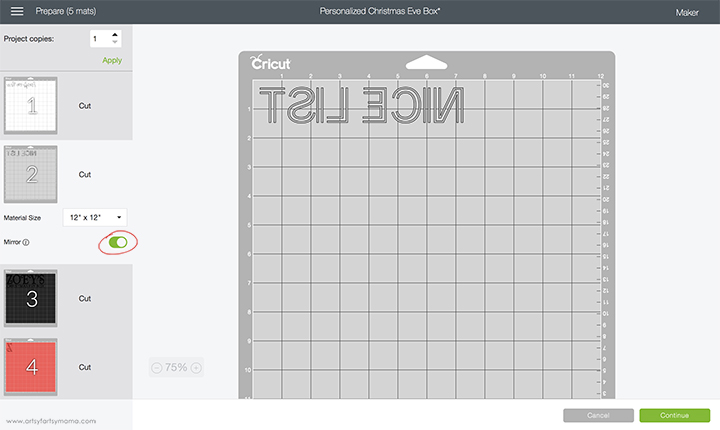
The next step is the Mat Preparation screen. When you cut iron-on vinyl, you need to make sure to "Mirror" the image so that it isn't backwards on your project. This is VERY important when your design has wording!! Click the toggle below the mat preview (see the circled area above), it will mirror the image for you. Do this for every mat that will be cutting iron-on vinyl.

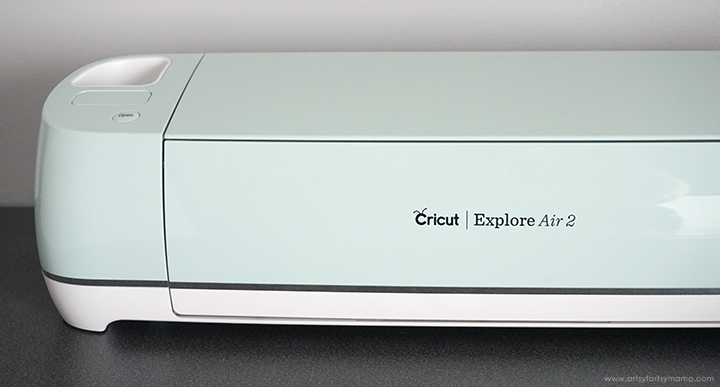
In the next step, you will need to connect to your Explore Air 2 machine via Bluetooth or cord. Then, you need to set your material. You can turn the Smart Dial to "Iron-On", or you can get more specific by turning the dial to "Custom". Clicking on "Browse All Materials" on the right-hand side of Step 1 to choose from a huge list of materials. Scroll down to "Iron-On" and choose the specific type of vinyl you will be cutting to ensure a perfect cut.
Lay the iron-on vinyl face-down on the green StandardGrip Mat and load it into the machine by pressing the flashing arrow button below the dial. When the button with the Cricut logo begins flashing, you can then press it to cut your project out. For adhesive vinyl, make sure to put it on the mat face-up to cut.

After the vinyl has been cut, you'll need to "weed" the vinyl. Use weeding tools to carefully peel away excess vinyl (or the parts of the design that you won't be using).
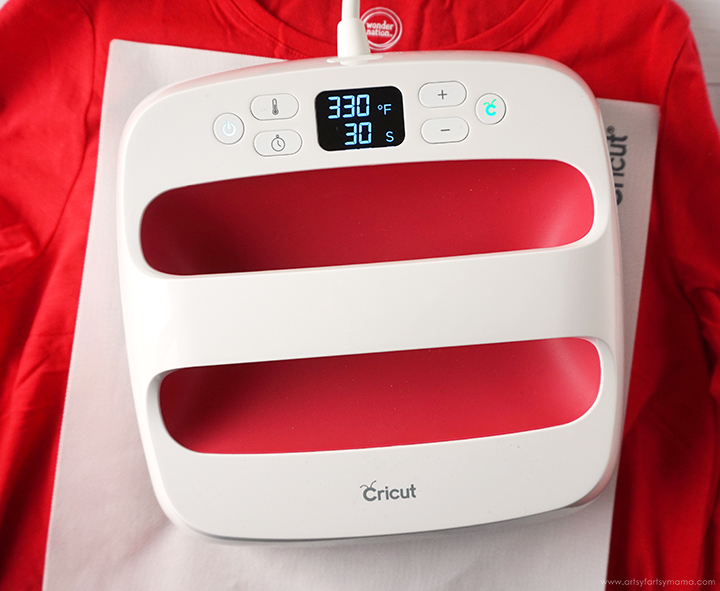
Plug in the EasyPress 2 and power it on. Each kind of iron-on vinyl has a different heat and time setting, so be sure to check EasyPress Heat Guide before getting started. Adjust the heat and time setting to your fabric and vinyl specifications. Once the light turns green and the machine beeps, it's ready to use.
When the EasyPress is up to temperature, place your shirt on the EasyPress Mat and cover with the Iron-On Protective Sheet. Set the EasyPress over the vinyl and press the green "C" button. Hold firmly in place while the timer counts down.
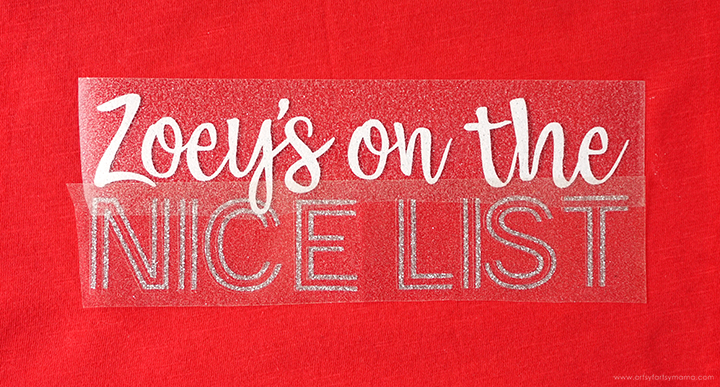
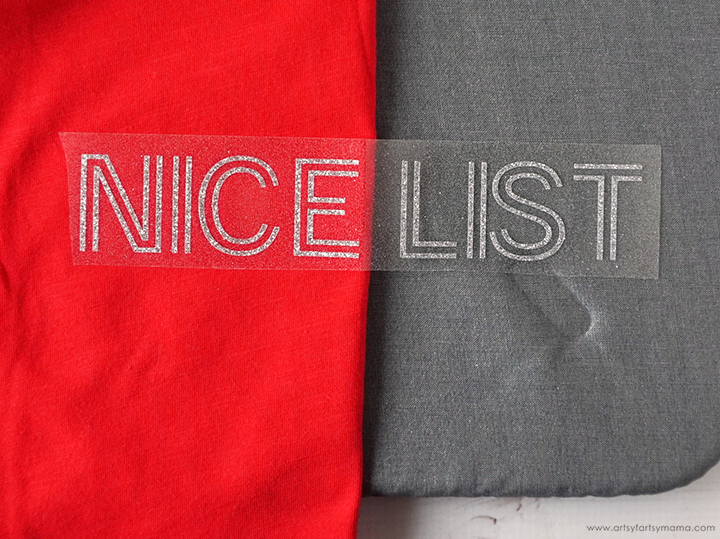
Peel away the carrier sheet on the "Nice List" vinyl and lay down the "Name's on the" above it. Place the carrier over the "Nice List" words again and cover with the Iron-On Protective Sheet. Set the EasyPress over the vinyl and press the green "C" button. Hold firmly in place while the timer counts down.

Turn the shirt over and press with the EasyPress firmly again for 15 seconds. Peel off the carrier sheets. If some of the vinyl isn't sticking, cover it with the Iron-On Protective Sheet and press it down again following the same directions as above.
*By the way, iron-on vinyl has the StrongBond Guarantee, which means that if you aren't completely satisfied with the iron-on vinyl on your projects, Cricut will replace it for free. Seriously! Now you don't have to worry about clothes not making it through multiple washes!

For the slippers, center the iron-on vinyl images (my daughter LOVES dogs) on the front of the slippers with the carrier sheet on top. Place a small towel or cloth inside the toes of the slipper to make it easier to press.
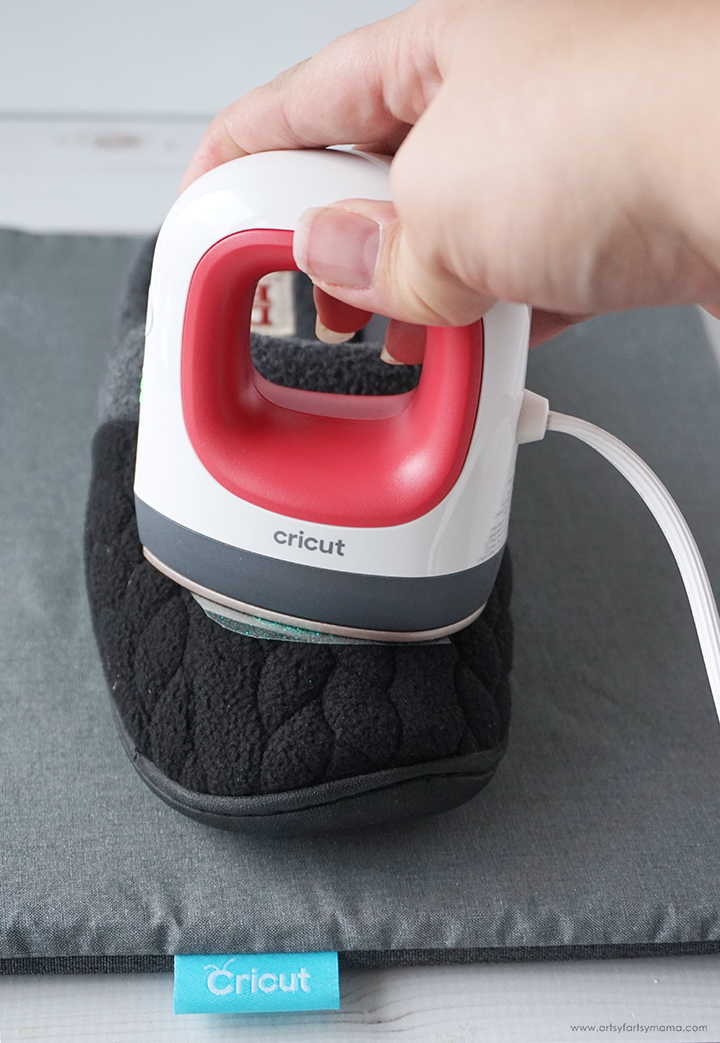
Adjust the setting on the EasyPress Mini to your shirt and vinyl specifications*. Once the light turns green and the machine beeps, it's ready to use. When the EasyPress is up to temperature, place your slippers on the EasyPress Mat. Set the EasyPress Mini over the vinyl and use a separate timer to keep track of the countdown.
*Instead of the specific temperature settings like the rest of the EasyPress family, the EasyPress Mini has three heat settings: Low, Medium, or High. Every project is a little bit different, so I recommend always referring to the Cricut EasyPress Heat Transfer Guide.
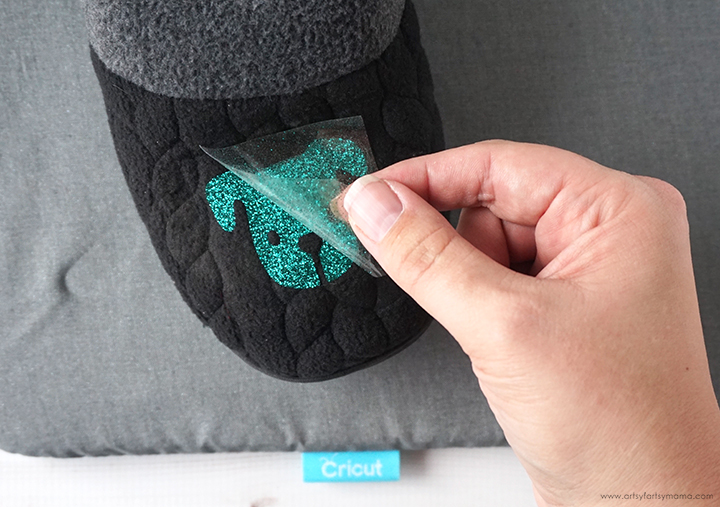
Repeat the process for the other slipper. Peel the carrier sheets off of the slippers while the vinyl is still warm. If the vinyl isn't sticking, put the carrier sheet back on and press again following the same directions as above.
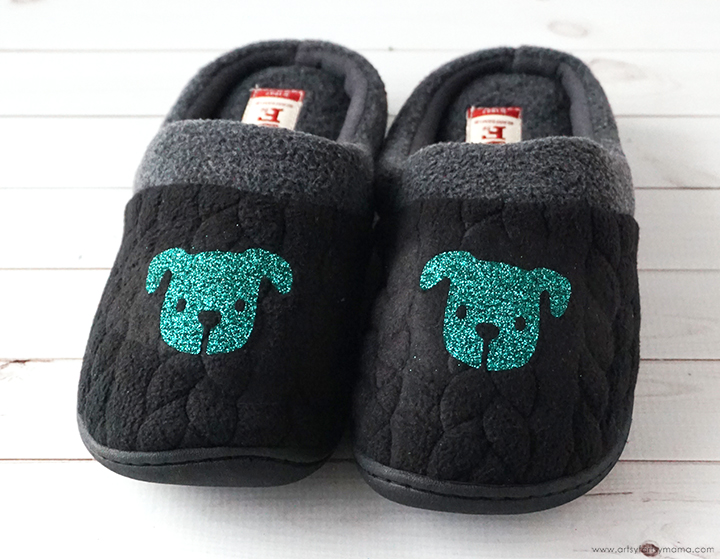
As long as your slippers are machine washable, then you can wash these with the vinyl without a problem! I love the hint of sparkle to these otherwise generic slippers!
Here is the completed Christmas Eve pajama set! My daughter is going to love these cute and warm Christmas pajama pants (covered in holiday dogs) that match both the shirt and slippers! What do you think?
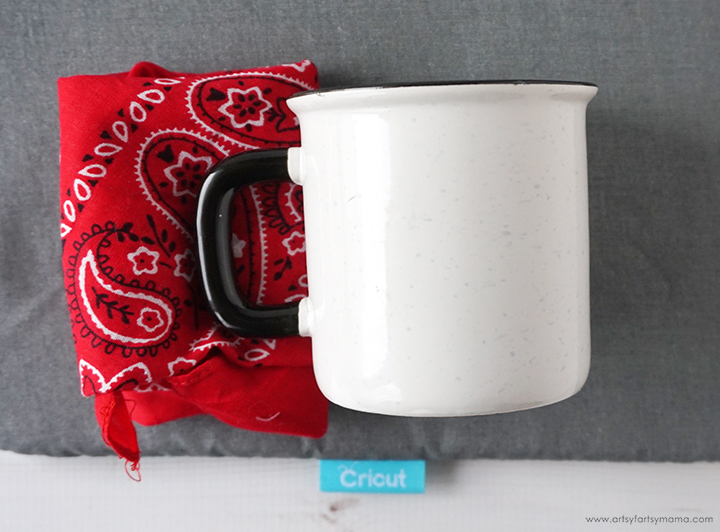
For the mug, wash it out well with soap and water. Lay the mug on the EasyPress Mat with a folded cloth underneath the handle to keep it steady. Next, use a cotton swab or a lint-free cloth to wipe the area where the vinyl is going to go with alcohol.

Place the iron-on vinyl initial on the mug and press the sticky carrier sheet down well so that it sticks in place on the mug.
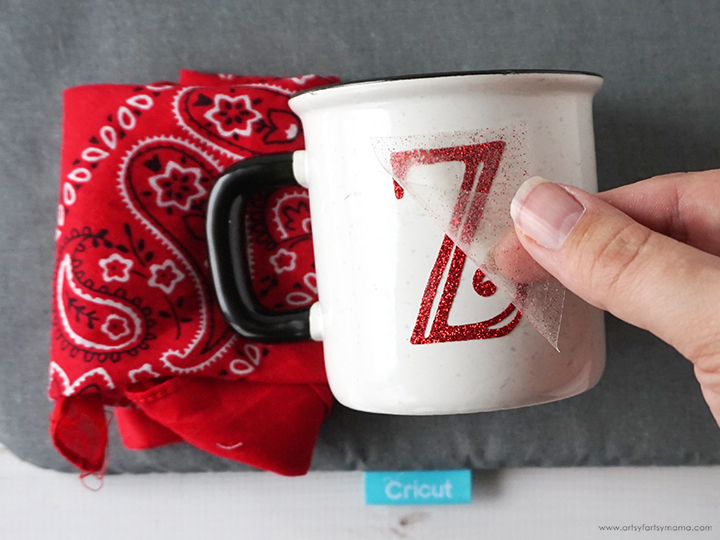
Adjust the setting on the EasyPress Mini to your vinyl specifications*. Once the light turns green and the machine beeps, it's ready to use. When the EasyPress is up to temperature, set the EasyPress Mini over the vinyl and use a separate timer to keep track of the countdown. Peel the carrier sheet off while the vinyl is warm, and re-press if necessary.
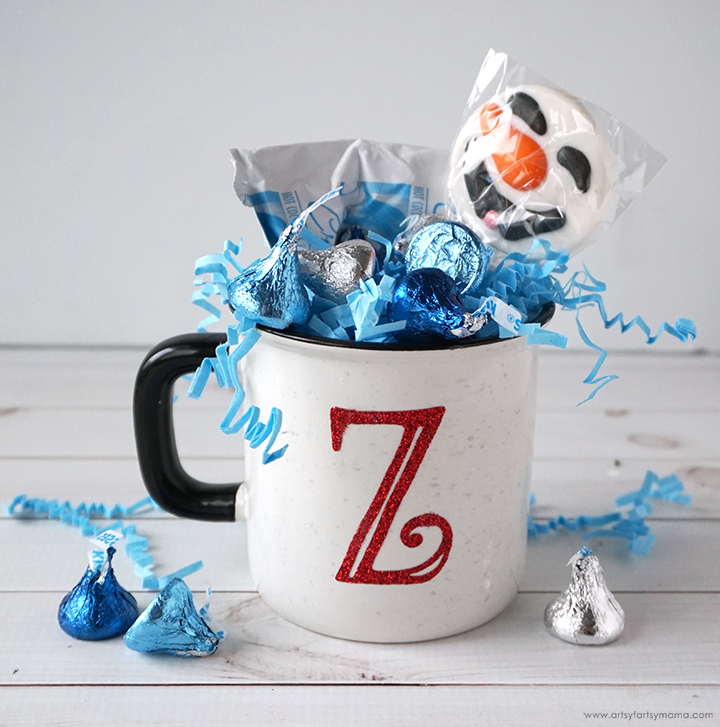
Fill the newly monogrammed mug with hot chocolate and goodies for a sweet Christmas Eve treat! Isn't this an adorable gift all on its own?!
Cut a piece of transfer tape and lay it over the vinyl. Use the scraper tool to press it down well on the front and back. Carefully peel the backing away from the transfer tape. If the vinyl is still sticking to the backing, lay it back down and press it again with the scraper tool.
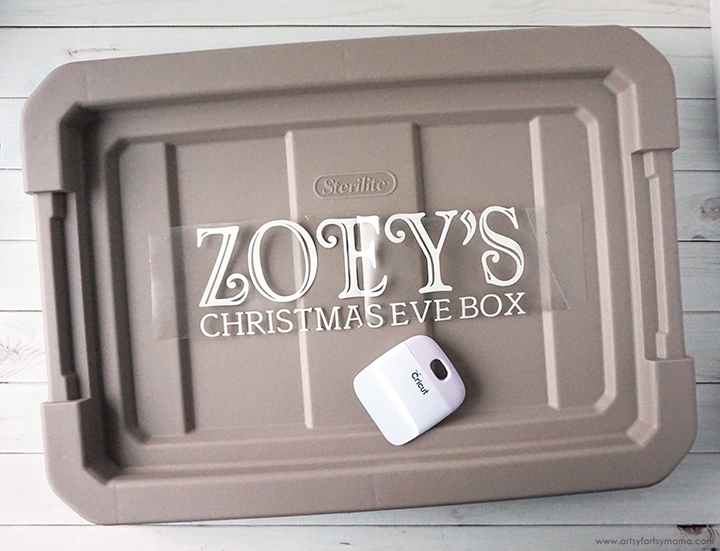


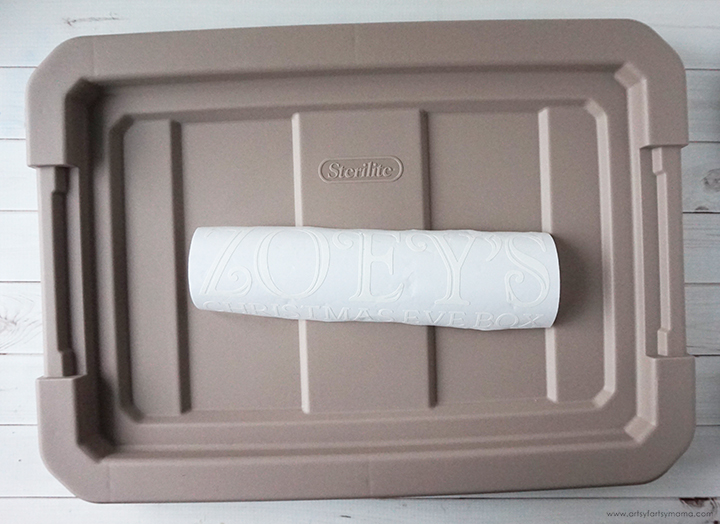
Fold the carrier sheet in half (non-sticky sides together) to make a crease in the center. Lay the crease down in the middle of the lid and press the center down using a Scraper Tool. Work from the center and out to the end (left or right, your choice) pressing the vinyl down well with the scraper and try your best to remove any air bubbles. Turn the lid around and press the other side of the vinyl down.
Slowly peel the transfer tape away from the vinyl. If the vinyl is still sticking to the transfer tape, lay it back down and press it again with the scraper tool. Once the tape is removed, your lid is now ready to use!
If your container is clear like mine, I would recommend lining it with some sheets of tissue paper first. Then add in all of your freshly personalized items and top the container with the lid and add a gift tag! Isn't this such a fun gift to be opened on Christmas Eve? Thank goodness for my Cricut machine!

What are your favorite Christmas Eve traditions?
Don't forget to Pin, Like, and Share!


