
Create your own beautiful resin bookmarks that are packed with glitter!

I love making bookmarks. This time, instead of a printable, I decided to try my hand at using resin and a ton of glitter to make one! In case you didn't know, have been learning to use resin in all different ways, and share tutorials at the Resin Crafts blog. I had some extra resin from one of those projects and decided use it to make a bookmark. It was so fun and easy to make, so I wanted to share how you can make some Glittered Resin Bookmarks, too!! It's a great project for resin beginners, and I think you're going to love it.
New to resin? Be sure to check out Resin 101: Getting Started with Resin!

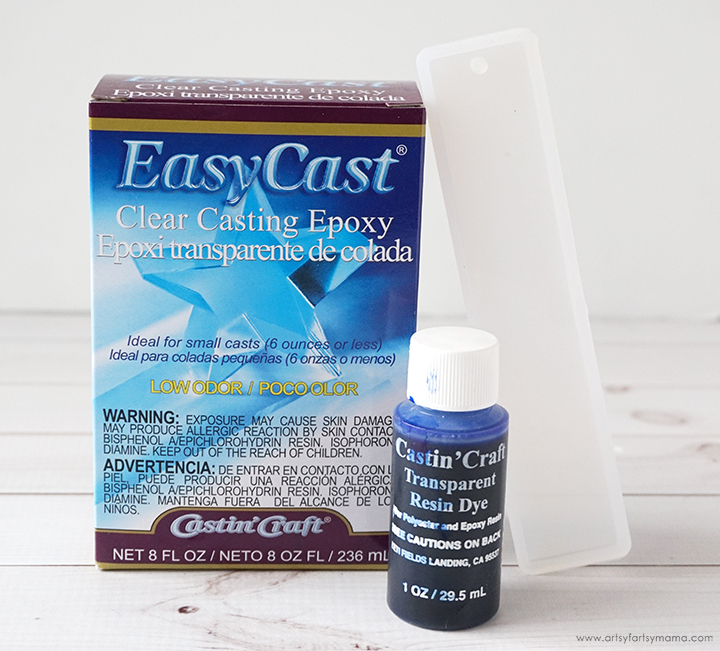
To make your own glittered resin bookmarks, you will need these supplies:
- EasyCast Clear Casting Epoxy
- Measuring Cups
- Stirring Sticks
- Disposable Gloves
- Castin’ Craft Transparent Resin Dye - Blue
- Fine Glitter - I used a mix of blues and an iridescent white
- Bookmark Silicone Mold
- Embroidery Floss
*Save 10% on resin supplies when you shop ETI with code AFM

Prepare the EasyCast Clear Casting Epoxy according to package directions. Be sure to work in a well-ventilated area and wear disposable gloves. Pour in equal parts of resin and hardener to the mixing cup. Stir the resin mixture together with a stir stick for two minutes, and then pour the resin into a clean mixing cup. Stir the resin again for another minute or two with a clean stir stick.

Add a drop or two of resin dye, and sprinkle in a generous amount of glitter. Stir the mixture together well until the color is evenly distributed.

Leave the resin to cure in an undisturbed area for 24 hours. You will know that the resin is completely cured when it is no longer tacky.
*To make a two-toned bookmark, split the uncolored resin into two cups. Then add different dyes and glitters to each cup. Pour a little bit of each resin into different ends of the mold, alternating until the mold is filled.

Carefully remove the bookmark from the mold, and cut away any excess resin (from drips, over-pouring, etc) using scissors. Tie a tassel with embroidery floss in a coordinating color. Not sure how to tie a tassel? Check out this DIY Tassel tutorial!

Hook the tassel string through the hole in the top of the bookmark to attach it.
These bookmarks are so easy to make, and there are so many options to make each one unique! They would make great gifts for both adults and kids, and are a fantastic incentive to keep reading.
Don't forget to Pin, Like, and Share!


I love how it turned out! My middle son works quite a bit with resin but for some reason it really intimidates me as a medium. Pinning this to try!
ReplyDelete