
Show off your favorite Harry Potter figures with this DIY Harry Potter Funko Pop Display!

One of my favorite things in life is Harry Potter. This last Christmas, I decided to get myself a gift: the Harry Potter Funko Advent Calendar! It comes with 24 Harry Potter Funko Pop mini figures that you get each day as you count down to Christmas. My daughter keeps trying to steal the figures for herself, so needed to find a way to display these beloved figures and keep them safe. After finding some house-shaped shadow boxes, the idea for this display came together like magic and I am absolutely thrilled with how it turned out!!
This post contains affiliate links for your convenience. As always, I only share products that I use myself and truly recommend!
To make this magical Harry Potter Funko Pop Display, you'll need these supplies:

To make the shelves for the display, start by cutting the birch wood into three pieces using a TrueControl Knife, acrylic ruler and a self-healing mat. Cut two pieces measuring 7 1/2" x 1 3/4", and one piece 5 1/2" x 1 3/4". Fit the birch pieces into the shadow boxes and make any adjustments as necessary so that the shelves have a snug fit.

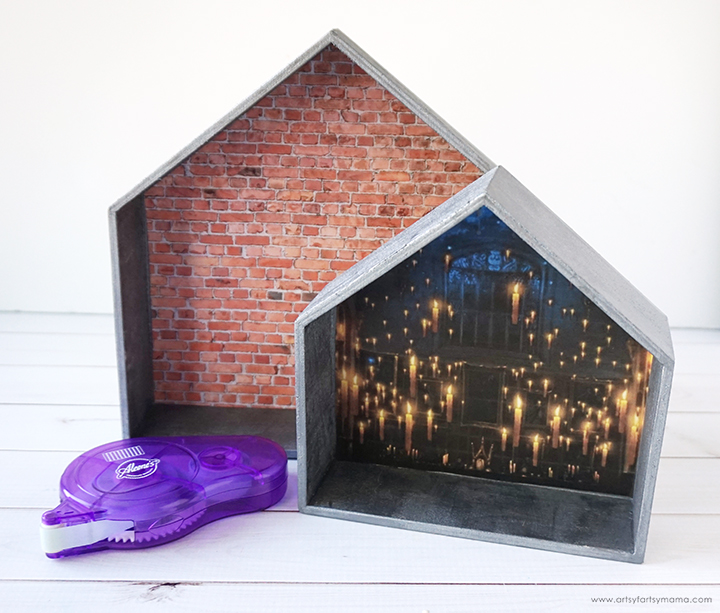
Use a pencil to trace the shadow boxes on the background images. Cut the shape out about 1/4" smaller than the tracing. Place the background inside the box and make adjustments until it fits perfectly. Add lines of tape runner around the edges and the center of the backside of the paper. Carefully place the paper into the box and press it down well.

Place a shelf inside the box and figure out where you want it to go. Make a pencil mark and remove the shelf piece. Add a thin line of adhesive to three edges of the shelf piece and carefully put it back into the shadow box at the mark. Use a mini level to make sure the shelf is level. Hold the shelf in place until the glue sets. Repeat this process for the other shadow box and shelves.
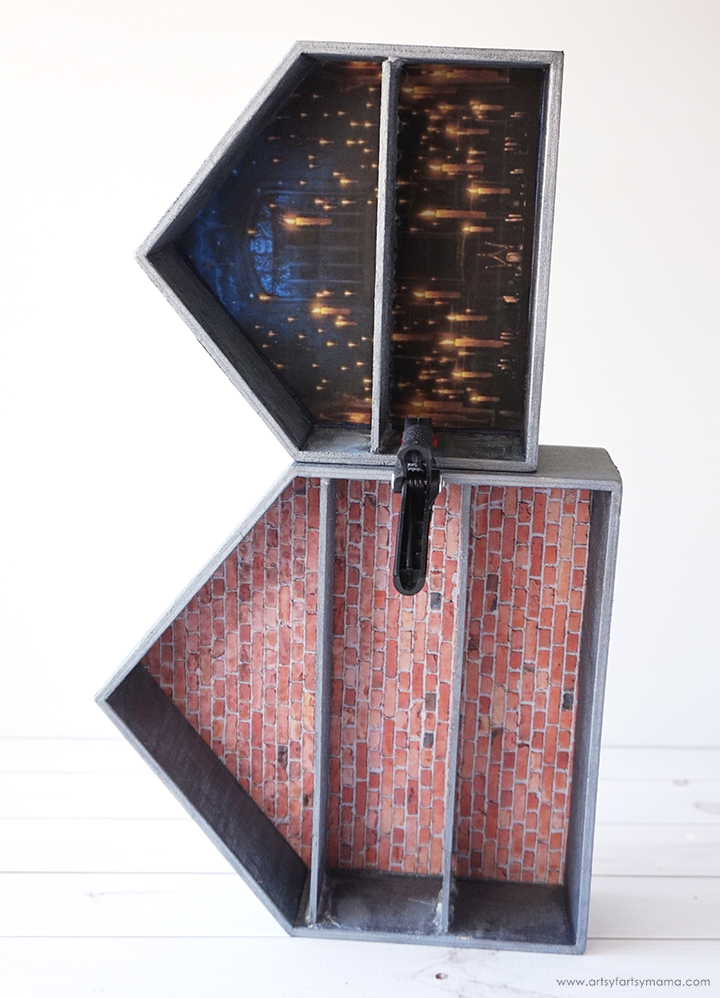
Add some adhesive to the side of the smaller shadow box and connect it to the larger shadow box, lining up the top edges where the roofs start. Hold the boxes together to dry with a mini clamp.


To make the wings of the Snitch, you'll need:
Beading Wire
Jewelry Wire Cutters
Gold Glitter Duct Tape
Scissors
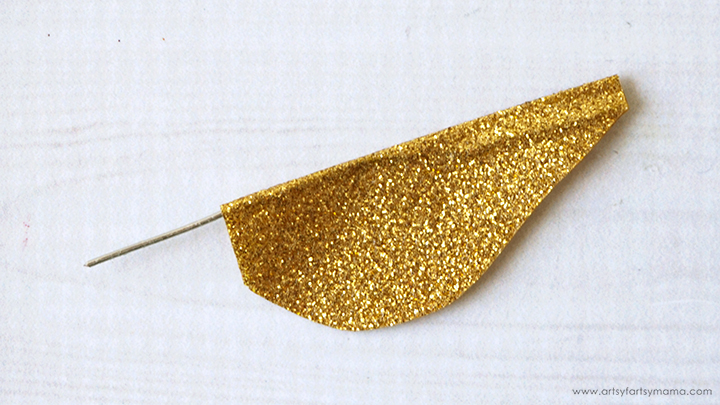
Cut a 2-3 inch piece of wire using wire cutters. Fold a piece of gold glitter duct tape over the wire and press the tape together well. Cut the tape into the shape of a wing. Repeat this step to make a second wing.

Use scissors to carefully cut fringe on both of the wings. Be careful not to cut all the way through!

Add some glue to the end of the wire and place it inside one side of the bead. Hold it in place until the glue sets. Repeat for the other side, then adjust the wires to look more wing-like.

Add a drop of glue to the center of the bottom of the smaller shadow box. Cut a 2-3 inch piece of thread or fishing wire and push an end into the glue. Cover the glue with a small piece of scrap duct tape. Glue the other end of the thread to the top of the Snitch and cover with another small piece of duct tape. Leave in place until the glue has completely dried.

When you hang the display up, it will look like the Snitch is flying all on its own! I love how the glitter sparkles in the sunlight and any bit of air makes it move like magic.
I was worried about the Funko figures getting knocked over or falling off the shelves, so I came up with a handy solution. I arranged the figures how I wanted, then stuck a glue dot to the figure's feet and pressed it onto the shelf. Voila! The figures stay firmly in place, but are removable if necessary.
The Shadow Box Houses have hooks on the back to make hanging the display easy! Place a level on one of the shelves and hold the display up where you want it to go. Use a pencil to make small marks on the wall at the peak of each roof. Place nails over the pencil marks, and hang the display up to enjoy!
Pin this project:

Who is your favorite Harry Potter character?


I totally love this. It will be a fun project with the kids this summer
ReplyDeleteI love this, my niece would love it for her LOL dolls.
ReplyDelete