
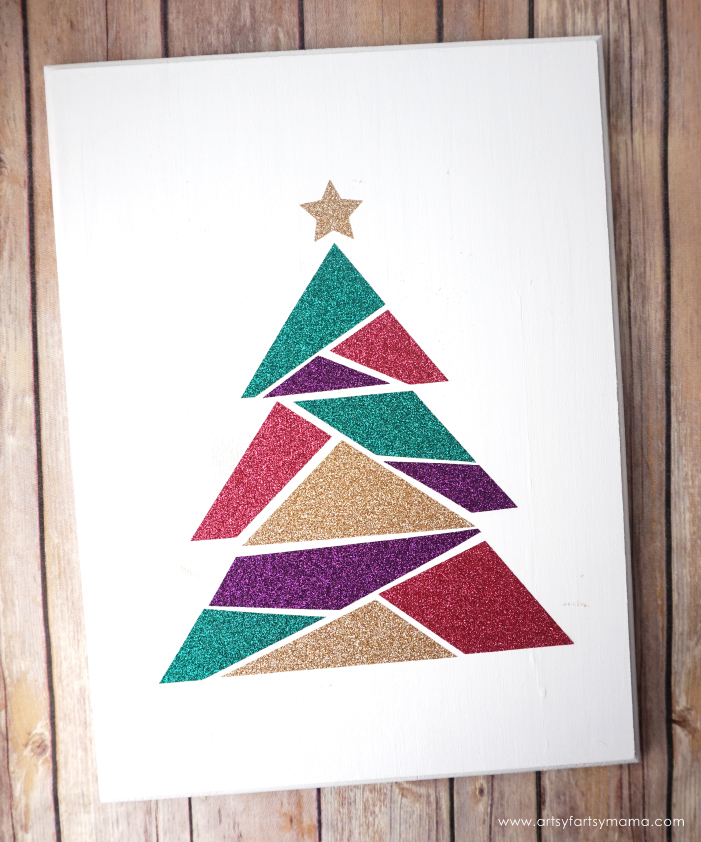
Make this easy DIY Modern Christmas Tree Sign to add some holiday sparkle into your home!
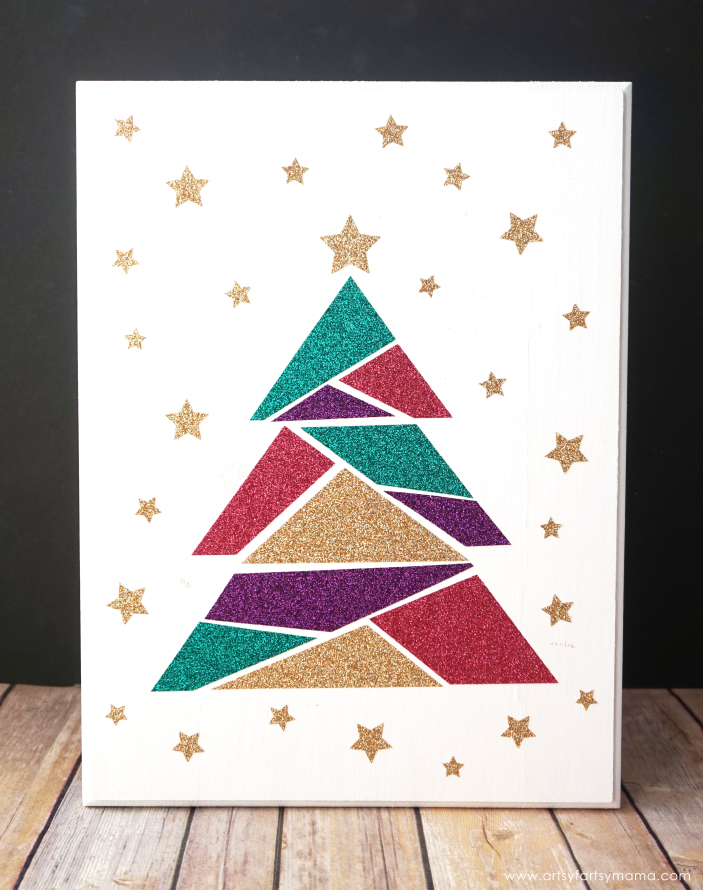
Looking to make some holiday decor, but don't want to take a lot of time doing it? This DIY Modern Christmas Tree Sign is really easy to make, and will look beautiful among your other holiday decorations. With the help of my Cricut, I was able to whip up this project in about 15 minutes (minus the drying time)!
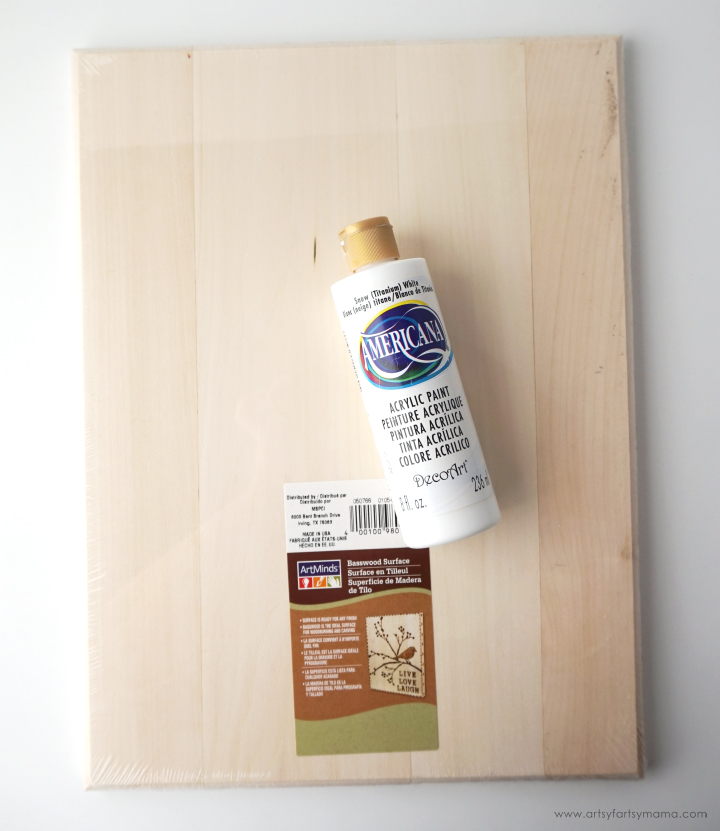
For my sign, I found a basswood surface at Michaels that measures 15.5" x 11.5". I painted it with 2-3 coats of Americana Snow (Titanium) White. Make sure it dries completely in between coats.
To make the Christmas Tree design for the sign, you'll need:
- Cricut Maker machine
- Modern Christmas Tree Sign Design
- Glitter Heat Transfer Vinyl - I used Old Gold, Emerald, Blush, and Eggplant
Iron-On Vinyl is made up of two parts: the iron-on vinyl, which will be what is ironed on to your project. One side is the pretty side that you will see on your project. The opposite side is more matte because it has a heat-activated adhesive so that it will stick to whatever you iron it on to. The other part is the liner. The liner is a clear carrier sheet (think transfer paper) that is sticky to hold the design in place and also protects the vinyl from the heat during application.
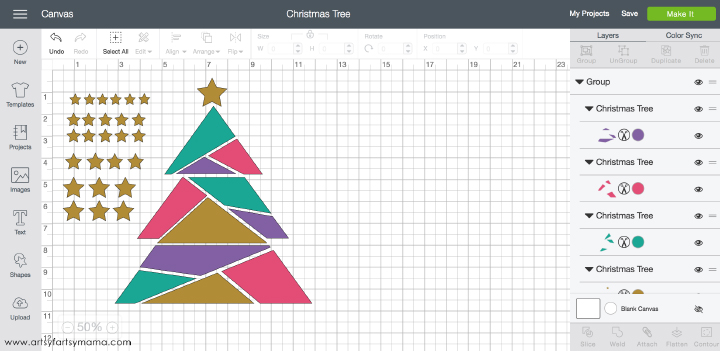
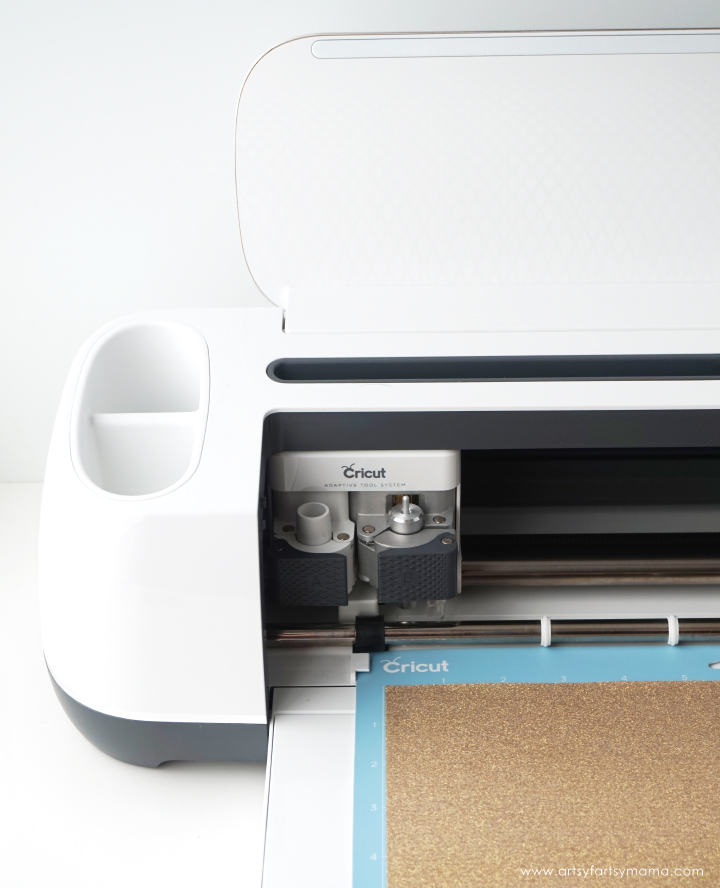
Open up the design in Design Space, and the project is ready to cut! Since we are working with iron-on vinyl instead of traditional vinyl, make sure to mirror the image before cutting. If you want to use different colors of vinyl, simply click on the colored circles in the Layers tab and change them out.
Place the vinyl you want to use for each cut on the mat face down/liner down. This is why you need to mirror the images before cutting. Load the mat into the machine by pressing the arrow button, and then press the flashing button with the Cricut logo to begin cutting the vinyl.
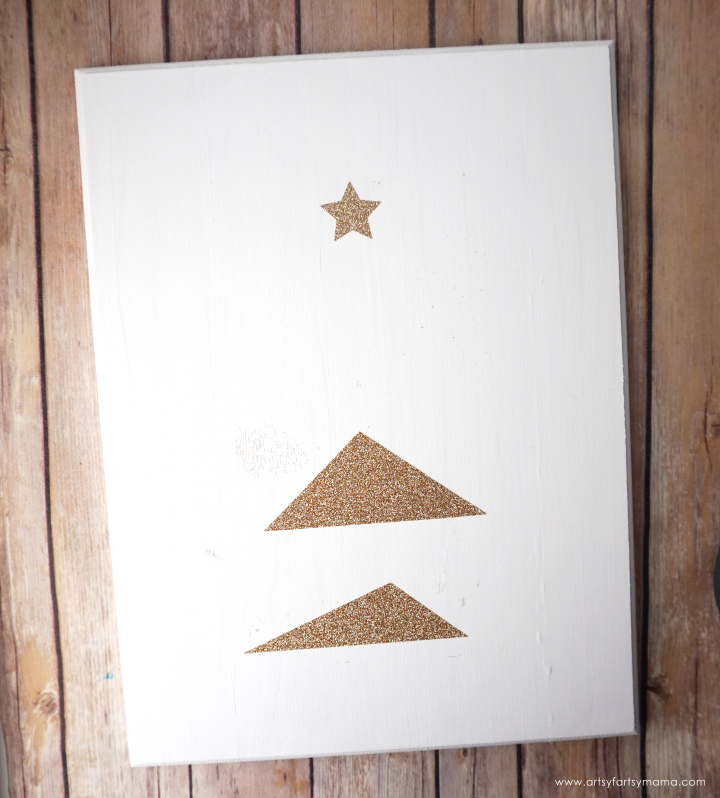
Weed the vinyl by peeling away the vinyl that is not part of the design. There will also be a set of gold stars in the design. Cut them off and set them aside for later. Starting with the gold vinyl, lay it with the carrier sheet facing up and center it on the sign.
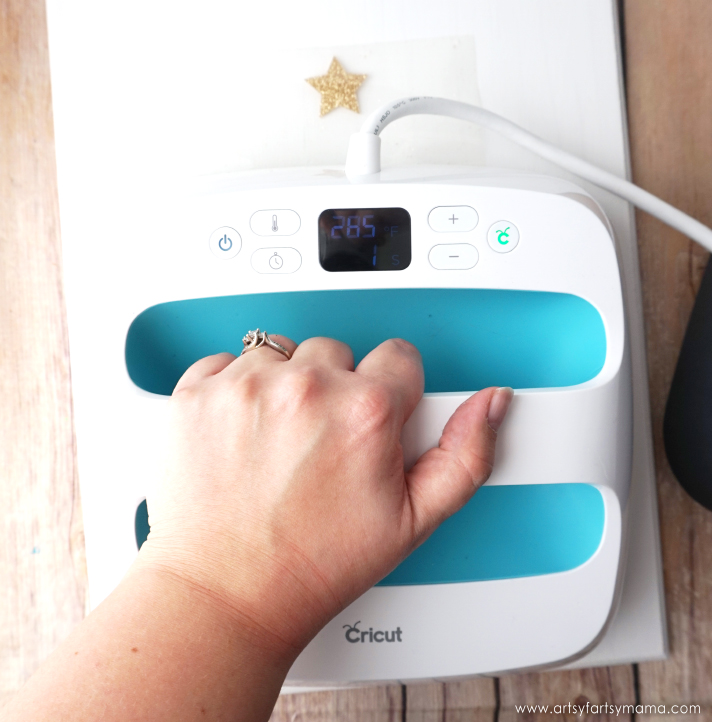
To get iron-on vinyl to stick, you need heat. The Cricut EasyPress is a cross between an iron and a heat press. What makes it different than the two is that the EasyPress distributes consistent temperature across its 9" x 9" plate. This compact piece of equipment heats up quickly and is easy to use!
Plug the EasyPress in and power it up. Adjust the temperature to 280º and timer settings to 40 seconds using the buttons. When it has completely heated up, the EasyPress will beep and the Cricut logo will change from red to green.
Lift the EasyPress out of its base and set it down over the vinyl. Press the green Cricut button to start the timer, and add pressure while you hold the EasyPress in place. When the timer goes off, move it over to another section of vinyl. Repeat until the entire vinyl design has been attached to the wood.
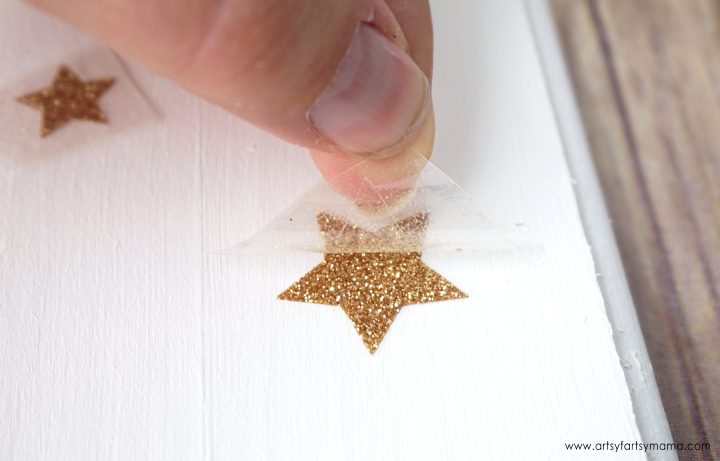
Peel off the carrier sheet while it's still warm and make sure all of the vinyl is stuck down well. If not, lay the carrier sheet back on and use the EasyPress again.
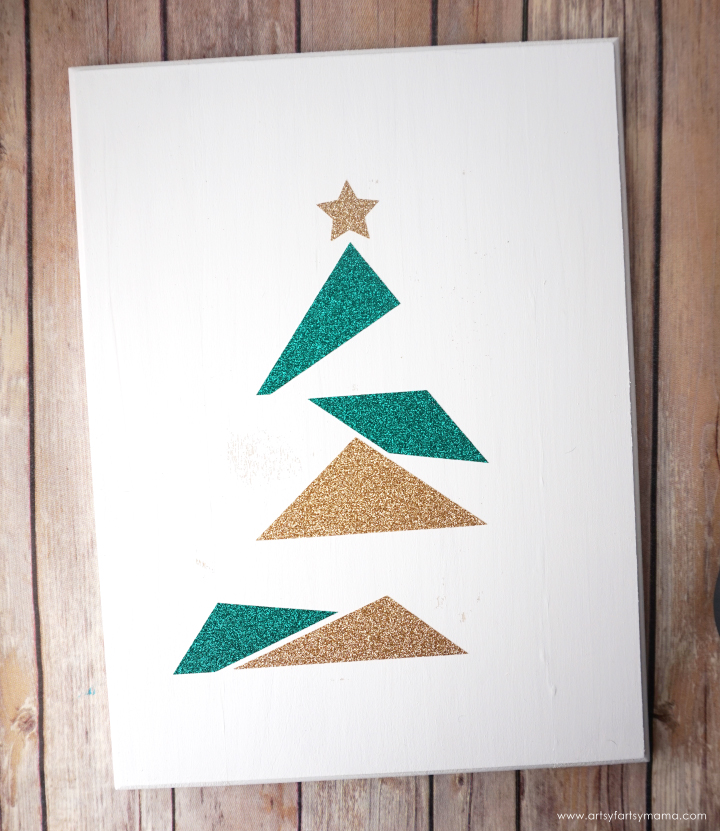
Next, lay down the Emerald HTV and press it in place with the EasyPress using the same instructions as above.
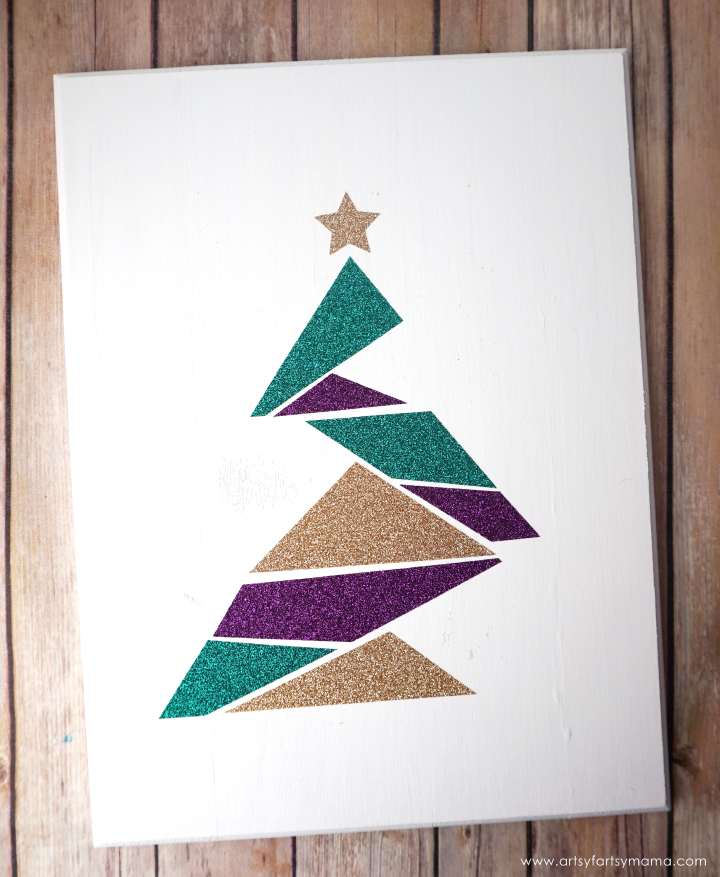
Last, place the Blush vinyl on the wood and stick it in place. Press the vinyl with the EasyPress.
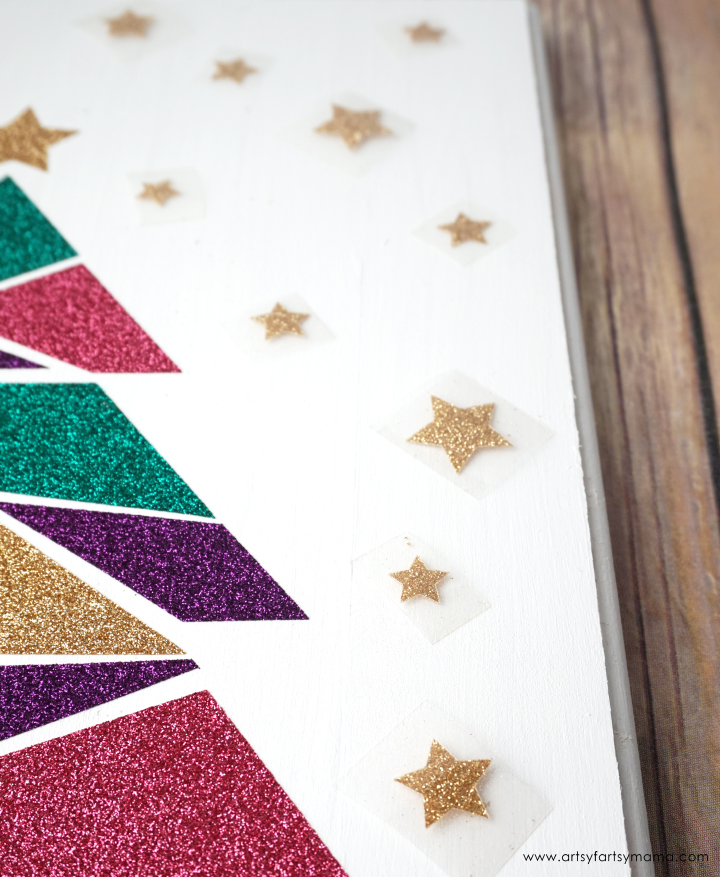
Weed out the extra star pieces and cut them apart. Arrange them all over the board until it looks how you like it. Press the carrier sheets around the stars down so that they don't shift.
Now the DIY Modern Christmas Tree Sign is complete and ready to put up on display! This is such a quick and easy project that anyone can make. I also love how you can customize it with different iron-on vinyl finishes and colors to match any holiday decor style.

Disclosure: This post may contain affiliate links, which means I may receive a commission if you click a link and purchase something that has been recommended. While clicking these links won't cost you any extra money, they will help to keep this site up and running. Thank you for your support!


Great Idea! Can't wait to start making it. Thanks for the posting!
ReplyDeleteWow - iron on vinyl. I would have used regular vinyl. I can see how the iron on version would hold up really well, I just would not have been smart enough to consider it. I'm a fellow Craft Lightning crafter.
ReplyDeleteSuch a cute project!
ReplyDeleteWOW! I never knew! So awesome and love your design!
ReplyDeleteSo beautiful and modern!
ReplyDeleteSo pretty and sparkly!!
ReplyDeleteSo Cute! Great job
ReplyDelete