
Make Halloween Character Treat Bags to fill with spooky goodies to share with friends!

Making Halloween crafts are one of my favorite things to create. There's so many fun things you can make, and these Halloween Character Treat Bags are simple and adorably spooky! For this post, I’ve teamed up with over 40 bloggers to bring you 15-minute Halloween project ideas ALL using the Cricut!
This post contains affiliate links.

Here's what you'll need to create all three Halloween Character Treat Bags:
Cricut Maker or Cricut Explore machine
Cardstock (black, white, green, orange)
Adhesive
Acrylic Gems (optional)
These Halloween bag templates are a Make It Now project found in Design Space and is FREE with a Cricut Access subscription.

Design Space will guide you through every step of cutting out the treat bags - starting with which color of cardstock to load on the mat, a reminder to place the scoring stylus into the machine (so the score lines can be made), and giving you the option to choose your material so that it cuts perfectly the first time. Finally, all you have to do is press "GO" and the Cricut will do all the work!

After everything was cut out, the first thing I did was work on assembling the base of the treat bags. Crease the bags along all of the score lines so that they will be easier to put together.

Next, add a line of adhesive (I used a tape runner) along the two edges of the widest flaps. Placing adhesive in these spots will be just the right amount to get the sides of the bags to stick together.
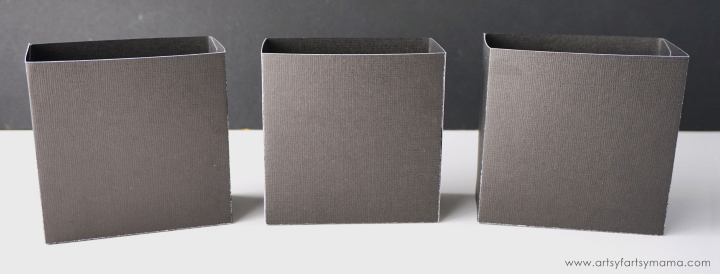
To make the bag, bring both sides up with the wrong sides facing each other. Fold the smallest tabs in first (from the bottom), then fold the thinner tabs in. Start on one side and line up the tabs with adhesive on them with the edges of the bag and use your fingers to press both inside and outside to help the adhesive stick well. Repeat for the other side. Now your bag bases are ready to embellish!!

To make the Halloween Pumpkin Character bag, you'll need some black cardstock for the bag template, and green and orange cardstock for the pumpkin details. I've already assembled the bag, so let's get to making the pumpkin to add to it!

We will be layering paper pieces to create the faces of the treat bags. First, turn the pumpkin over so that the back of the paper is facing up and add some adhesive.

Next, place the square black piece face down onto the back of the pumpkin face. Add more adhesive onto the back.

Carefully line up the edges of the pumpkin face with the front of the treat bag. Use your fingers inside and outside of the bag to press the papers together so that the adhesive sticks well.

Add some adhesive to the back of the pumpkin stem, but only at the bottom. Line the straight edges up with the top of the bag and press well. Next, crease the fold lines of the handle piece and add some adhesive to both ends (right side up).

Line each end of the handle on the inside of the back to the score line and press well. Add in your Halloween goodies and some gift bag filler and your Pumpkin Character Treat Bag is ready to share!!

Now it's time to assemble the Halloween Spider Character Treat Bag! Assemble the bag base, and cut the spider elements out of black and white cardstock.

Unlike the pumpkin, we're going to add some adhesive to the front side of the white piece of cardstock.
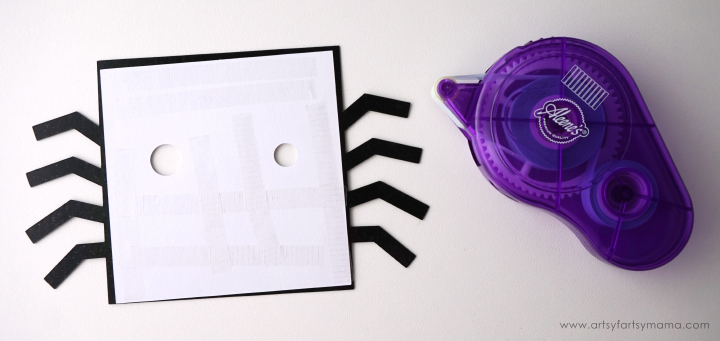
Lay it face down on the back of the spider piece. Press well, then add some adhesive to the back of the white piece only (not the legs).

Line the top and bottom up with the bag, and press well. Crease the fold lines of the handle piece and add some adhesive to both ends (right side up).

Line each end of the handle on the inside of the back to the score line and press well. To add a little more personality to the spider, I used some adhesive gems to the eyes. Simply peel the gem from the backing and stick them on. Any color will look great!

Add in your Halloween goodies and some tissue paper and your Halloween Spider Character Treat Bag is ready to hand out to your friends!!

Last, but not least is the Halloween Frankenstein Character Treat Bag! This one has the most pieces, but is so simple to assemble. You'll need some black and white cardstock for the bag, eyes, and hair details, and green cardstock for the face.


Lay the white piece face-down on the back of the green piece. Try to center it (better than mine) so you don't see any white showing through the edges, mouth, or stitches. Add some adhesive to the back.

Lay the face piece down onto the black to create the illusion of hair, bolts, and to fill in the facial features. Add adhesive to the back of the black piece, but not on the bolts.

Line the top and bottom up with the bag, and press well. Crease the fold lines of the handle piece and add some adhesive to both ends (right side up).

Line each end of the handle on the inside of the back to the score line and press well. To give Frankie a little more life, I also wanted to add some gems to the eyes. These ones weren't adhesive, so all I had to do was use a little bit of a quick-drying tacky glue to the eyes.

I used two different sized gems and stuck them on over the glue. Let them dry well, and you're all set! Again, any color will look great.

Add in your Halloween goodies and some crinkle paper and your Halloween Frankenstein Character Treat Bag is ready to hand out as a Halloween surprise!!
Want to win your very own Cricut Maker machine?!
Enter the giveaway using the form below:


Cutest bags ever!! Thanks for joining!
ReplyDeleteErmagherd!! I'm dying of cuteness over here!!
ReplyDeleteIs there by any chance, you could give me the measurements for these treat bags? I don't have a Cricut of any kind! Nor can I afford one now! But, I would love to pass out treat bags like these. If you could give me the measurements in inches, I could try to figure how to make these adorable treat bags. I usually have about 150 trick or tr-eaters. Thank you for any and all help! Gloria Sperring
ReplyDeleteThanks for the great instructions and pictures to go with it!! My friends littles will love these
ReplyDelete