


Get two pieces of cardstock and lay them down vertically. Cut pieces of Duck Tape® and Duck Glitter® and stick them across the paper horizontally. Don't worry about having extra tape going over the edges.

Use a paper cutter to trim the tape edges and on both sides of the tape. You should now have 10 strips that measure about 8x2".

Now turn the strips sideways and mark the center to cut each strip in half. Now you should have a stack of 4x2" gift tags ready to be decorated!
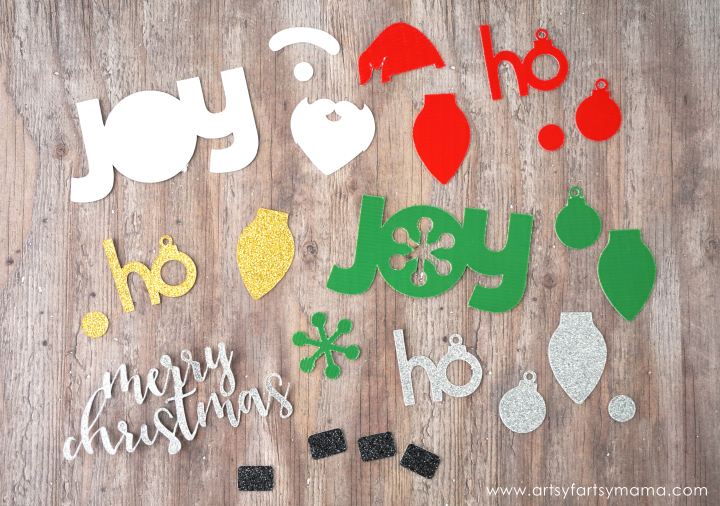
I used some of the 8x2" strips to create some designs to make the gift tags extra special! Did you know that you can cut Duck Tape® with the Cricut Explore Air 2?! All of these designs can be found in Design Space. Since the tape was backed on cardstock, I was able to cut the designs easily on the chipboard cut settings.
Both the Duck Tape® and the Duck Glitter® cut beautifully every time, even on that intricate "Merry Christmas" design!! Don't worry if you don't have a cutting machine. You can easily cut out your own designs with scissors and punches.

I put all the designs together and stuck them onto the 4x2" strips with some tape runner. For the "Merry Christmas" design, I sprayed the back with spray glue so that I didn't have any of the edges poking up. Once they were all assembled, I used a hole punch to make a hole for ribbon on each tag.

With the Duck Tape® being backed with cardstock, you can now flip the tag over to write a sweet message to the gift recipient! The tags are durable as ever and with all the combinations of Duck Tape® and Duck Glitter®, the options are endless for creating a unique gift tag for your friends and loved ones!
Be sure to check out the Duck Tape holiday Pinterest board for more creative holiday ideas!
Which Duck Tape® Gift Tag is your favorite?
Be sure to check out the Duck Tape holiday Pinterest board for more creative holiday ideas!
Which Duck Tape® Gift Tag is your favorite?


My new machine arrives today & I'm SO EXCITED! It's my first cutting machine & I just can't wait to get creating with it. I may start with these!!
ReplyDeleteSuch a cute idea! I need to get a cricut!!
ReplyDeleteThese are so, so adorable! I NEED a cricut in my life!
ReplyDeleteLoving the glitter tapes!
ReplyDeleteSo cute!
ReplyDeleteI haven't tried cutting Duck Tape with my Cricut yet. I'll have to try it next~
ReplyDeleteSuch cute ideas!
ReplyDeleteThis is such a great project! Love it :)
ReplyDeleteThese are so clever! Pinned!
ReplyDeleteChristmas is over for the year, But I look forward to making these for other occasions! Thank you!
ReplyDelete