
Learn how to make this DIY Welcome Sign with a few simple materials and a Cricut!
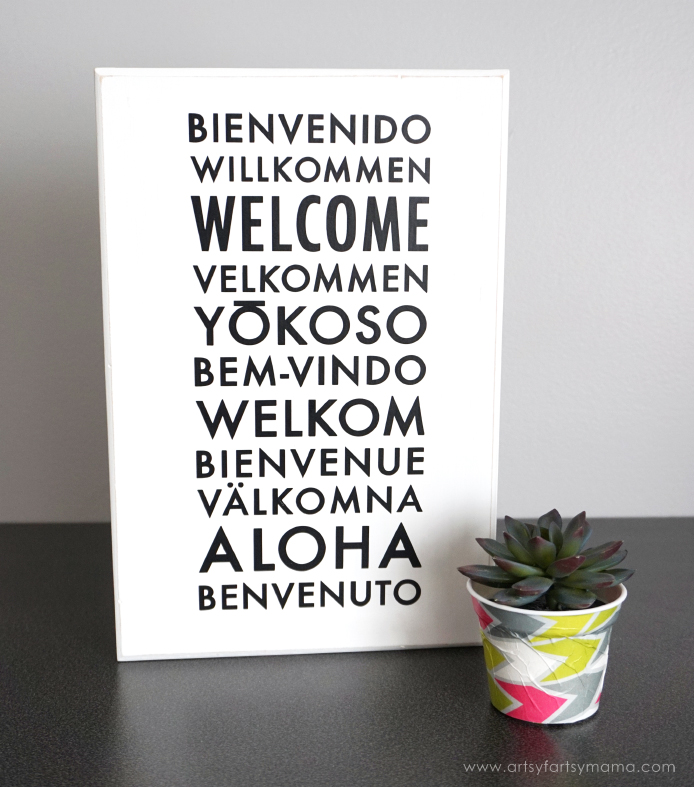
Making unique home décor is what I feel really makes a house a home. I saw this really cute "Welcome" design while using my Cricut, and knew exactly what I wanted to do with it. This DIY Welcome Sign was a really fun and easy project to make, and I love being able to display a piece of handmade décor that shows that as long as you're not here to rob or hurt us, you are welcome!
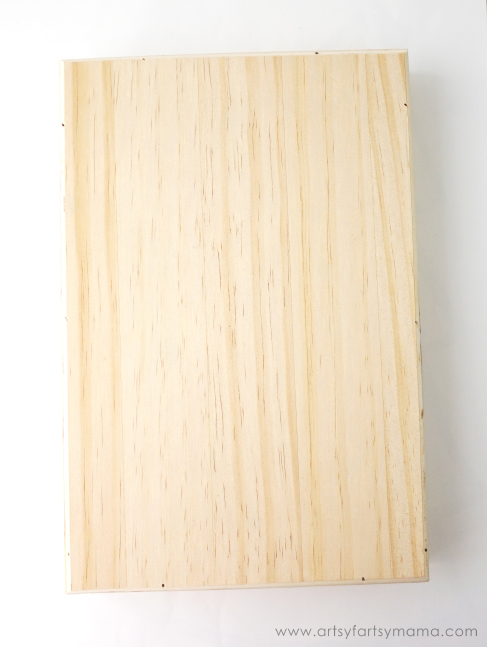
First, you'll need a board for your sign. I found this 12" x 8" wooden canvas panel that is the perfect size to hang in my entryway.
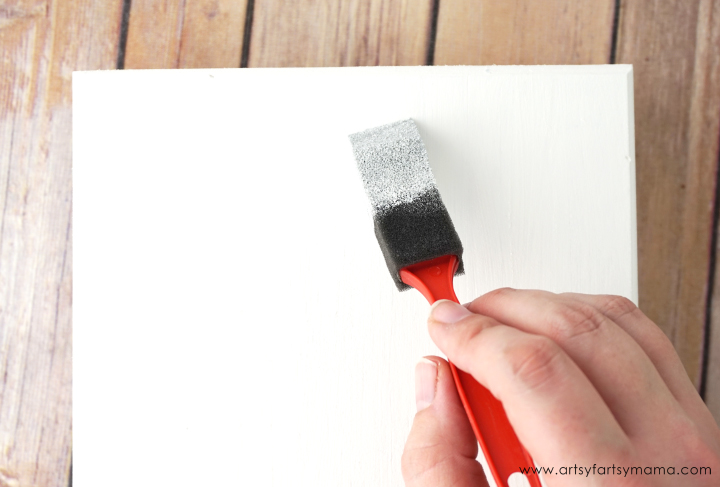
I painted the wood panel with a couple of thin coats of white acrylic paint. Once the paint was completely dried, I took some fine sandpaper to the board to smooth out any paint strokes and give it a smooth, beautiful finish.

Most people connect the word "Cricut" with "cartridges". Cricut uses the term "cartridge" to refer to image sets or groups of themed images in a physical, plastic cartridge that you plug in to a Cricut machine to be able to cut specific images. If you wanted more images or fonts, you had to purchase each cartridge separately.
With the Cricut Explore machines, you can now link those physical cartridges you already own to your Cricut account through Cricut Design Space. When a cartridge has been linked to your account, the digital versions of those images are activated and the physical cartridge is no longer needed! How great is that?!
To link a physical cartridge to your account, sign in to Design Space and plug the cartridge into the rectangle space above the "Open" button on the Explore machine (see image above). Now your account will always show those images and fonts from your cartridges every time you log in!!
Now that we've got that covered, here's the important question:
Are you required to use cartridges?
No way! In fact, I have never owned a Cricut cartridge. You can shop cartridges and fonts individually, or you can get a Cricut Access subscription. When you subscribe to a Cricut Access monthly OR yearly membership plan (that you can cancel anytime), you get instant access to the Cricut Image Library of over 30,000 non-licensed images, 1,000 Make It Now projects, and 370 fonts!! With a subscription, you also get additional benefits of unlimited use of those images and fonts, as well as discounts on purchases made on the Cricut website. Once you've subscribed, you can see the green "a" Cricut Access symbol next to all those available images, fonts, and projects in Design Space and get to work!
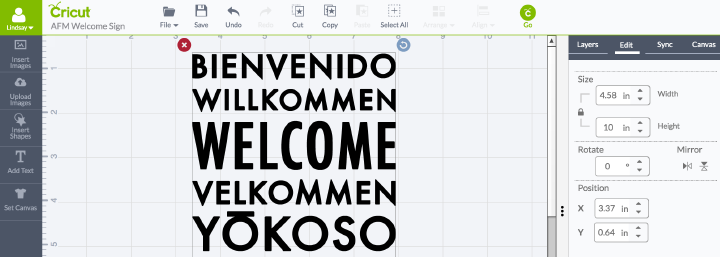
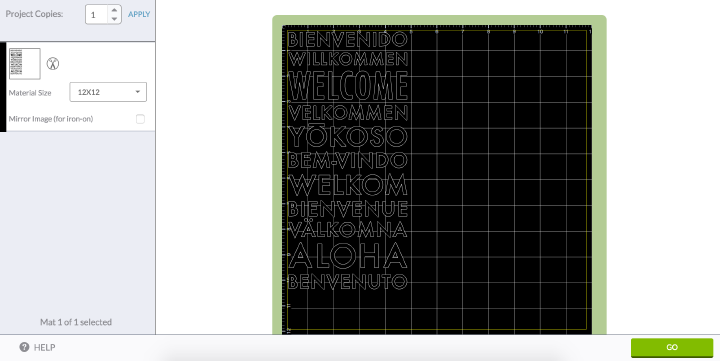
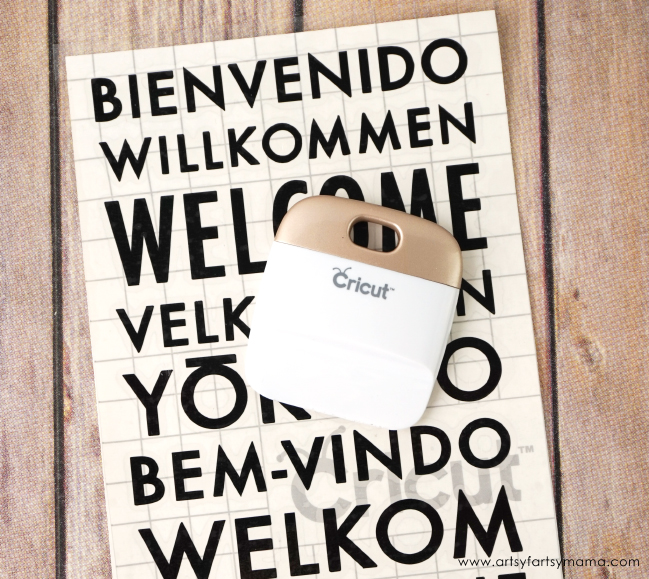
Now, let's get to making the best part of the sign!! Open up the Welcome Sign canvas that I've saved for you so you don't have to go searching for the image in the Cricut Image Library (which IS available with Cricut Access, by the way). If you use the same wooden board I used, the image is also already sized to fit. All you have to do is click "GO"!
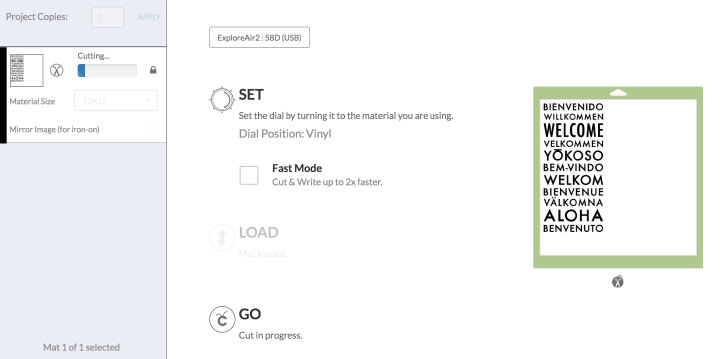
The program guides you through each step to successfully cut your project. From changing the material setting to cutting, the Design Space program is easy to use. Another great feature with the Cricut Explore Air 2 is that you can cut vinyl in Fast Mode if you're in a hurry. Just check the box!
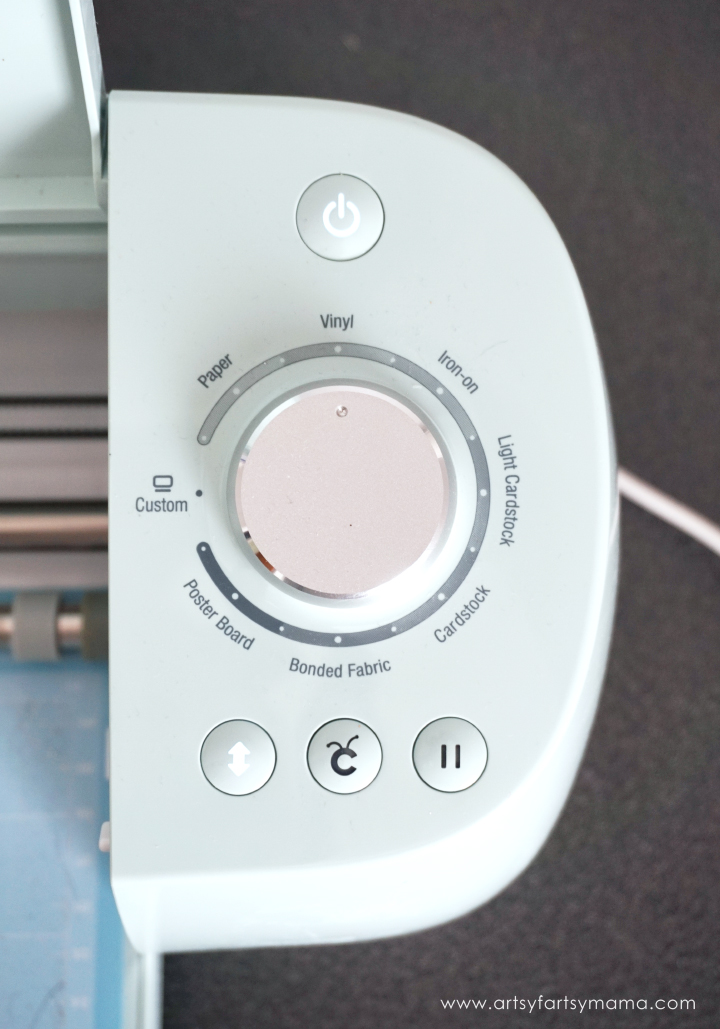
The next step is to adjust the Smart Set dial to point at vinyl (whatever material you will be cutting). You'll see in the program what the dial is currently set to, so there's no worry. Don't see your material in the circle? Set the dial to "custom" and you can choose your material from a dropdown list under the "Set" step.
The dial saves the headache of having to manually adjust the blade depth or speed settings, and you to get the perfect cut the first time!
The arrow button below the dial will begin flashing to prompt you to load the mat. The program also reminds you to complete this step and won't allow you to cut without doing it. Once your mat is properly loaded, the button with the Cricut logo will begin flashing, which means "GO" and that you're ready to get your project cut.
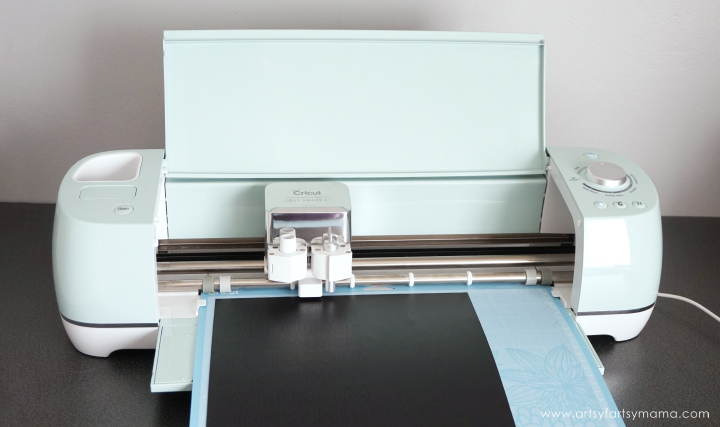
The machine runs quietly and efficiently, and cuts vinyl quick - even without Fast Mode! When the project is done cutting, the arrow button will flash again. Push the button to unload the mat.
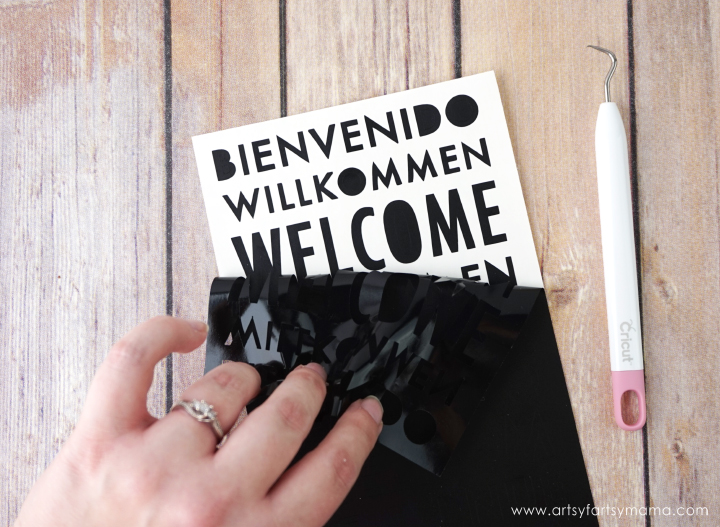
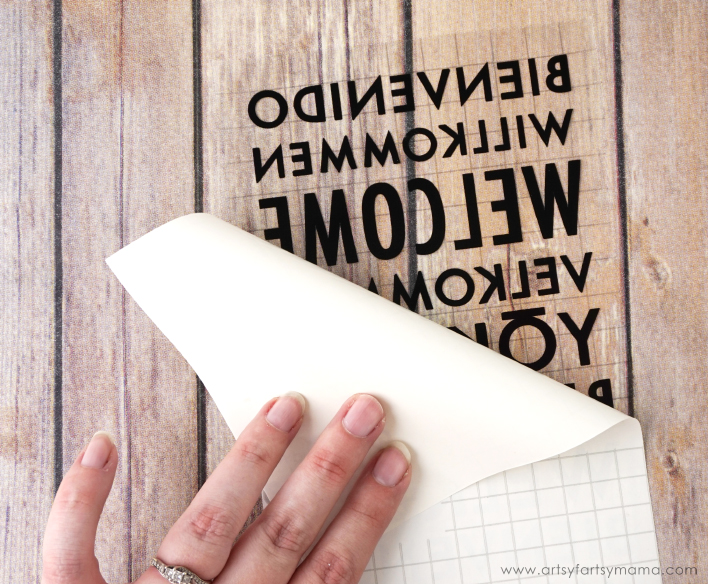
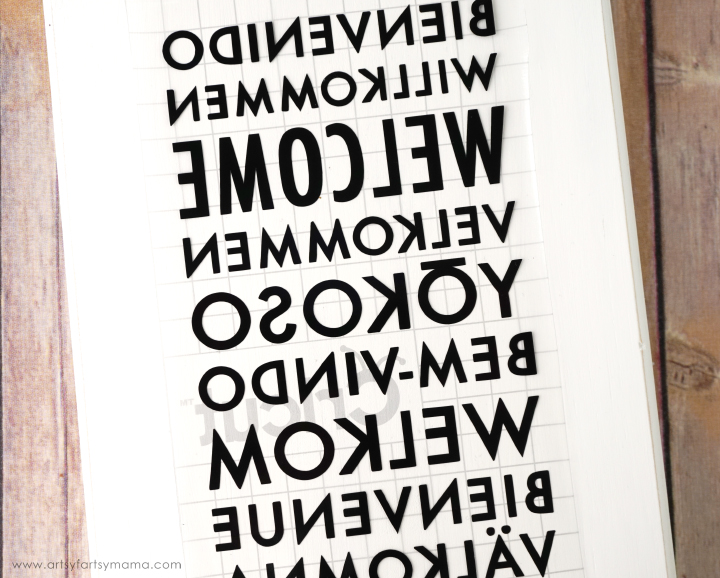
Carefully remove the sheet of vinyl from the mat. When doing vinyl projects, weeding is the most tedious part, but it's also the most important part. "Weeding" is removing the negative pieces, or the parts of the vinyl that you don't need. For these words, I start in one corner, and slowly pull up on the vinyl to remove the outer part and leaving the letters stuck to the backing.
My best tip is to work slow, and try your best to be patient!! It will be worth it in the end.
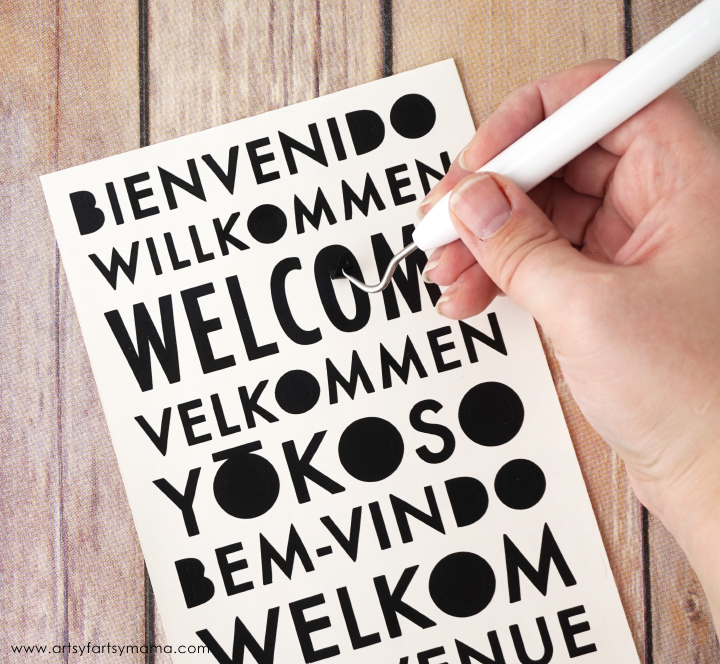
To remove smaller pieces of vinyl, like the inside of letters and small details, the Cricut Weeder Tool is a lifesaver. For example, to remove the circle in the center of an "O" I usually poke a hole in the middle with the pointed end of the tool, then slowly pull the circle out. Repeat with all the other letters, specifically "O", "B", "R", and "A".
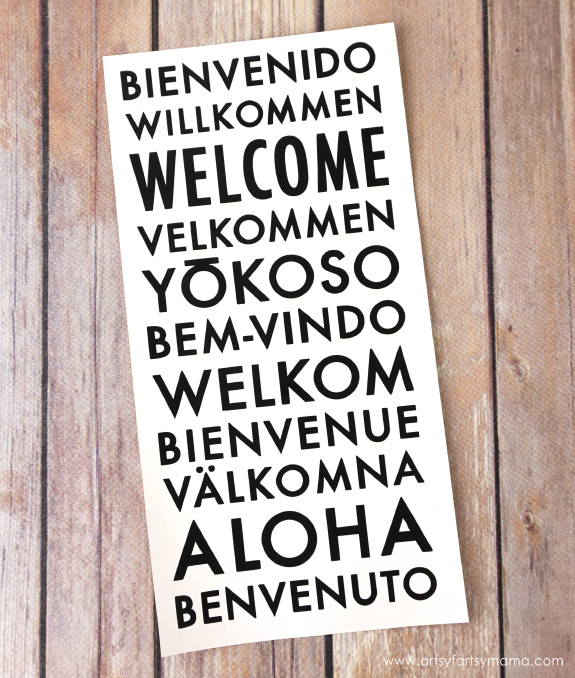
Once all the weeding is done, take a breath and have a bite of chocolate. The hardest part is complete!
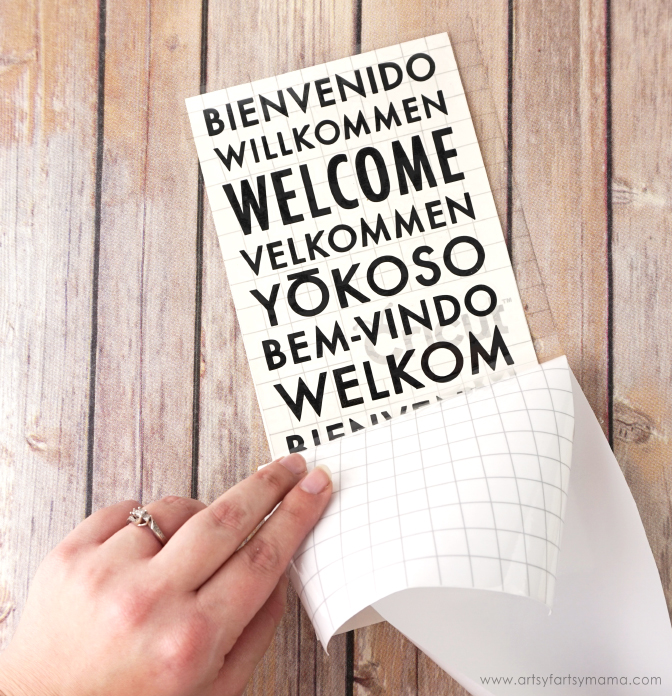
Now it's time to transfer the freshly weeded vinyl onto the wood panel. Instead of peeling up every letter and manually moving them over (terrible idea), you can use Cricut Transfer Tape to get the job done easily. The clear film with grid makes it simple to position your design right where you want it. With a project containing words, the grid is the key to making sure your design goes on straight.
To apply the transfer tape, place the piece of vinyl over the transfer tape and cut along the guide to be slightly larger than your design. Peel the backing off the top edge of the transfer tape. Line up a guideline to hit the top edge of the "bienvenido" letters. Press the transfer tape down, then keep slowly peeling the transfer tape backing off and pressing the tape down. This method has helped me avoid getting large bubbles and essentially ruining my project.
Once the transfer tape is placed over the vinyl, you need to really press the tape to get the vinyl to stick to it. Using Cricut Scraper Tool helps to really get the tape to stick evenly and you can add a little more pressure than you can with just your hands.
Turn the vinyl/tape over so that the vinyl backing is facing up. Slowly peel the backing away at a 45º angle. If the vinyl isn't sticking to the transfer tape, lay the backing back down and rub it with the scraper again until it sticks.
I always get nervous to apply the vinyl to my project, but it doesn't have to be scary! Lay the transfer tape holding your vinyl upside down on top of the wood panel. Since the transfer tape is totally clear, you can mark the centers of the board and use the grid! By taking the time to do this, the vinyl has a less likely chance of being placed crooked.
Carefully pick up the transfer tape, turn it over and place the top edge down where you've marked it and slowly work your way down. Once the vinyl has been laid down, rub it again with the scraper tool to help the vinyl now stick to the wood.
Like you did with the vinyl backing before, slowly peel the transfer tape away at a 45º angle. If the vinyl isn't sticking to the wood, lay it back down and rub it with the scraper again until it sticks.
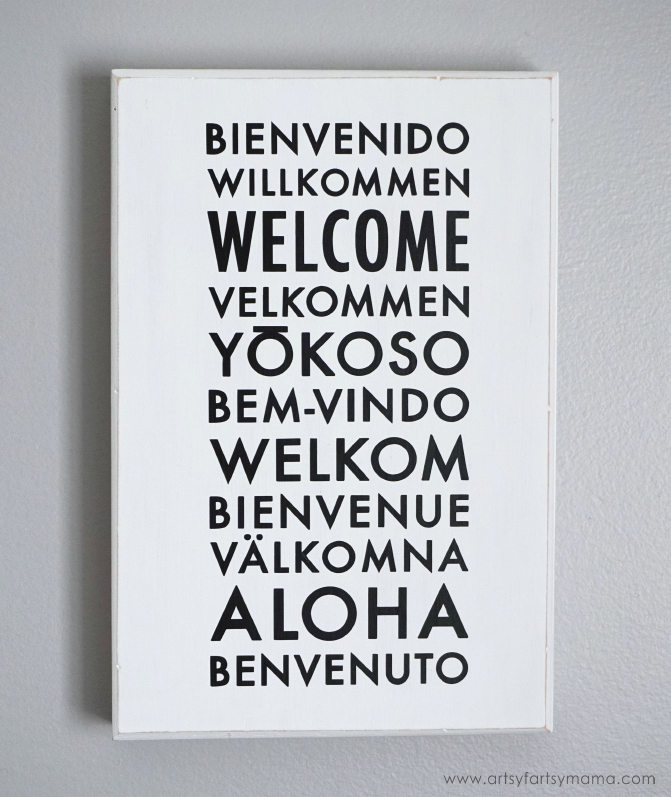
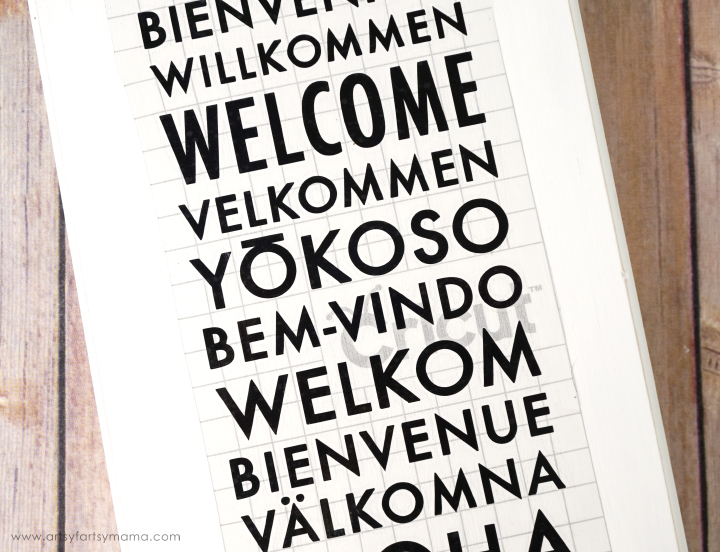
Now that the transfer tape is removed, your DIY Welcome Sign is complete! Hang it on a wall or display on a shelf to welcome your guests into your home. If you've got any questions at all about the Cricut or anything else in this post, please feel free to leave them in the comments.
Where would you hang this DIY Welcome Sign?


I have the Provo Craft Cricut am I able to use the Cricut Access?
ReplyDelete