
Sponsored by Wood Creations
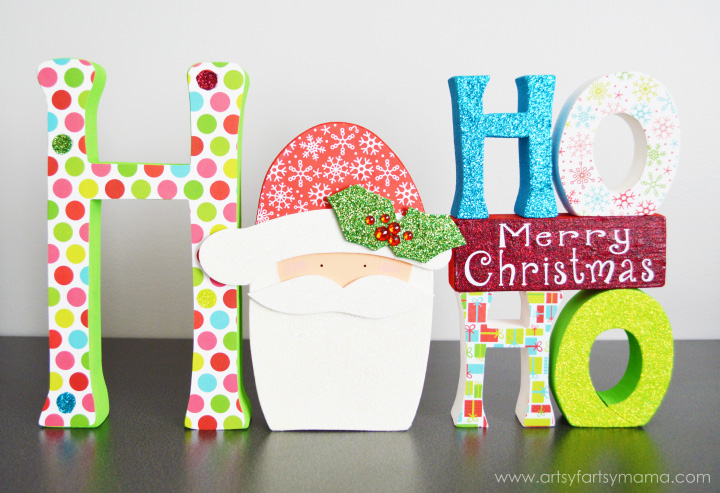
Christmas crafting is in full swing at our house, and I'm SO excited to show you my latest creation! This Ho Ho Ho Set from Wood Creations was so much fun to put together and looks great with my holiday decorations. Read through the tutorial, and be sure to enter to win an unfinished Ho Ho Ho Set for yourself at the end of the post!!
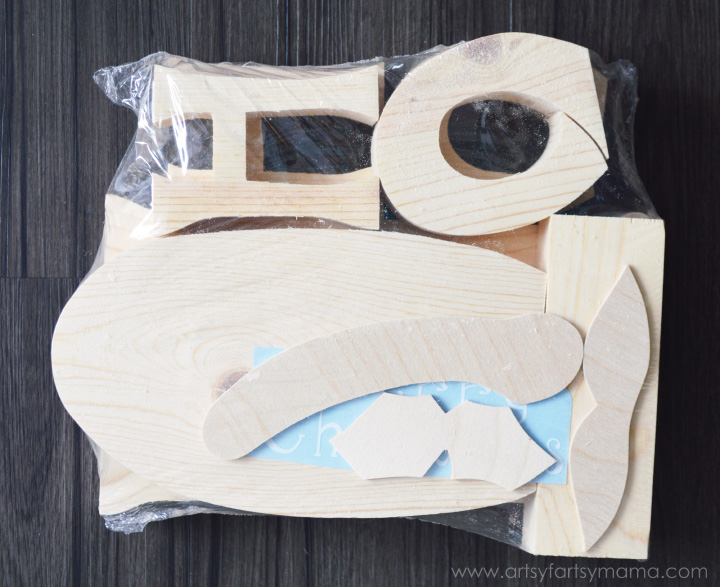
The Ho Ho Ho Set comes unfinished and wrapped up so you don't lose any pieces. You can pick up sets in any Wood Creations store, or purchase them online if you aren't close to any current locations. You can immediately get to crafting, but I like to rub everything down with sandpaper and round out most of the edges to make sure everything is smooth before I get started.
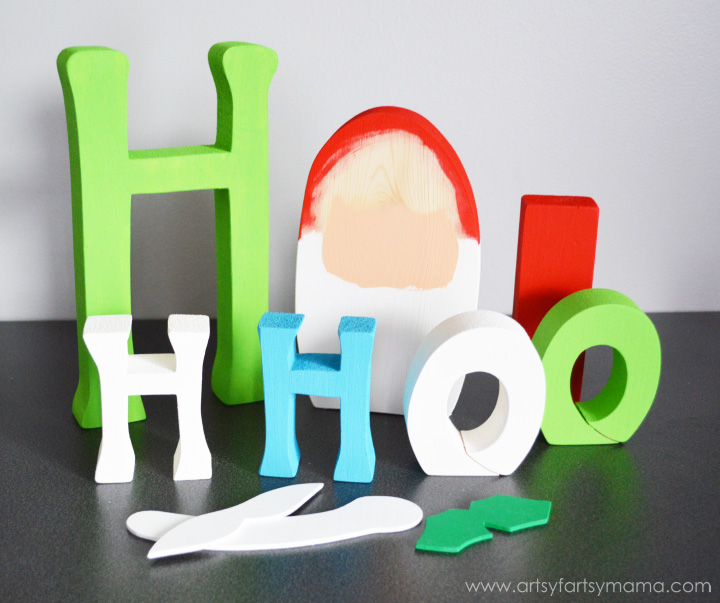
First, I start with the painting. Decide what color you want everything to be, and then paint the pieces with acrylic paint. I personally use DecoArt Americana paints and love that I only need 1-2 coats for full coverage.
Since there are more parts for it, the Santa is a little more tricky than the rest. I laid out the parts before painting, then kind of marked where his face and beard needed to go. The back is entirely white, and I carried the beard and hat section to the sides.

Once the paint is dry, trace the letters on cute holiday papers. Cut them out, then paint a coat of Mod Podge on the front of the letter and place the paper on top. Rub it with your fingers or a scraper to get out any air bubbles. Let dry completely.
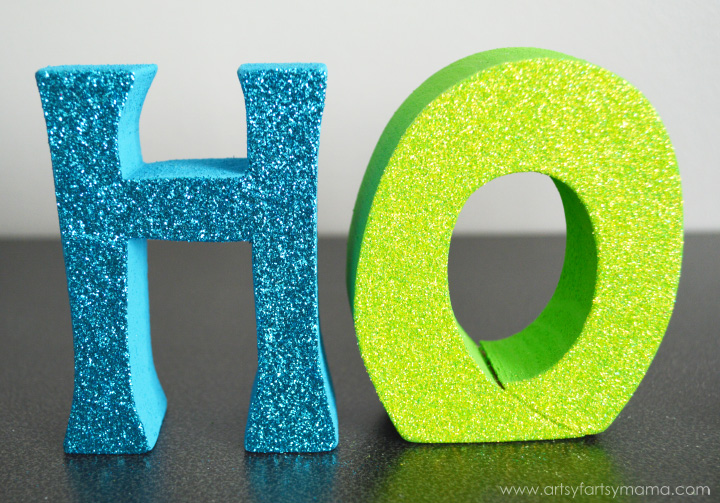
Or, my personal favorite: covering the letters with glitter!! Get a scrap piece of paper to work on, because it's going to get messy. Lay the letter down, and paint a thick coat of Mod Podge. Sprinkle glitter over the entire letter and let sit for a minute or two. Lightly tap the top of the letter while there's still piles of glitter on it to press the glitter down into the Mod Podge. Then, carefully stand the letter up and tap it on the table to get any excess glitter off. Carefully bend the paper or make a funnel and pour the glitter back into its container. Let sit for a while to dry.
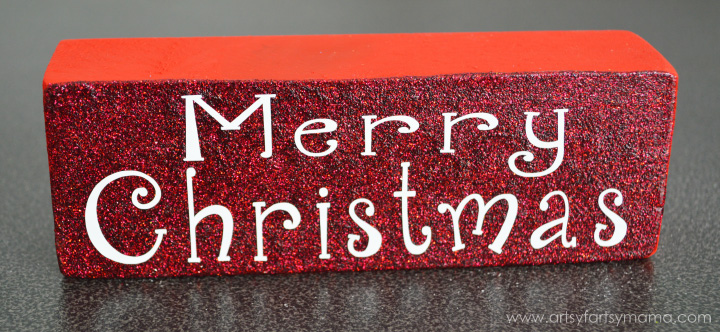
The set came with some "Merry Christmas" vinyl to attach to the block. Since vinyl doesn't normally stick to glitter that well, I tried something different. Glitter the block like you would the letters. Let dry, then cover the glitter with a thick coat of Mod Podge and let it dry completely. Once dry, you will have a smoother surface to stick the vinyl to - AND you get to keep it glittered!!
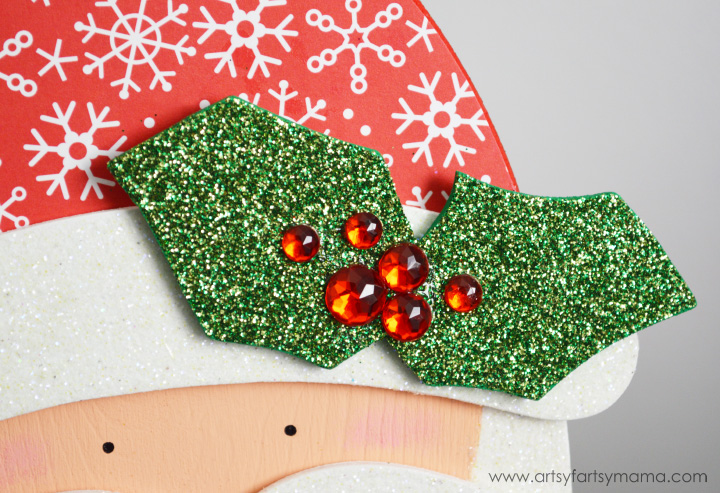
Santa has been painted, but needs to be assembled. Cut some holiday paper for his hat, and glitter his beard, mustache, and hat brim with white glitter and the holly with green glitter. Let everything dry completely before putting it together.
After the holly was dried, I glued on some sticker gems. Yes, they were stickers, but they won't attach well to a layer of glitter. Instead of Mod Podging the holly piece, I just put a dot of E6000 on the back of each gem and stuck them to the holly.
Once everything is dry, glue them in place with either hot glue or E6000 (I prefer E6000 because it's a little more permanent).
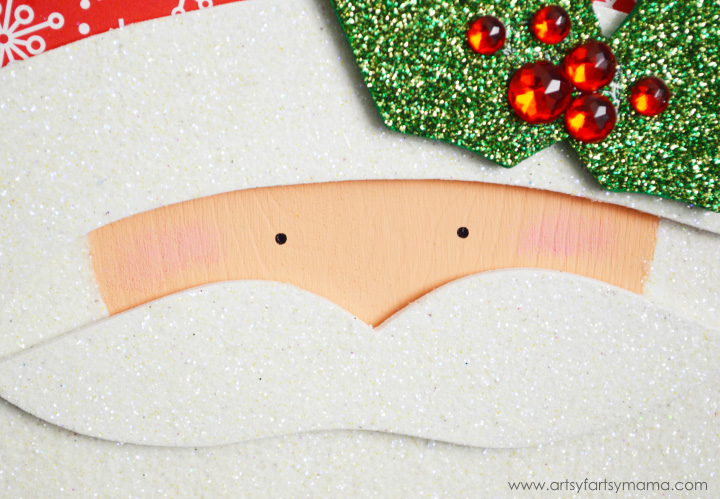
Painting his face might seem overwhelming, but I promise you can do it! Using a dry, small paint brush, dot it into a small amount of dark pink acrylic paint. Dab it on a paper towel or paint tray so that it's super light. Then, lightly dab it onto Santa's cheeks until they are the amount of rosy that you like. If his cheeks get too rosy, you can dab some flesh colored paint over the pink to lighten it up.
For his eyes, dab the end of a paint brush into black acrylic paint, and do a few practice dots on your paint tray or paper towel. Mark where you want the eyes with a pencil on Santa's face, then add the eyes with paint.
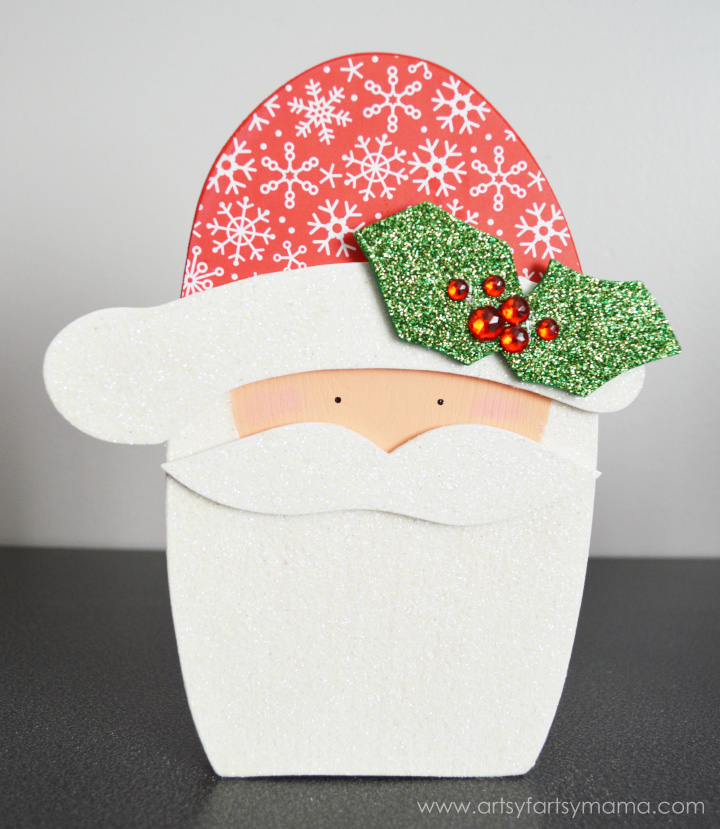
Set Santa somewhere safe to dry, lying flat. The glued on pieces might slide if you stand him up to dry. You can add any other embellishments you want (ribbons, more gems, etc), but I kept mine just like this.
Spray all the pieces with clear spray paint or polyurethane to protect the paper and to seal in the glitter (NO glitter mess at all when you need to move or pack up the set!!). Once dry, your entire set is finished!! You can stack the H's and O's on top of each other with the "Merry Christmas" underneath, but I liked the look of the "Merry Christmas" in the middle. That's what I love about these sets. You can make them all your own!! There are thousands of holiday paper designs and embellishments (which you can also purchase at Wood Creations) that will make every set look unique.


Wow these look soooo cute!
ReplyDeleteWood Creations is my new favorite place to shop! I love the Grinch Christmas set also!!
ReplyDeleteGreat job Lindz! I love it
ReplyDeleteI love all the Christmas pieces, but my favorite is Merry and Bright ! bjn1957{at}gmail{dot}com
ReplyDeleteAdorable!!! I love this - you have such great style.
ReplyDeletelove the set above. :)
ReplyDeleteFirst, your stuff is always soooo cute!! Second, I LOVE Wood Creations!! I don't really have a a favorite Christmas craft there, but that's only because I want them all!!!! I like the "Believe in the magic of Christmas" set, the 3 presents, the Grinch, The Santa head Christmas countdown..... :) Shantelle Witter
ReplyDeleteLove the ho ho set!!
ReplyDeleteLove the peace on earth, large tags, and the Grinch! Too hard to choose!
ReplyDeleteOh so many to like. I like the Merry and Bright and the HO HO HO set
ReplyDeleteI love the Ho Ho Ho set :)
ReplyDeleteI love the Peace!
ReplyDeleteI like the believe set! I love what you did with the HO HO HO set. :)
ReplyDeleteFavorite time of year!! Would LOVE to win wood creation Ho Ho Ho
ReplyDeleteI like the "believe in the magic of Christmas" Thanks so much for the giveaway! I love how your projects are always so colorful and fun!
ReplyDeleteMy daughter is looking with me and she really likes the Grinch. But she also likes your set that you've already decorated :)
ReplyDeleteI love this set, I almost bought it just the other day. Your projects always turn out so dang cute!
ReplyDelete-Shelly M.
I really like the presents
ReplyDeleteI love ALL their crafts, but my favorite is the "Peace on Earth Goodwill to Men."
ReplyDeleteThat is adorable!! I'm a sucker for Christmas decorations. :)
ReplyDeleteHO, HO, HO is my favorite!
ReplyDeleteThey're all adorable!! I love the "believe" set!
ReplyDeleteYou did a wonderful job, love the colors!!
ReplyDeleteSo cute
ReplyDeleteWay cute! :-)
ReplyDeleteLove love love!!! (:
ReplyDeleteYour set turned out adorable. Hope that I can give it a try.
ReplyDeleteI absolutely adore the Ho Ho set!! I'm a Wood Creations junkie!!! :) :)
ReplyDeleteMy favorite is the Ornament Trio ’14, but they all look amazing.
ReplyDeleteI really like the Santa advent.
ReplyDeleteMy favorite set is the present trio 14". Super cute stuff!!
ReplyDeleteI love the Santa Christmas countdown! (courtney hennagir on rafflecopter.)
ReplyDeleteSanta's Almost Here
ReplyDeleteGrinch ’14
ReplyDeleteThis is SO super cute!
ReplyDeleteI love the little Christmas trees. :)
I love the way you did your Ho-ho-ho!! I think I would chose the Grinch, it's my kids' favorite movie. :)
ReplyDeleteI would love to have Believe Word Set ’14.
ReplyDeleteAdorable!!!
ReplyDeleteThe Ho ho ho is adorable.
ReplyDeleteI love this! So cute for the season!
ReplyDeleteI love the Peace on Earth set for this year. Thanks for the giveaway!
ReplyDeleteOooh! Merry & Bright :)
ReplyDeleteSo cute! Love the glittery ones especially! I would choose Peace on Earth.
ReplyDeleteLove the Ho Ho Ho set. So cute.
ReplyDelete