

We just moved into a new home, and I decided I needed a new piece of home decor to accent our entry wall. To make this wreath, you only need a few simple supplies (some of which you might already have on hand), and it comes together really quickly! It's easy to customize for any personality or color scheme, and it's the type of craft that is practically fool-proof (as long as you can manage using a glue gun!).

I wanted my wreath to be thicker than the usual wreath form, so I bought two styrofoam wreath forms. One that is 12 inch and the other is a 7 inch. The 7 inch form didn't fit perfectly inside the larger wreath form, but with a little effort, I was able to push it in without a problem.
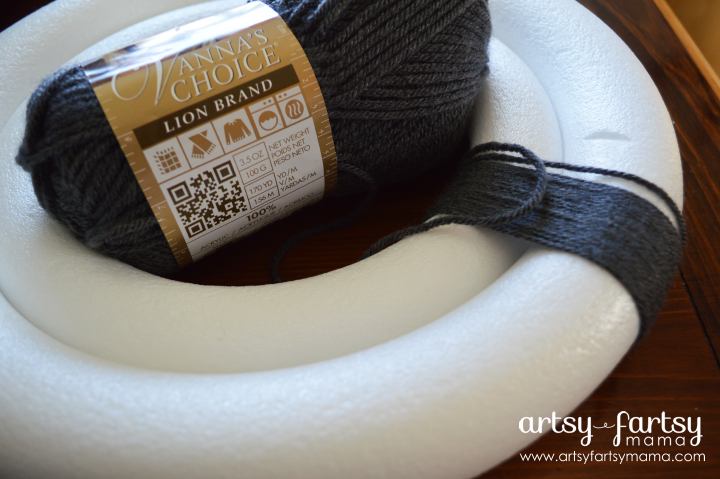
Once the wreath forms were put together, I started wrapping the wreath in Lion Brand Yarn in Vanna's Choice Yarn: Silver Heather. I found it easiest to tape the end of the yarn down on the back of the wreath, and then carefully pull it around up through the center. This process took the longest, but if you put a movie in while you wrap, it goes a lot faster!!
The flowers are all cut out of felt, and are super easy and quick to put together. The loopy flowers are the most work of all the flowers, but is really simple!! I bought sheets of craft felt in yellow, blue, and white. The great thing about making these flowers is that you don't have to cut perfectly!! You won't even be able to tell if you cut crooked!!
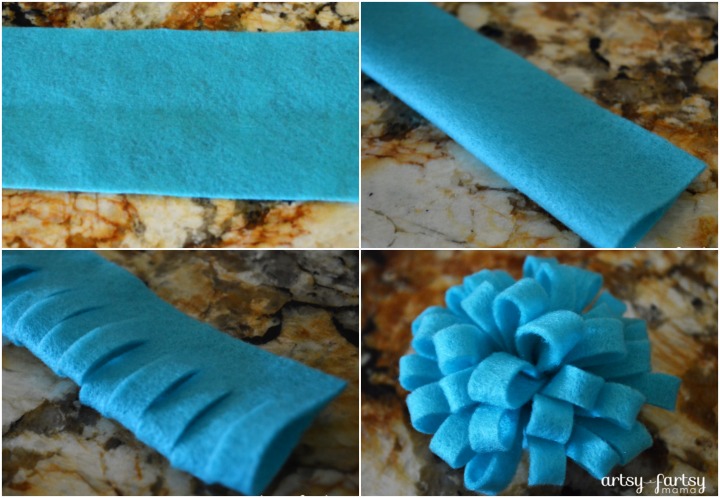
1. To make the loopy flower, cut a strip of felt about 2-3 inches wide (adjust width for different size flowers), and the longest length of the felt sheet (about 9 inches).
2. Fold it in half lengthwise, and glue the open sides shut with a glue gun.
3. With scissors, cut every 1/8 inch apart on the folded edge along the entire length of felt, being careful not to cut all the way through the glued edge.
5. Roll the strip tightly, adding a little glue to the bottom edge while rolling to keep it from slipping & unrolling.6. Turn the pom pom over and fluff it out. The back will be flat, so it's easily attachable to the wreath.
The other flowers (on the sides that are white and blue), are all just 5 circles cut out. One circle is the base, then you fold the other circles in half. Glue the pointed edges of the folded circles on the center of the base circle. Add one more to the center, then fluff out the flower. You get different size flowers from cutting different size circles. You can see a photo tutorial from some hair clips I made here.
The tighter rosettes (like the one with the silver bead center) is just one large circle. Then, you start on the edge of the circle and cut a spiral to the center. Start at the outer edge, and roll the spiral tightly, gluing along the way to keep it from coming unrolled. When you get to the end, glue the edge down, and leave the rosette as-is, or glue a small bead to the center for some visual interest.
Arrange the flowers on the wreath, THEN glue them down. I'm indecisive when it comes to arrangements, so gluing them down first would not be the best idea if you want to change your mind later. The flowers definitely can be rearranged or removed after they've been glued, but it is a little work and you risk stretching the yarn. So, just trust me when I say to lay it out first, then glue once you've decided!
When the wreath is just how you want it, hang it up on a wreath hanger or a nail on the wall and enjoy!!


that is so cute! What a great idea to use two wreaths to make it wider!
ReplyDeleteSo cute! Love me a good hot glue project! My girls would have fun making these for their room!
ReplyDeleteI love this wreath! I made some rosettes recently for an interest piece for my daughters room. I haven't seen the first flowers before, so I might have to try those soon!
ReplyDeleteI like how you doubled the wreath forms! So smart.
ReplyDeleteLove the colors! So pretty. Pinned!
ReplyDeleteSo clever to layer the a wreath Forms!!! I Love me a good wreath and this is just Darling!
ReplyDelete