Treat Yo' Self to a customized zippered pouch full of your favorite things!
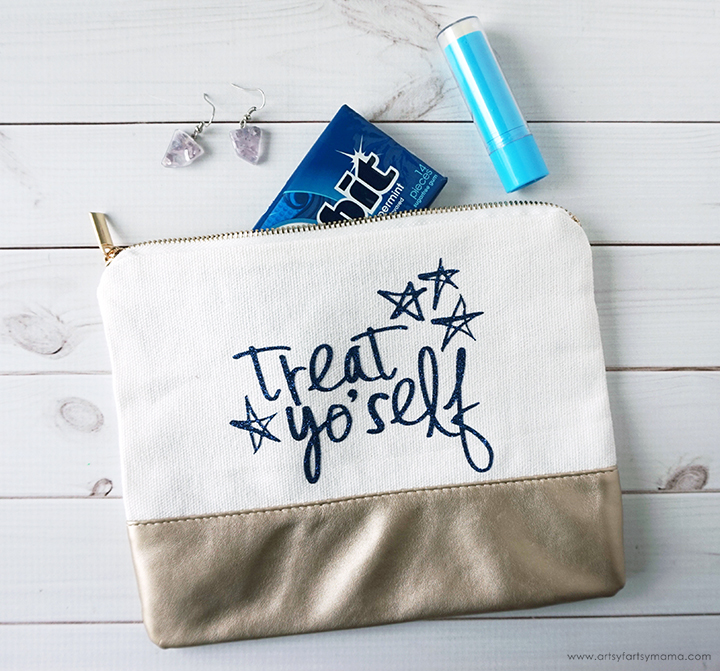
As busy moms (and dads), we all need to take some time out to treat ourselves. I was inspired by the classic Parks & Rec "Treat Yo' Self" episode to make this "Treat Yo' Self" Zippered Pouch! This is a one-of-a-kind gift idea and a fun way to show some personality in your fashion!! This project couldn't be easier to make, and I'm excited to show you how you can make one for yourself to fill with all of your favorite things!!
What you'll need to make your own Treat Yo' Self Zippered Pouch:
- Blank Canvas Zippered Pouch (I find these at Target for $3!)
- Treat Yo' Self Project
- Cricut Maker or Cricut Explore Air 2 machine
- Glitter HTV
- EasyPress 2
- EasyPress Mat
- Iron-On Protective Sheet
- Weeding Tools
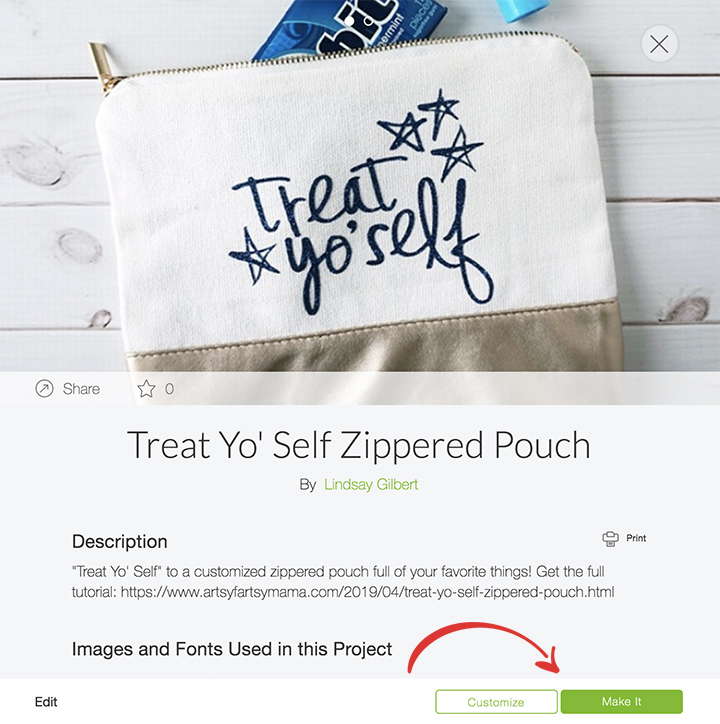
Open the Treat Yo' Self Project in Design Space. If you want to make it exactly how it is shown here in the tutorial, you can select the green "Make It" button to take you directly to the cutting process. If you'd like to make adjustments, select "Customize" and you'll be taken to the canvas to easily make edits to colors and image size.
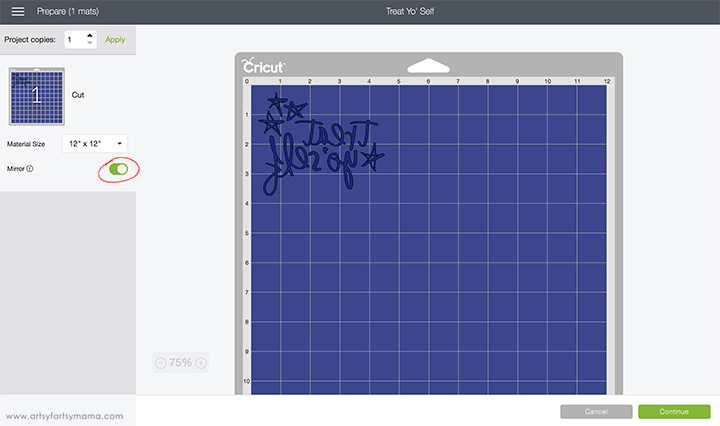
Once you're done making adjustments or if you've clicked on "Make It", you'll be taken to the next step, which is to prepare your mat(s). When cutting HTV, make sure to mirror the image and place the vinyl face-down on the mat. If you don't, your design will be backwards when you put it on the pouch. To do this, click on the "Mirror" toggle below the mat preview (circled) to reverse the image on the mat.
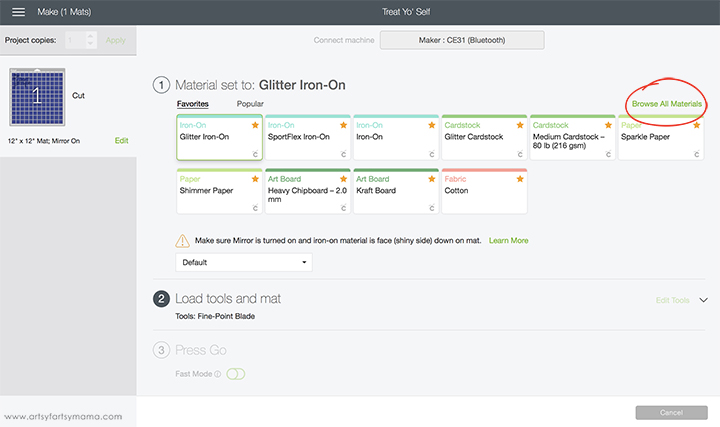
After connecting to your machine, you need to select your cutting material. Click on "Browse All Materials" and select glitter HTV. That's all you have to do! The Maker knows the exact cut speed/blade depth to cut your material correctly the first time just by selecting the material you want to cut. Depending on your project, you will also be prompted to load any other tools or blades into the machine. This project will only need the Fine-Point Blade.
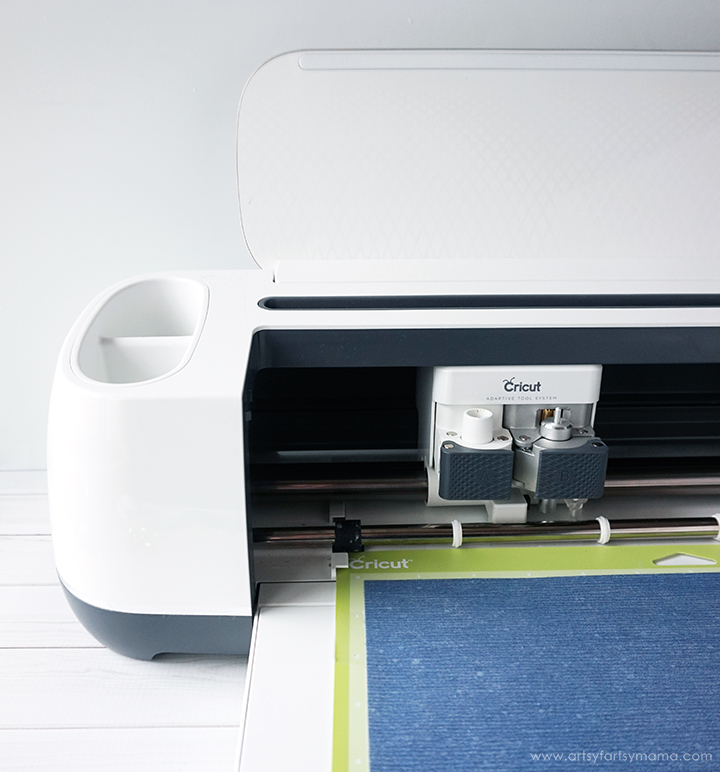
Lay the HTV face-down on the green mat and load it into your machine. Then all you have to do is click "go" by pressing the Cricut logo button on the machine and the Maker will do all the work!
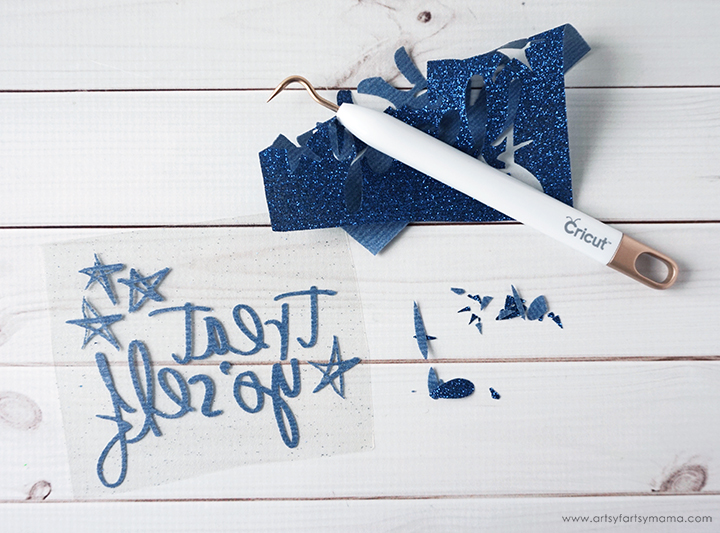
"Weed" the excess vinyl by removing all of the parts that don't belong in the design. I usually start by peeling away at the corner first, and then working my way around the design. Then I remove the smaller pieces of the design, like the insides of the letters and stars, using weeding tools.
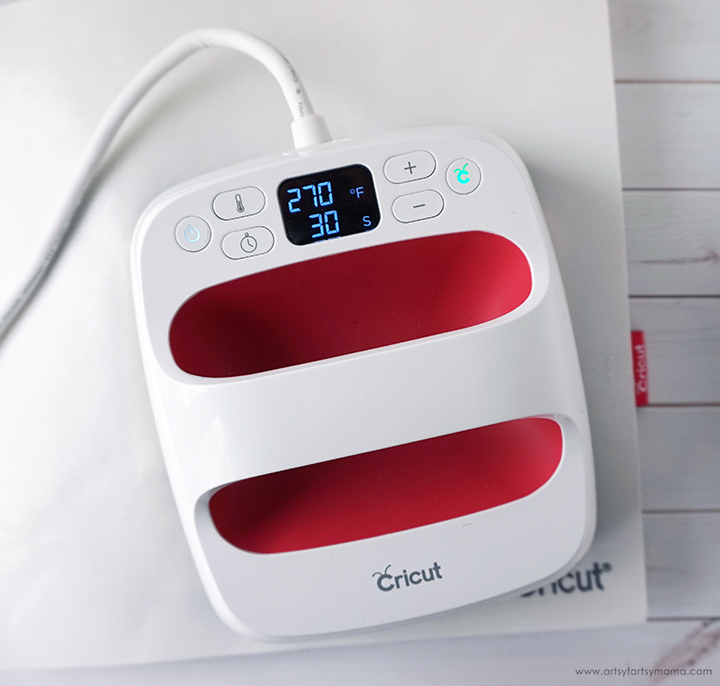
*Each kind of HTV has a different heat/time setting combined with different materials, so be sure to check the recommended EasyPress settings for best results.
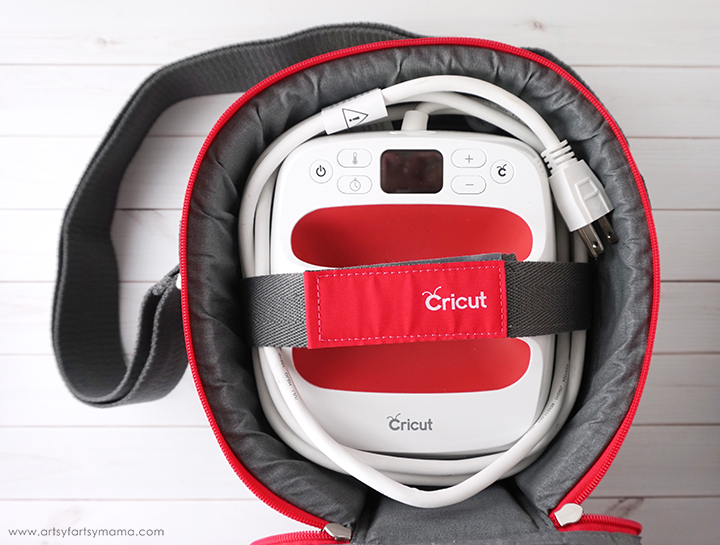
*Learn all about the Cricut EasyPress Totes here
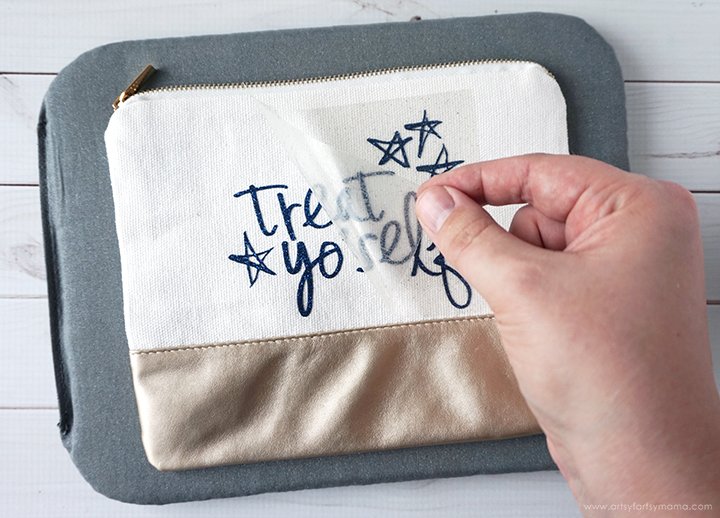
Lay the Iron-On Protective Sheet over the vinyl and pouch to prevent the gold leather fabric and pouch lining from melting. Once the EasyPress is up to temperature, set the EasyPress over the vinyl and press the green "C" button. Hold firmly in place while the timer counts down. Turn the pouch over and press firmly again for 15 seconds. Peel the carrier sheet away while the vinyl is warm.
I'm looking forward to making more of these Treat Yo' Self Zippered Pouches to give to friends and family for their birthdays! You can add all kinds of things to this pouch - makeup, gum, candy, or use it as a gift bag to hold all kinds of things, including gift cards and more!
How do you treat yo' self?