

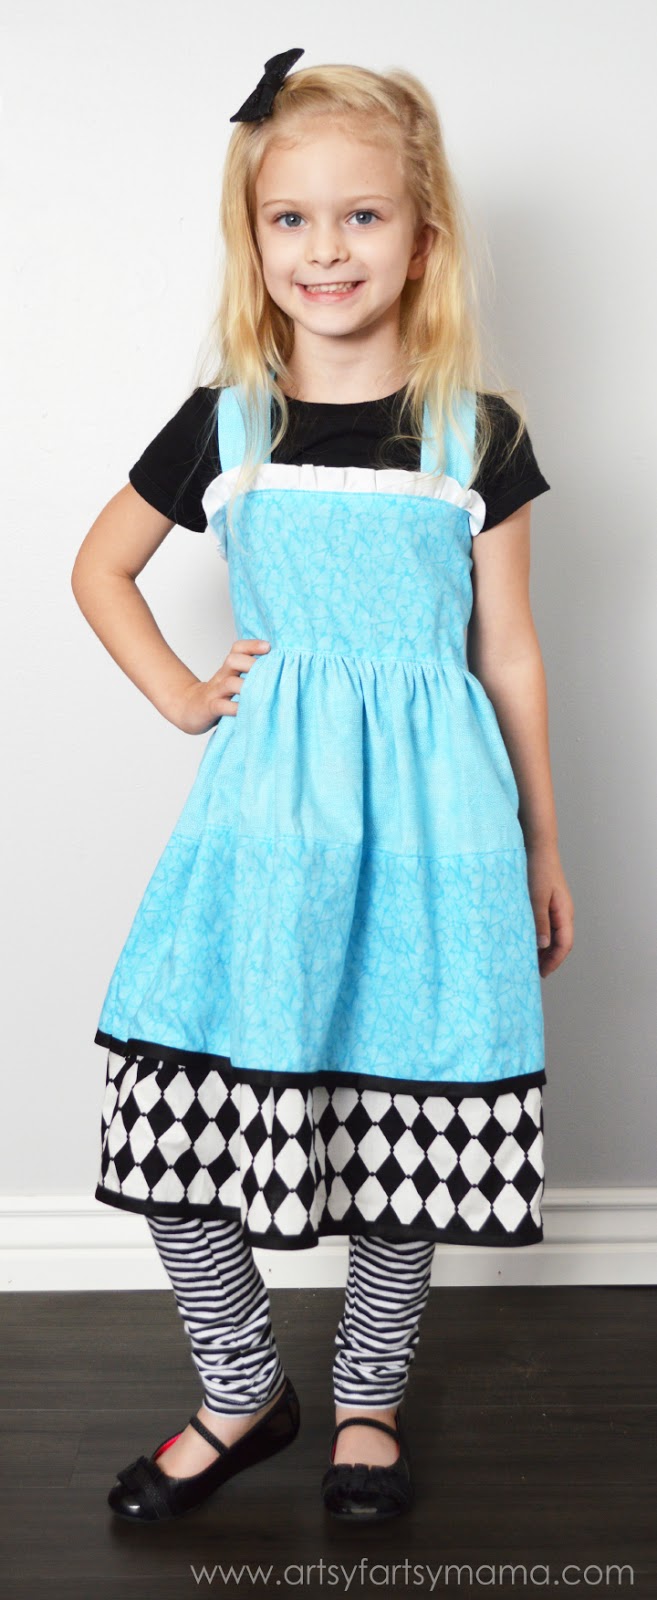
My daughter decided around March this year that she wanted to be Alice in Wonderland for Halloween. I was sure she was going to change her mind since she thought about it so early, but I was wrong! She was determined to be Alice, even when all the popular Frozen costumes started coming out. I'm personally not a huge fan of purchased costumes mainly because they are expensive, and I haven't found one yet that is a good quality. Making it ourselves gives me the freedom to create a unique costume that will hopefully get more use than just one evening.
The apron is pretty simple to put together. Even someone with very basic sewing skills can handle this (I promise!!). Measure with a measuring tape how wide you want the apron to be and how long. I just had my daughter stand still for just a few minutes and wrote down the measurements.
Draw out the rectangle in the measurements. For a more square apron, leave it as is. For a more rounded apron (like mine), then either draw rounded corners on your pattern, or sketch a "U" shape to fit your measurements. Once it's just how you want it, cut out your new "pattern".
Cut two pieces of fabric, right sides together using your pattern. Sew along the edge with about a 1/8-1/4" seam allowance, leaving about 4 inches open at the top of the apron. Clip the corners or snip along the edges if making a rounded apron so the edges lie flat. Turn the apron inside out and iron the seams.
Measure your child's waist and add about 10 inches or so, and cut a piece of ribbon - you can even get the ribbon and tie it around them and then cut so you get the perfect measurement. Center the piece of ribbon on top of the apron and pin in place. Sew about 1/4" up from the bottom of the ribbon all the way across the apron. If you use a thread color the same as your ribbon, you won't even be able to see it.
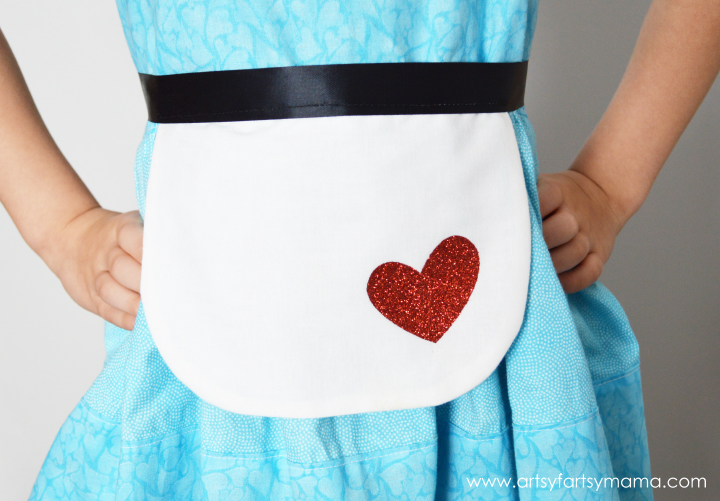
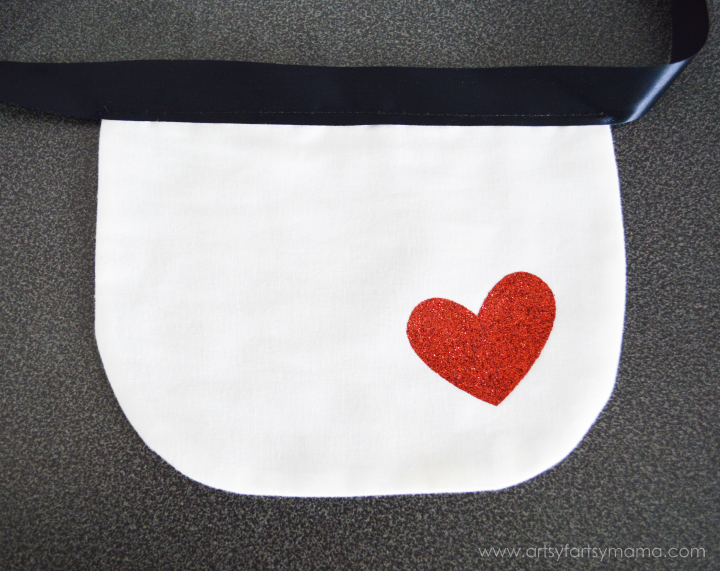
To add the heart, I simply cut one out of glittered heat transfer vinyl with my handy Cricut Explore machine and ironed it on. Once you're done adding whatever details you want to put on it, tie the apron around the waist, and you've got yourself your basic Alice in Wonderland costume!
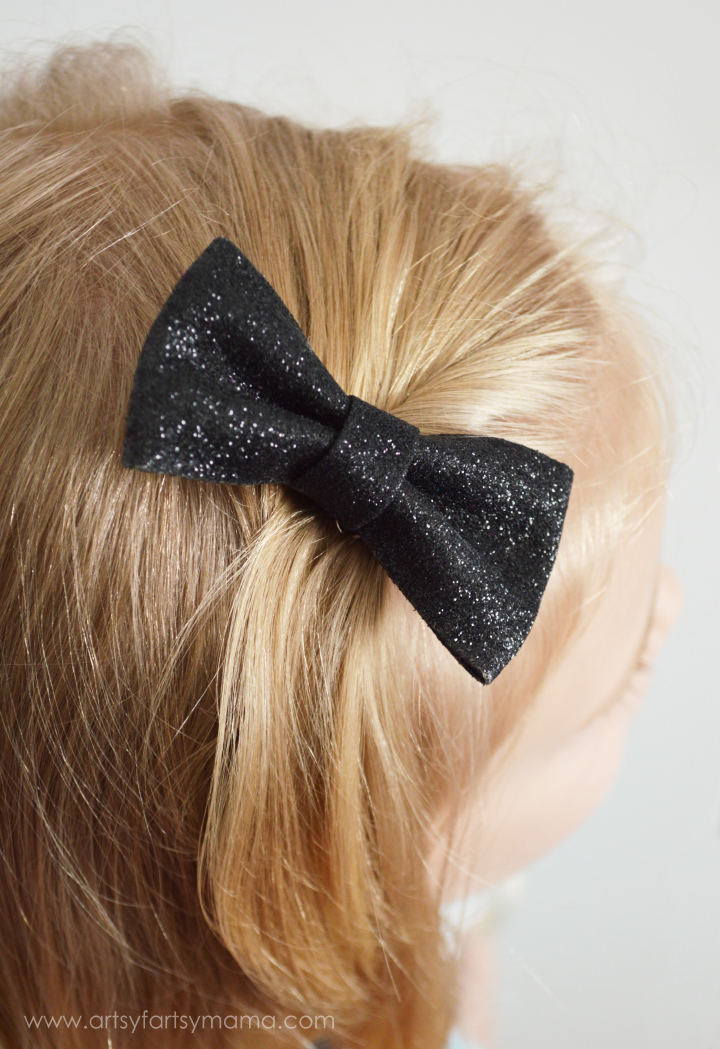
In the movie, Alice wears a black headband/bow. So, we found a really cute glitter bow from The Ribbon Retreat. I just placed an alligator clip through the loop in the back of the bow, and it was ready to wear! You could easily glue it to a headband, too. My daughter won't wear headbands that well, so the clip worked great for us.

To complete the costume, we found some cute striped leggings and a black t-shirt to wear under the dress. Tights would also look adorable! Throw on some black shoes and we're more than ready to go collect some candy!!


I am always excited to see what Zoey is going to be for Halloween. You did an amazing job yet again!! She is growing up sooo fast!
ReplyDeleteThis is seriously soooo adorable! LOVE!
ReplyDelete